Introduction
phone.systems™ is a fully-featured, cloud-based virtual PBX that is specifically designed to interconnect with any service provider. There is no special hardware to purchase and maintain, and phone.systems™ is compatible with all landlines, mobile phones and computers, SIP devices and multi-line desktop phones. Multiple users, remote offices and telecommuters become part of a highly flexible, scalable and cost-effective phone system, supported by essential PBX services such as voice menus, voicemail to email, conferencing, time and caller routing, internal extensions and more
The user interface for phone.systems™ is specifically designed for simplicity and ease-of-use. No special training or expertise is required, and voice systems are instantaneously activated as call flows are configured via an intuitive, drag-and-drop graphical web interface. In addition, separate instances of phone.systems™ may be simply and securely interconnected wherever they are in the world via the Interlink feature, allowing remote offices and users to behave as a single telephone network.
phone.systems™ is applicable for both business and personal use, and configurations cover a wide range of applications from simple home use through to complex, multi-branch voice systems.
Back to the topFeature List Overview
phone.systems™ includes the following features:
PBX and call management
- Internal numbers - extension numbers that are directly accessible to system users.
- Ring groups - redirect incoming external or internal calls to different destinations included in the ring (or hunt) group.
- Voice menus - automated attendant system or Interactive Voice Response allows callers to listen to a recording and navigate to different destinations using their dial pad.
- Audio playback - play customized audio messages to callers.
- Conference calling - multiple callers can partake in a conference call.
- Voicemail - a mailbox in which callers may leave voice messages, which are then sent to a specified email address, a file server or a third party cloud account.
- Call recording - calls are recorded, including for SIP Account and External Line contact methods (if applicable), with the call contents being sent to a specified email address, a file server or a third party cloud account.
- Caller blacklists - block incoming calls received on specific phone numbers.
- Call queuing - place incoming calls in a queue before passing those calls to queue members.
- Time routing - incoming calls are forwarded to different destinations, according to the day and time of the call.
- Caller routing - incoming calls are forwarded to different destinations, depending on the originating phone number.
- Receive faxes - Convert incoming faxes to PDF, with multiple file delivery options available.
- Event notifications - users receive alerts via email when specified events occur.
- Configurable feature codes - for accessing system functions such as call transfers and call pickup directly from the phone.
- Call forwarding options - forward incoming calls to any phone number or VoIP destination.
User interface, system management and special features
- Graphical user interface - call flows are configured via an easy-to-use, intuitive, drag-and-drop graphical web interface that is compatible with desktop computers, tablets and mobile devices.
- Remote management - system management is achieved via a web-based interface, accessible from anywhere in the world.
- Instant activation - voice configurations are instantaneously activated as they are graphically assembled, providing immediate access to the voice system.
- Built-in contact center - for managing contacts and contact methods used by phone.systems™.
- Built-in media center - for uploading audio files, recording messages and managing playlists that are used by phone.systems™.
- Receive calls on one or many phone numbers - add phone numbers used for inbound calling directly from the management interface.
- SIP trunk configuration - Add and configure inbound and outbound SIP trunks directly from the management interface.
- Call logs - access to detailed call history, with optional date filters.
- Call statistics - access to detailed call statistics and charts.
- Interconnect multiple instances of phone.systems™ - unify remote offices into a single phone network with free internal calls using the secure Interlink feature.
- Multi-language support - for global applications of phone.systems™.
- Third-party compatibility - the phone.systems™ platform is specifically designed to seamlessly interconnect with any SIP-standard compatible VoIP service provider, hardware or software.
- Integrated call.center™ SIP softphone - optional iOS, Android, Windows and MacOS compatible softphone, including a secure management portal.
Control Panel
phone.systems™ is quickly and easily configured via a graphical web interface, with drag-and-drop objects being connected together to define the call flows and the functionality of the PBX.
The components used in building phone.systems™ applications are as follows:
- Object - there are a number of different objects, with each object performing a specified PBX function such as voicemail, time routing or conferencing.
- Object Menu - a menu listing the various objects that are used in building the call flow.
- Settings Menu - a menu listing options for managing important supplementary phone.systems™ components such as phone numbers, internal numbers, contacts, media, inbound and outbound trunks, file delivery methods, feature codes, Interlinks and for accessing call logs.
- Workspace - an area where the objects are placed and the call flows assembled.
- Workspace Tab Menu - for displaying different pages of the PBX workspace.
- Trash Bin - for removing objects from the workspace.
- Cables - used to logically connect objects together to define call flows.
Workspace
The workspace is used to assemble call flows. Objects are dragged from the Object Menu onto the workspace, configured and then logically connected via "cables" to build the required voice system.
To select an object, position the mouse over the required object in the menu. Drag that object from the menu over the workspace, and release it where required.

Once objects have been positioned on the workspace, a configuration dialog box will
be automatically opened on the right-hand side of the workspace. All required fields
must be completed, and then the object is saved onto the workspace by pressing the
 button.
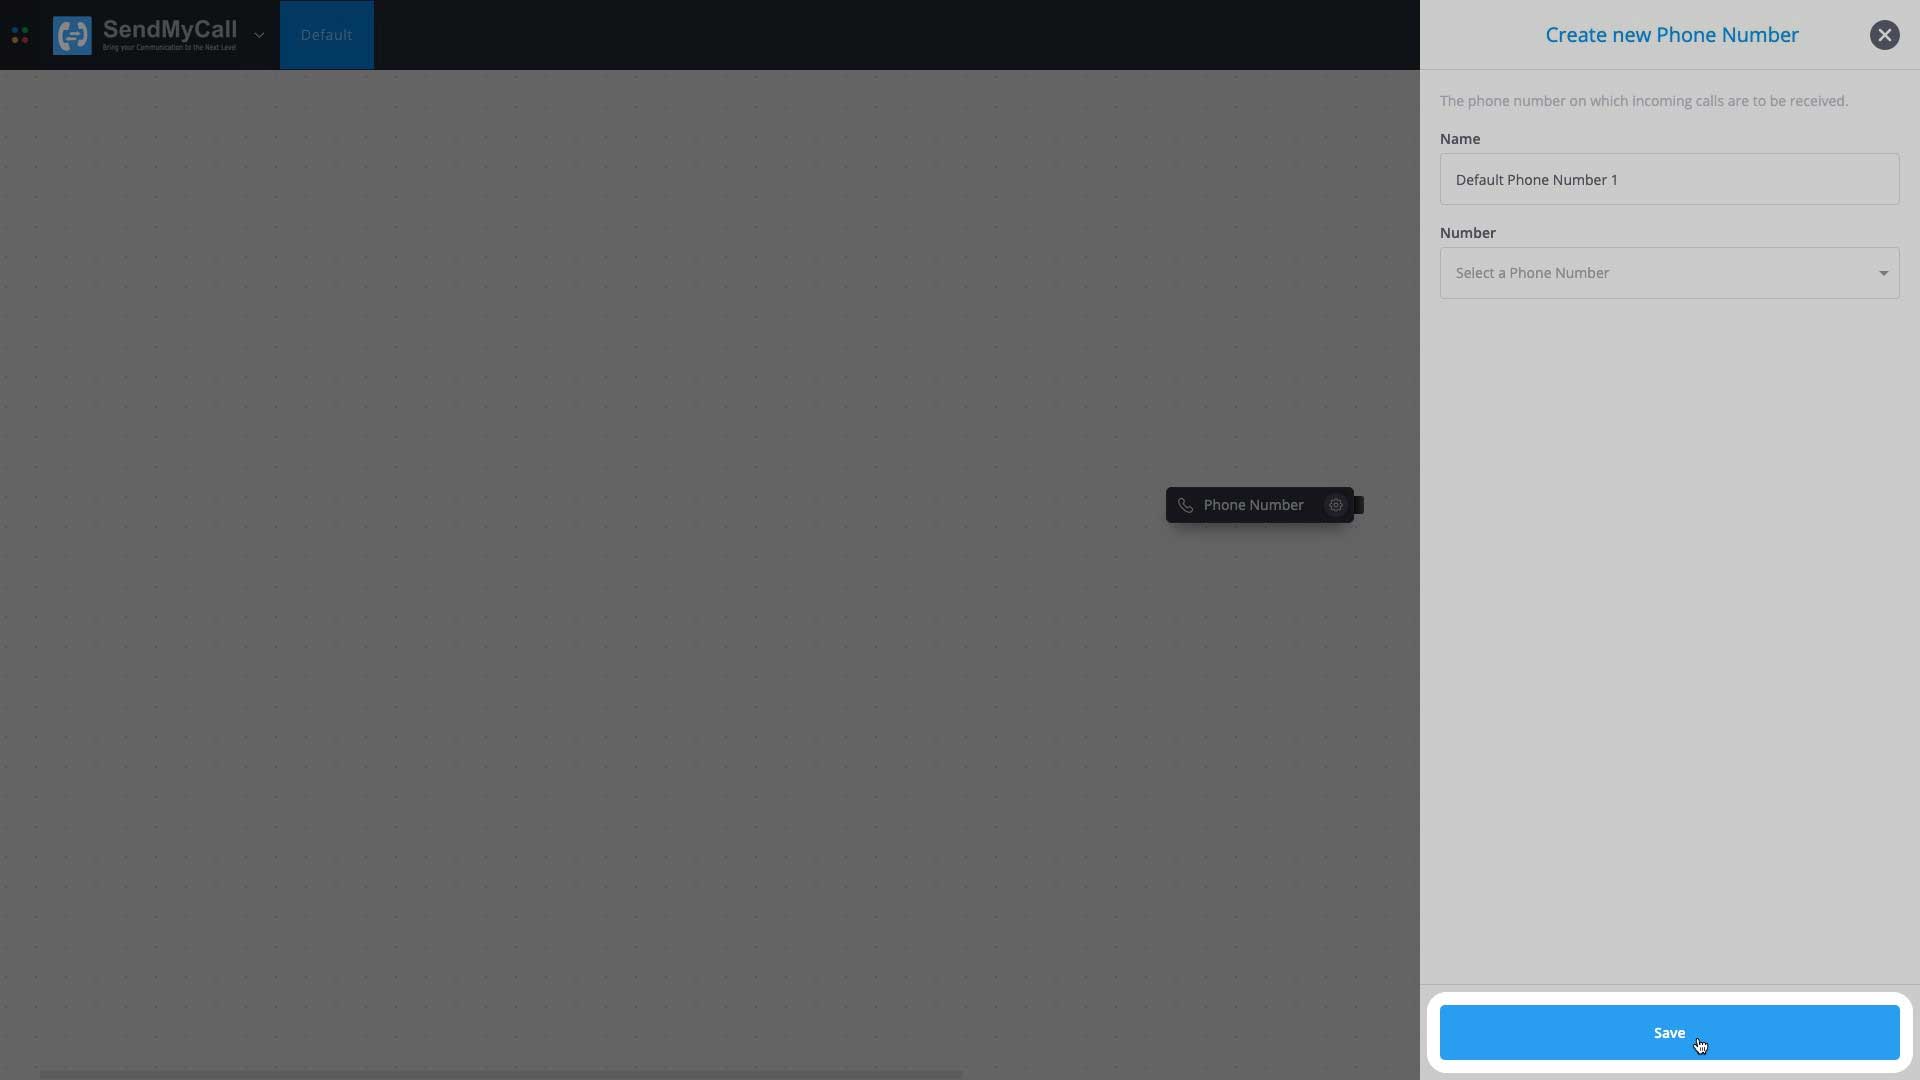
Objects that have been positioned on the workspace may be dragged and re-positioned as required.
Back to the topWorkspace Tab Menu
phone.systems™ allows the user to segment a voice system into logical groups and functions that may be arranged over multiple workspace pages. This feature is very useful when building complex voice systems, such as a PBX for a multi-branch business. The various workspace pages are accessed via the tabs on the Workspace Tab Menu, and tabs may be added, deleted or repositioned as required. In addition, the tabs may be labeled so as to define the functionality of each workspace page. Note that when phone.systems™ is initially activated, there is a single tab denoted as Default. This tab may be renamed, but cannot be deleted unless at least one additional tab has been added to the workspace.
A new workspace page may be added by clicking on the
 icon at the top right-hand edge of the Workspace Tab Menu.
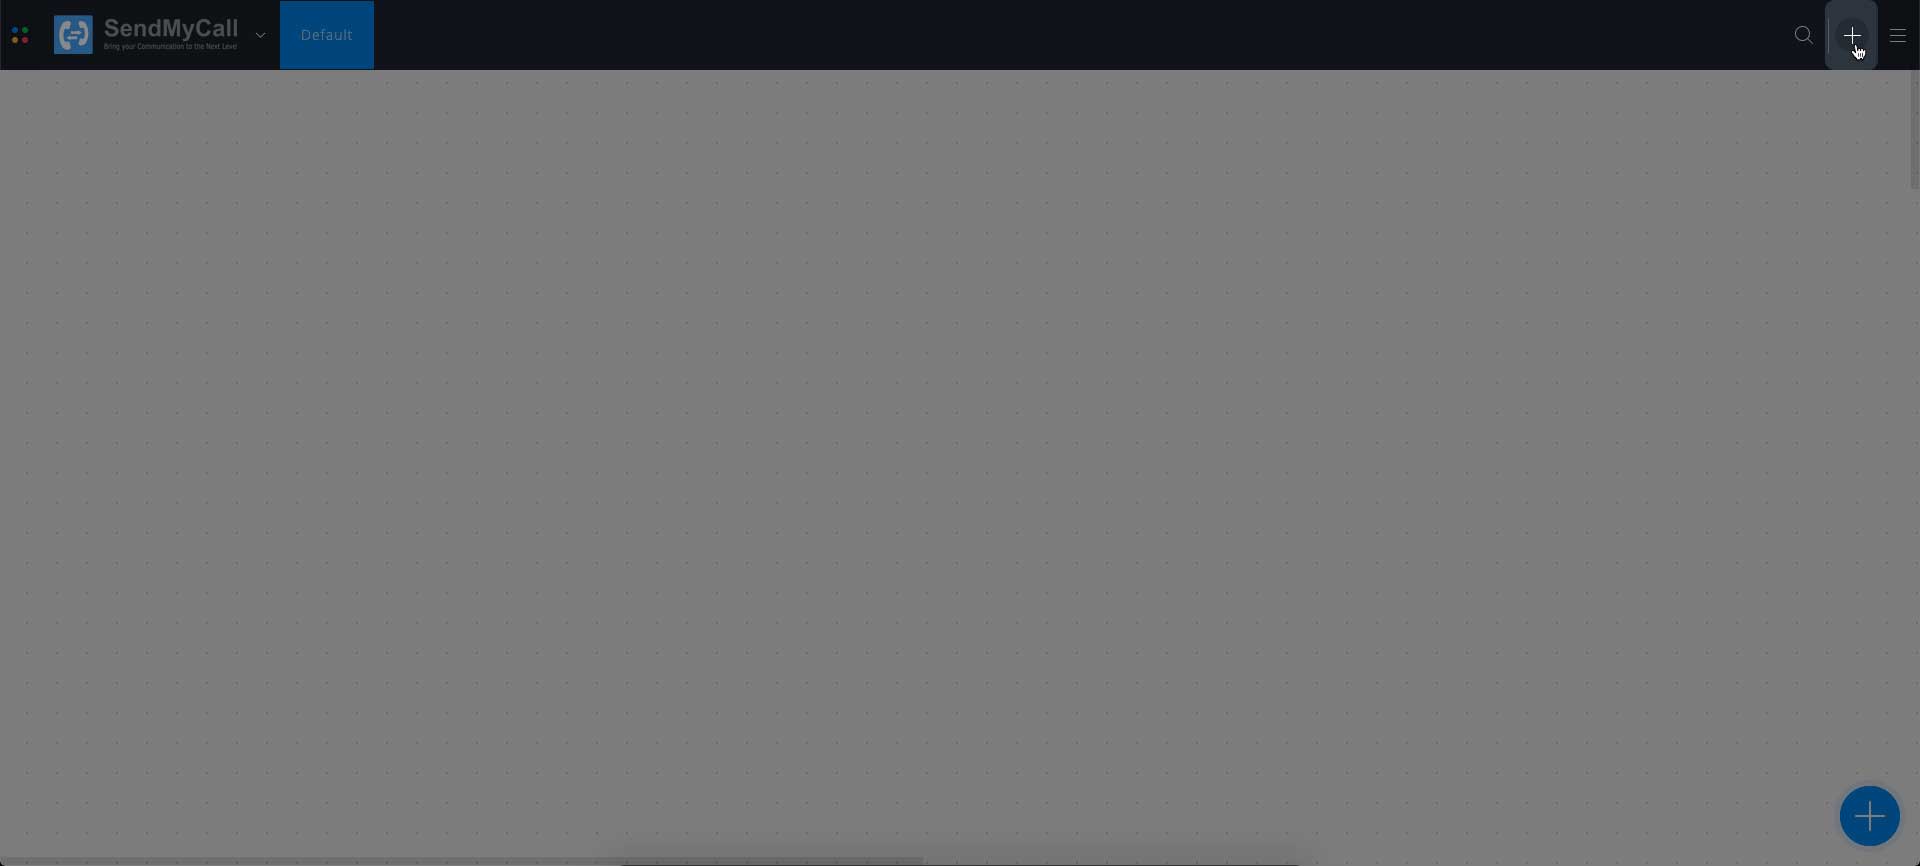
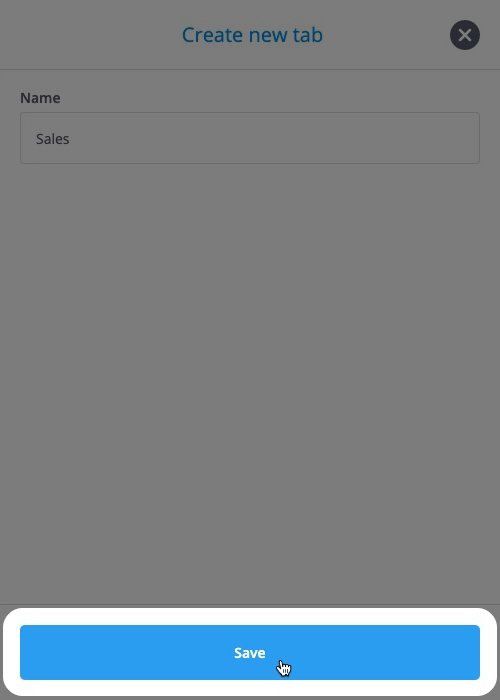
A window is opened in which the name of the new tab must be entered,
and the Tab Menu is updated by clicking on the
 button.

Placing the mouse over a tab name displays
![]() icon. The name of the tab may be changed by clicking on the icon, which opens a
tab configuration window. Note that a tab and its associated workspace page may
deleted by clicking on the
icon. The name of the tab may be changed by clicking on the icon, which opens a
tab configuration window. Note that a tab and its associated workspace page may
deleted by clicking on the
 ,
even if there are phone.systems™ objects on that page. Therefore, added care must be taken when deleting tabs.
Tab positions may be changed within the Workspace Tab Menu by "dragging" tags horizontally along the tag listing bar.
More information regarding the usage of multiple workspaces is detailed in the section Tabs and Multiple Pages.
Back to the topSearch
The search tool is used to find related phone.systems™ resources with a single search request. It is effectively a combination of the existing search capabilities, with the addition of the ability to search for associated objects, contacts, delivery methods and phone numbers.
To begin the search, click on the search icon in the Workspace tab menu to activate the search window.
In the search field, type in the name of the resource to be located and click on the Search button. Once the search has been completed, all results will be displayed and grouped by resource type.
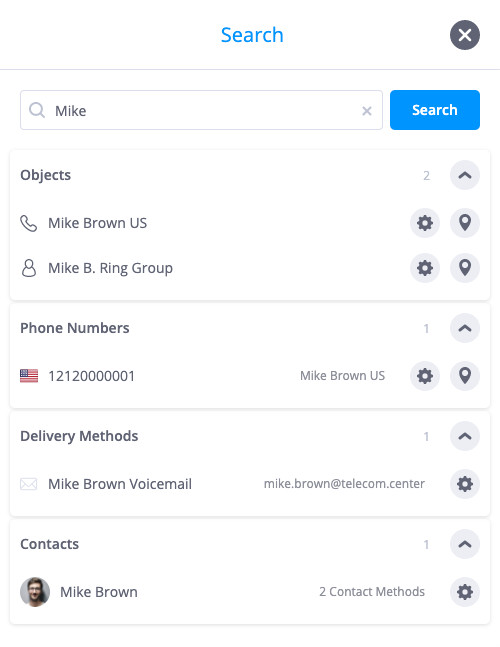
The button
![]() may be used to expand and view the grouped search results. Additional buttons
may be used to expand and view the grouped search results. Additional buttons
![]() and
and
![]() provide the option to locate the object on the workspace or to access the resource’s settings window.
provide the option to locate the object on the workspace or to access the resource’s settings window.
Settings Menu
The Settings Menu is accessed by clicking on the
![]() icon in the top right-hand corner of the screen.
icon in the top right-hand corner of the screen.
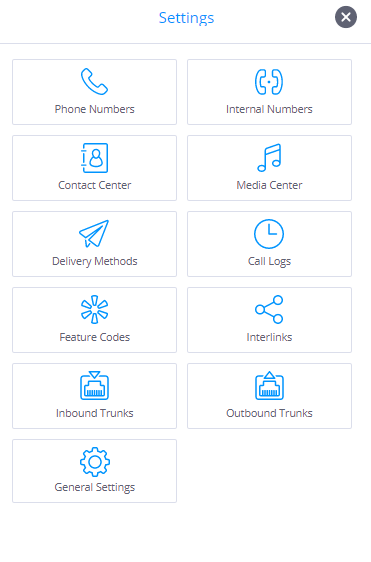
The options for the Settings menu are:
-
 Phone Numbers - Add and manage phone numbers that are used for inbound calling and
for displaying as caller IDs when making outbound calls on SIP devices. In addition, a list
of Phone Numbers together with their associated objects may be exported.
See the section
Phone Numbers
for further details.
-
 Internal Numbers - Add new Internal Numbers (extensions) and display a
list of all the currently configured Internal Numbers, together with the names
of the objects that these numbers are connected to. In addition, a list of
Internal Numbers together with their associated objects may be exported.
See the section
Internal Numbers
for further details.
-
 Contact Center - Add and edit contacts and contact methods that will be used by the various
phone.systems™ objects. See the section
Contact Center
for further details.
-
 Media Center - Upload files, record messages and create, modify and
delete playlists that are used by phone.systems™ . Playlists consist of
pre-recorded music, commercials or any other messages that may be played to the
caller while they wait for their call to be answered. See the section
Media Center
for further details.
-
 Delivery Methods - list and configure methods that may be used for the delivery of audio and
text files generated by phone.systems™. These files include voicemail and notification messages,
as well as the contents of recorded calls. Delivery method options are Email, Dropbox, FTP, SFTP,
Google Drive and OneDrive. See the section
Delivery Methods
for further details.
-
 Call Logs - Display CDRs (Call Detail Records) and service usage charts such as call
distribution and lost call rates. CDRs may be selected according to the call direction (inbound or
outbound), and filters such as the source and destination phone numbers, gateway, call contact or
date range may be applied. See the section
Call Logs, Charts and Statistics
for further details.
-
 Feature Codes - Configure phone system feature codes such as required for DTMF transfers,
call pickup and call recording on demand. See the section
Feature Codes
for further details.
-
 Interlinks - Multiple instances of phone.systems™ may be securely interconnected via the
Interlink feature. Users are able to directly and transparently dial out to internal
numbers on other phone.systems™ accounts, just as if they were on the same PBX system. To connect
to another phone.systems™ account, follow the on-screen instructions to generate an
Interlink Authorization Key, and then provide this code to the administrator
of the remote system to complete the connection. Alternatively, the
Interlink Authorization Key that has been supplied by the
administrator of the remote phone.systems™ may be entered.
See the section Interlinks for further details. -
 Inbound Trunks (if enabled) - Configure inbound SIP trunks to be used by phone.systems™.
See the section
Inbound Trunks
for further details.
-
 Outbound Trunks (if enabled) - Configure the routes and gateways for outbound SIP
trunks to be used by phone.systems™. See the section
Outbound Trunks
for further details.
-
 General Settings - Select the language for the phone.systems™ menus, with the current
options being English, Russian, Lithuanian and Latvian. Also, set the system time zone,
choose the decline code that is sent to the caller when maximum channel capacity is reached,
and enable or disable the dark mode for the user interface. See the section
General Settings
for further details.
To close the Settings Menu, click on the
![]() icon in the top right-hand corner of this menu.
icon in the top right-hand corner of this menu.
Object Menu
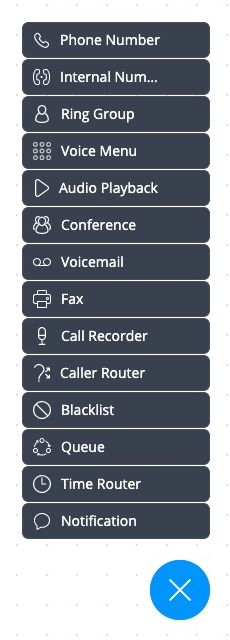
The Object Menu serves as a listing of the various objects that may be used in setting up the PBX. This
menu may be minimized to create a larger workspace by clicking on the
![]() icon located at the bottom right-hand corner of the workspace. When this menu is minimized, the icon
icon located at the bottom right-hand corner of the workspace. When this menu is minimized, the icon
![]() is rotated to appear as
is rotated to appear as
![]() ,
and clicking on this icon once again recovers the Object Menu.
,
and clicking on this icon once again recovers the Object Menu.
Objects
There are a number of different objects, each performing a specific function or set of functions. These objects may be arranged and inter-connected in a wide variety of combinations, with calls being passed from one object to another as required.
Objects are dragged from the Object Menu onto the workspace, and once an object has been added to the workspace, it must be configured. Configuration options for all objects are specified in the section Object Configuration.
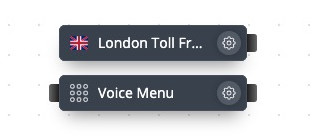
Each object has either one or two sockets which are shown as small protrusions on the left and/or right-hand sides of the object, and these sockets are used for connecting the objects together via cables. The left-hand socket acts as the input to an object, while the right-hand socket acts as the output from that object
 Back to the top
Duplicating objects
phone.systems™ includes the ability for users to duplicate objects on the workspace. All configuration parameters in the original object are copied to the new object, however the name of the new object is modified to include a copy number. For example, the first duplication of a Voice Menu object named “Voicemail” will be named “Voicemail Copy 1”.
To use this copy feature:
For MacOS, hold down the “option” key when dragging an object.
For Windows, hold down the “Ctrl” key when dragging an object.
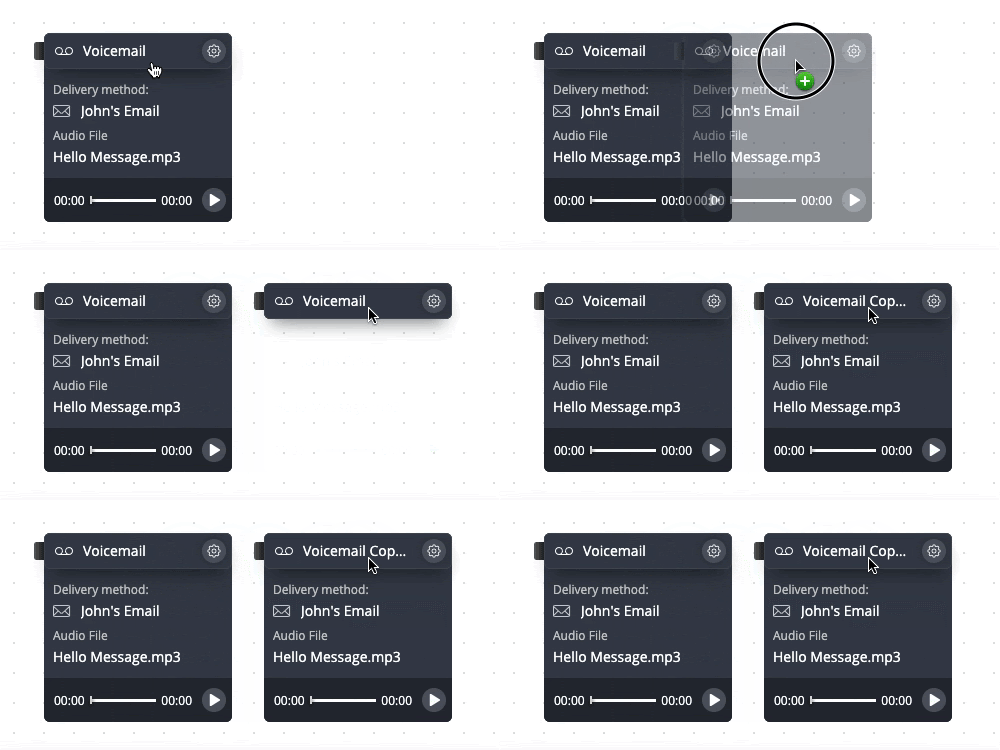
It is important to note that not all objects may be duplicated. For example, Phone Number and Internal Number objects are assigned unique phone/internal numbers and may therefore not be copied.
Back to the topSelecting and moving multiple objects
phone.systems™ allows users to select multiple objects and reposition them simultaneously on the workspace, or move all of the selected objects to another tab. Once an object has been selected, it will be marked with a blue border.
To use the object selection feature:
MacOS - hold the ‘command’ key to select individual objects
MacOS - hold the ‘shift’ to select a complete object tree (objects connected by cables)
Windows - hold the ‘ctrl’ key to select individual objects
Windows - hold the ‘shift’ to select a complete object tree (objects connected by the cables)

Use the same keys as listed above to deselect objects, or to exclude particular objects from the object tree selection. Clicking on an empty area on the workspace will deselect all previously selected objects or object trees. Additionally, selected object trees may be moved to the Trash Bin.
Back to the topCables
Cables are used to logically interconnect the objects that have been placed in the workspace area, thereby defining the call flows and the functionality of the PBX.
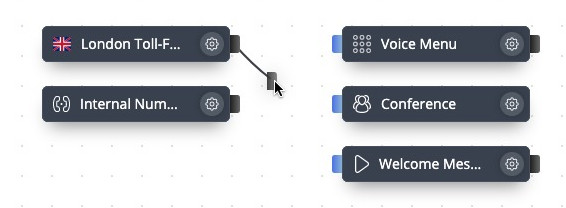
To create a cable, place the mouse over the right-hand socket of an object, and use the mouse to "drag" a cable from that socket towards the left-hand socket of the destination object.

Once the end of the cable is over the left-hand socket of the destination object, release the cable and the two objects will be logically connected as required.

IMPORTANT - phone.systems™ includes an intelligent cabling configuration assistant that serves to simplify the connection logic between objects by indicating possible cable attachment points. In the figure below, once a cable has been generated from the Phone Number object, all valid input connection options on the workspace are shown by the available objects having their left-hand sockets colored blue. The cable may be connected to any one of these sockets.
To remove a cable and logically disconnect two objects, place the mouse pointer
over that cable until the "delete cable" icon
![]() appears. Click on that icon to complete the removal of the cable.
appears. Click on that icon to complete the removal of the cable.

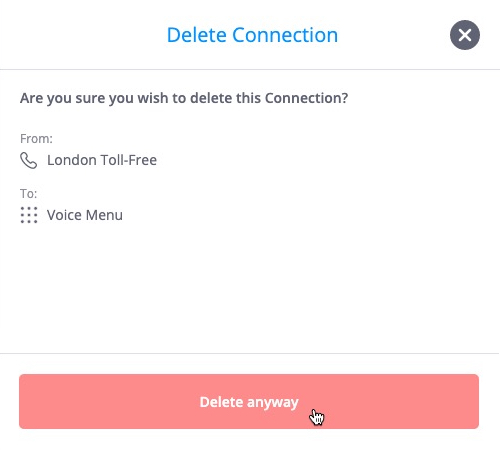
A “Delete Connection” window will appear, displaying the details of
the object connection to be terminated. To complete the action, click
the “Delete Anyway” button, or select the
![]() icon to leave the connection unchanged.
icon to leave the connection unchanged.
In some cases, multiple cables, each having a distinct logical function, may be generated from the exit (right-hand) socket of an object, and these cables are connected to various objects as required by the call flow. For example, when configuring a voice menu, there are three different logical options for the cables that are generated from the right-hand side of this object:
-
Calls are forwarded to objects according to the extension number entered by the caller.
-
Calls are forwarded to a specific object if the caller enters an invalid extension number.
-
Calls are forwarded to a specific object if the caller does not enter an extension number within a defined timeout period.
When a variety of logical functional options may be assigned to a single cable, then once the cable has been connected between two objects, a configuration window is automatically displayed that allows the user to select the required function for that cable.
The screenshot below illustrates the functionality of multiple cables exiting a Voice Menu object. After the voice message has been played to the caller, if the caller presses “100” then the call will be forwarded to the sales ring group, and if “200” is pressed, then the call will be forwarded to the support ring group. Invalid extension and timeout conditions (denoted as i and t respectively on the cables) are forwarded to specified Audio Playback objects where appropriate messages are played to the caller.

Note that the allocated extension numbers may be changed by clicking on the configured number displayed on the cable. A configuration dialog window is opened, and a new extension number may be entered.
Similarly, some objects, such as Time Router or Caller Router, have two right hand (exit) sockets, which are used to implement a “Yes/No” call flow logic. For example, for a Time Routing object, a cable generated from the “Yes” (green) socket defines the routing of calls if those calls are received within the configured day/time interval, and the “No” (red socket) option defines routing in the case of a time period match failure.
In the illustration below using a Time Router object, if the incoming call is received within the configured day/time parameters, then the call will be forwarded to Sales. Otherwise, the call will be forwarded to an Audio Playback object where a pre-recorded "after-hours" message is played to the caller.

It is important to note that if a cable is not connected from the left-hand (output) socket of an object to the right-hand (input) socket of another object, then a call will be terminated if the PBX logic attempts to pass that call to adjacent objects. For example, in the illustration below, an incoming call is forwarded to an Audio Playback object where a message is played to the caller. Because the right-hand side of the Audio Playback object does not have a cable connected to another object, the call will be terminated as soon as that message has been played.
 Back to the top
Trash Bin
The Trash Bin allows the user to delete objects that have been previously placed on
the workspace. To delete an object, drag that object towards the
![]() or
or
![]() icon at the bottom right-hand corner of the workspace. This icon will be replaced by the Trash Bin icon
icon at the bottom right-hand corner of the workspace. This icon will be replaced by the Trash Bin icon
![]() ,
and the object to be deleted should be dragged and dropped over the Trash Bin.
,
and the object to be deleted should be dragged and dropped over the Trash Bin.
Note that the Trash Bin does not have a recycling facility, and trashed items may not be recovered.
Back to the topUsing phone.systems™ with touchscreens
The phone.systems™ user interface is compatible with touchscreen-enabled devices. The major differences between regular and touchscreen usage are as follows:
-
For a touchscreen, to select an object that should be moved on the workspace or that requires the connection/deletion of an output cable, apply a long press (long tap) to that object. This action results in the
 icon being displayed above the selected object, and also causes the output
socket of the object to be highlighted. The object may now be moved, or a
cable may be connected between that object and another object on the
workspace as detailed below.
-
Moving an object - Once the
 icon is displayed, the object may be "dragged"
and repositioned on the workspace. Tapping on a blank area in the
workspace removes the
 icon.
icon.
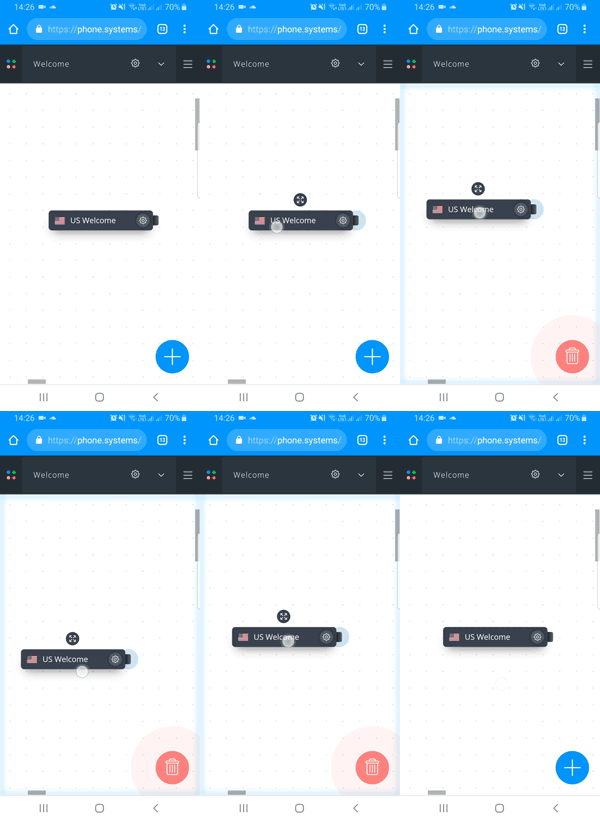
-
Connecting objects with cables - Once the output socket of an object is highlighted, a second short tap on that socket causes the output socket of the selected object and the valid input sockets of all other objects on the workspace to be highlighted with pulsating blue circles. A cable may now be dragged from the output socket of the selected object, and connected to the input socket of a destination object. Tapping on a blank area in the workspace removes the
 icon.
icon.
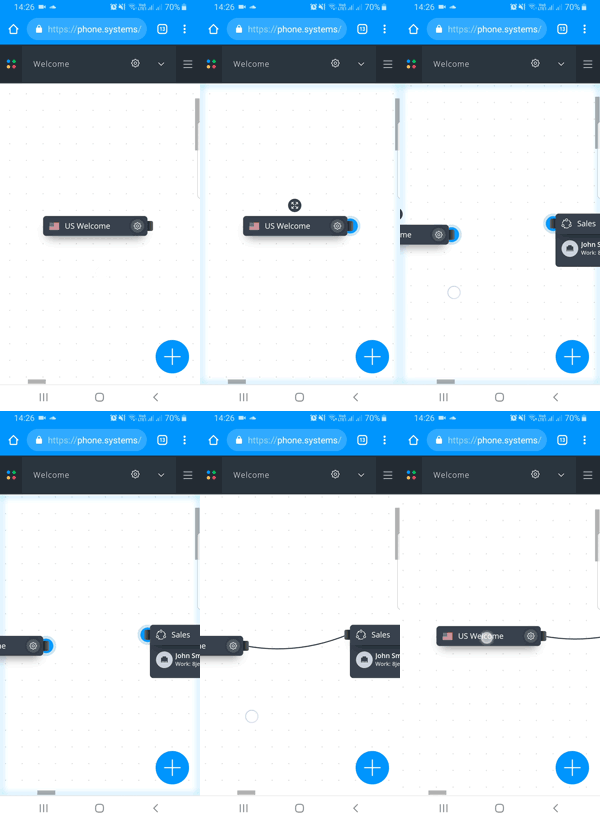
-
Deleting a cable - Once the
 icon is displayed, the cable connecting the
selected object to another object on the workspace is displayed, with the
"delete cable" icon appearing in the center of the cable. Clicking on the
 icon removes the cable.
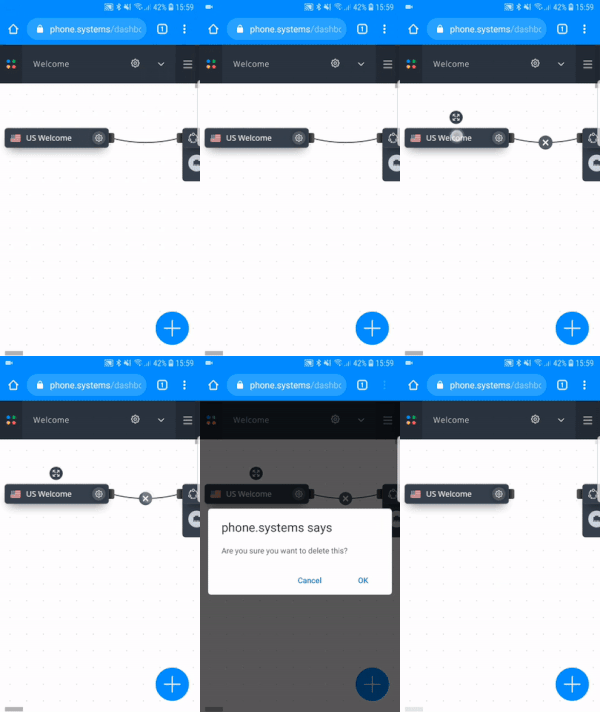
Object Configuration
Once an object has been dragged from the Object Menu and released onto the workspace, a
configuration dialog box is automatically opened. Each object has a specific
set of configuration requirements, and the object will only be usable once the
configuration has been successfully completed and the
 option selected. Note that if the user chooses not to configure the object but instead selects the
![]() icon at the top right-hand corner of the configuration window, then that object will be removed from the workspace.
icon at the top right-hand corner of the configuration window, then that object will be removed from the workspace.
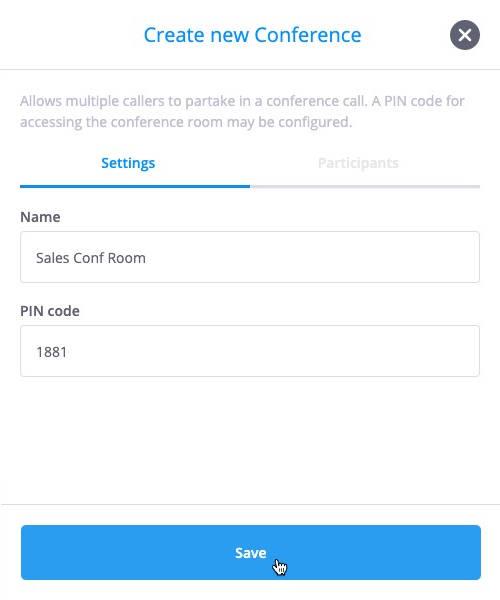
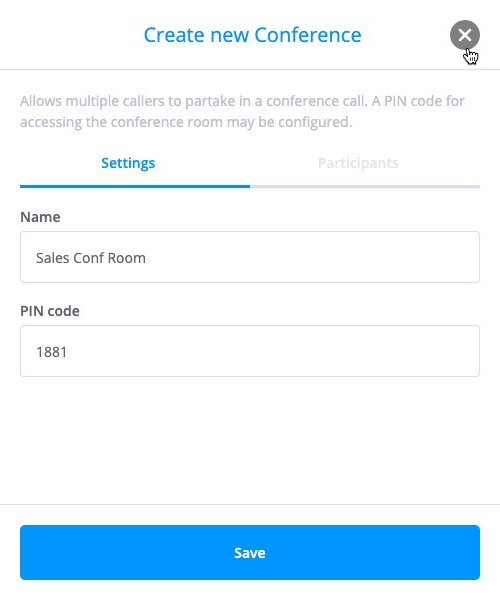
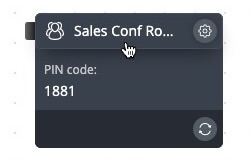
Once an object has been configured, then clicking on that object will display selected configuration details. For example, clicking on the Conference object expands that object, showing the required participation PIN code.
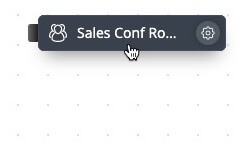
In addition, the configuration of an object may be modified by clicking on the
![]() icon on the right-hand side of that object.
icon on the right-hand side of that object.
The functions and configuration options for the different types of objects are detailed below.
Back to the topObject: Phone Number
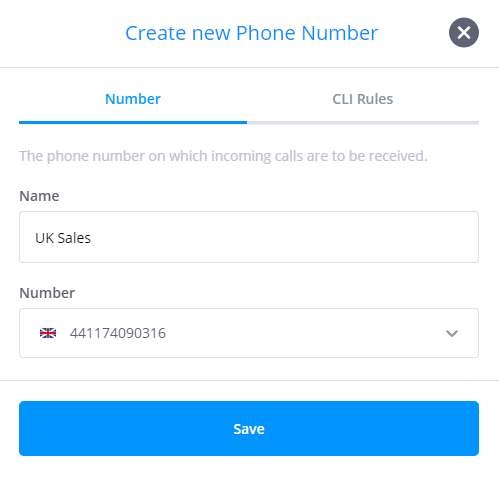
The Phone Number object is configured with a phone number on which incoming calls are to be received.

The information to be entered for this object is:
-
The name of the Phone Number object. This aids in identifying this number on the workspace, for example, "Toll-Free London". Note that newly created Phone Number objects are provided with default names in the format {Tab name} {Object type} {Object type count in current tab}, for example "Main Phone Number 3".
-
The phone number, which may be selected from a list of unused phone numbers that were previously added via the
 option in the "Settings" menu. In addition, a new number may be entered by selecting the
 option.
Phone numbers are entered in E.164 format:
<CountryCode> <City/AreaCode> <LocalNumber>
The country code is 1-3 digits long, while the length of the city/area code and local number may vary. Some examples of phone numbers in E.164 are 14169233346 for Toronto, Canada and 442034116446 for London, United Kingdom.
A phone number may only be allocated to a single Phone Number object, and may not be reused by other such objects.
Note that phone numbers may be added and deleted by using the
 option under the Settings menu (see the section
Phone Numbers
for more details).
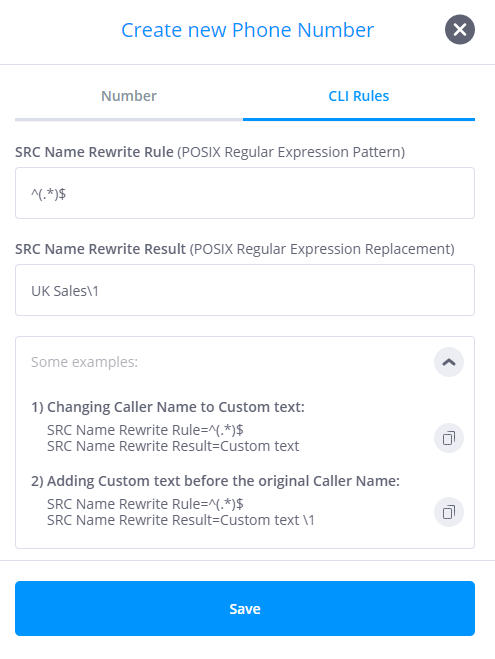
CLI Rules
CLI Rules are used to override the Source Caller Name. This functionality allows flexible Caller Name configurations and may be used to differentiate SIP calls received from phone.systems™. CLI Rules will help you to identify from which Phone Number object the call is coming from.
Note: By default, the CLI Rules feature is disabled.
 Back to the top
Object: Internal Number
The Internal Number object is used for internal dialing as an extension number. This facility allows users to call each other directly and to reach selected objects (such as Conference and Voice Menu objects) via internally-assigned extension numbers. Note that one Internal Number object must be created for each internal extension required, and extension numbers cannot be duplicated on multiple Internal Number objects.
Internal numbers may be made accessible to other instances of phone.systems™ that are interconnected via the Interlink feature (see the section Interlinks for further details). In addition, internal numbers are optionally used as internal caller IDs by SIP devices when making outbound calls to other extensions within the phone.systems™ network.

The information to be entered for this object is:
-
The name of the Internal Number object, for example, "Sales Conf Extension". Note that newly created Internal Number objects are provided with default names in the format {Tab name} {Object type} {Object type count in current tab}, for example "Main Internal Number 7".
-
An internal number (extension number) that will be used for internal dialing (1 to 4 digits). This number may be selected from a list of unused internal numbers that were previously added via the option
 in the "Settings" menu. Alternatively, a new number may be entered by selecting the
 option.
-
The option to make this internal number private (accessible only to this instance of phone.systems™), or public (accessible to other instances of phone.systems™ via the Interlink feature). By default, internal numbers are public.
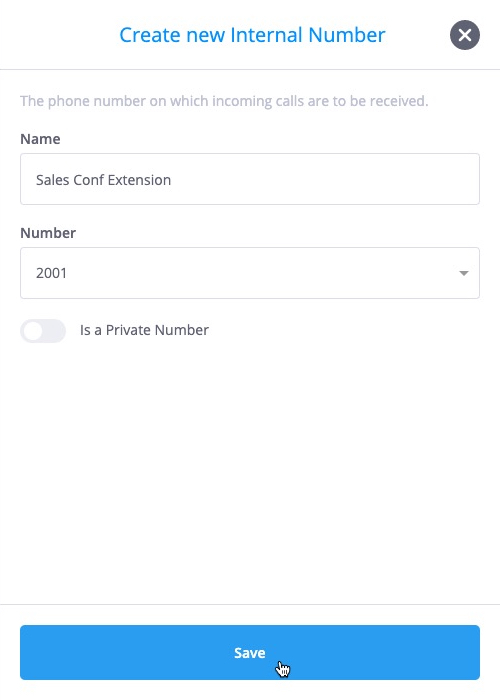
A simple usage example of the Internal Number object is shown below, where an internal extension number is dialed by phone.systems™ users to access the company's conferencing facility.
 Back to the top
Object: Ring Group
The Ring Group object redirects incoming external or internal calls to different destinations included in the ring (or hunt) group. These destinations consist of contact methods, such as phone numbers (landline or mobile) and VoIP connections that are configured for the various contacts in the system.
Multiple contacts and contact methods may be included as call destinations within a single Ring Group object, and the ring times and ring sequences for the selected contacts/contact methods are fully configurable. If the first contact/contact method is busy or remains unanswered for the set time period, the call is passed to the next device in the configured ring sequence, and so on through the list of contact methods. Alternatively, all destinations in the ring group may be configured to ring simultaneously.
The contacts and their various contact methods to be used by Ring Group objects may be either configured when assembling the ring group, or may be pre-configured using the Contact Center found under the Settings menu (see the section Contact Center for further details).
The Ring Group object includes the ability to configure playlists as both "music-on-hold" and "ringback-tone", so that pre-recorded music, messages, commercials or any other audio clips may be played to callers.
 Back to the top
Ring Group Configuration
The information to be entered for this object is:
-
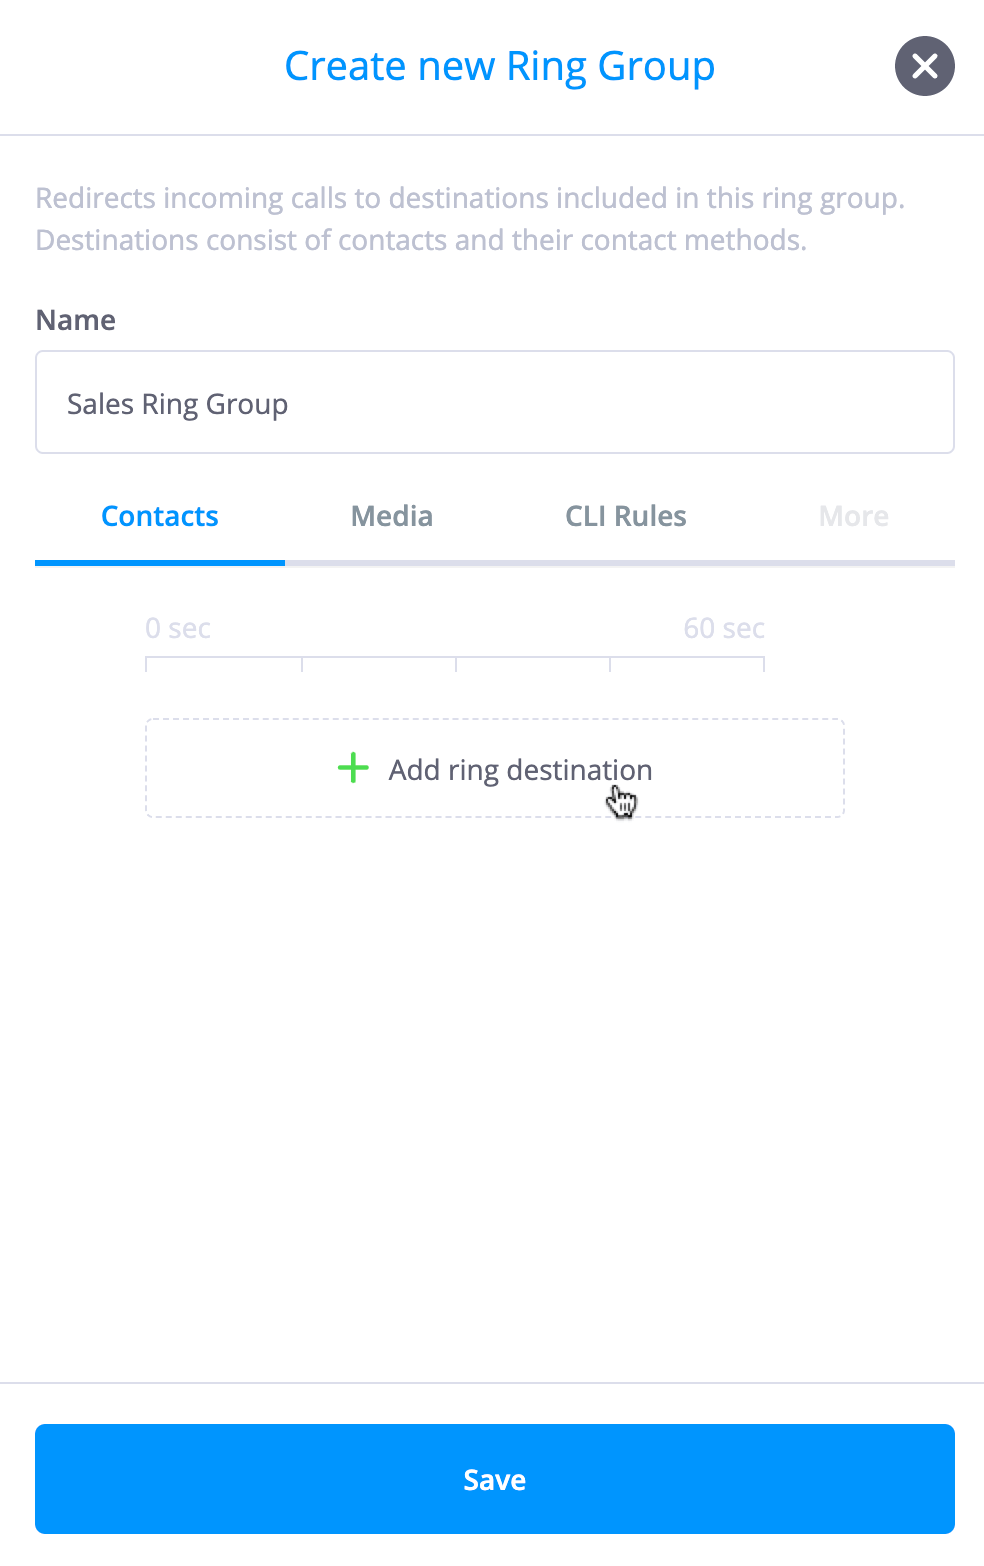
The name of the Ring Group object, for example "Sales Ring Group".
-
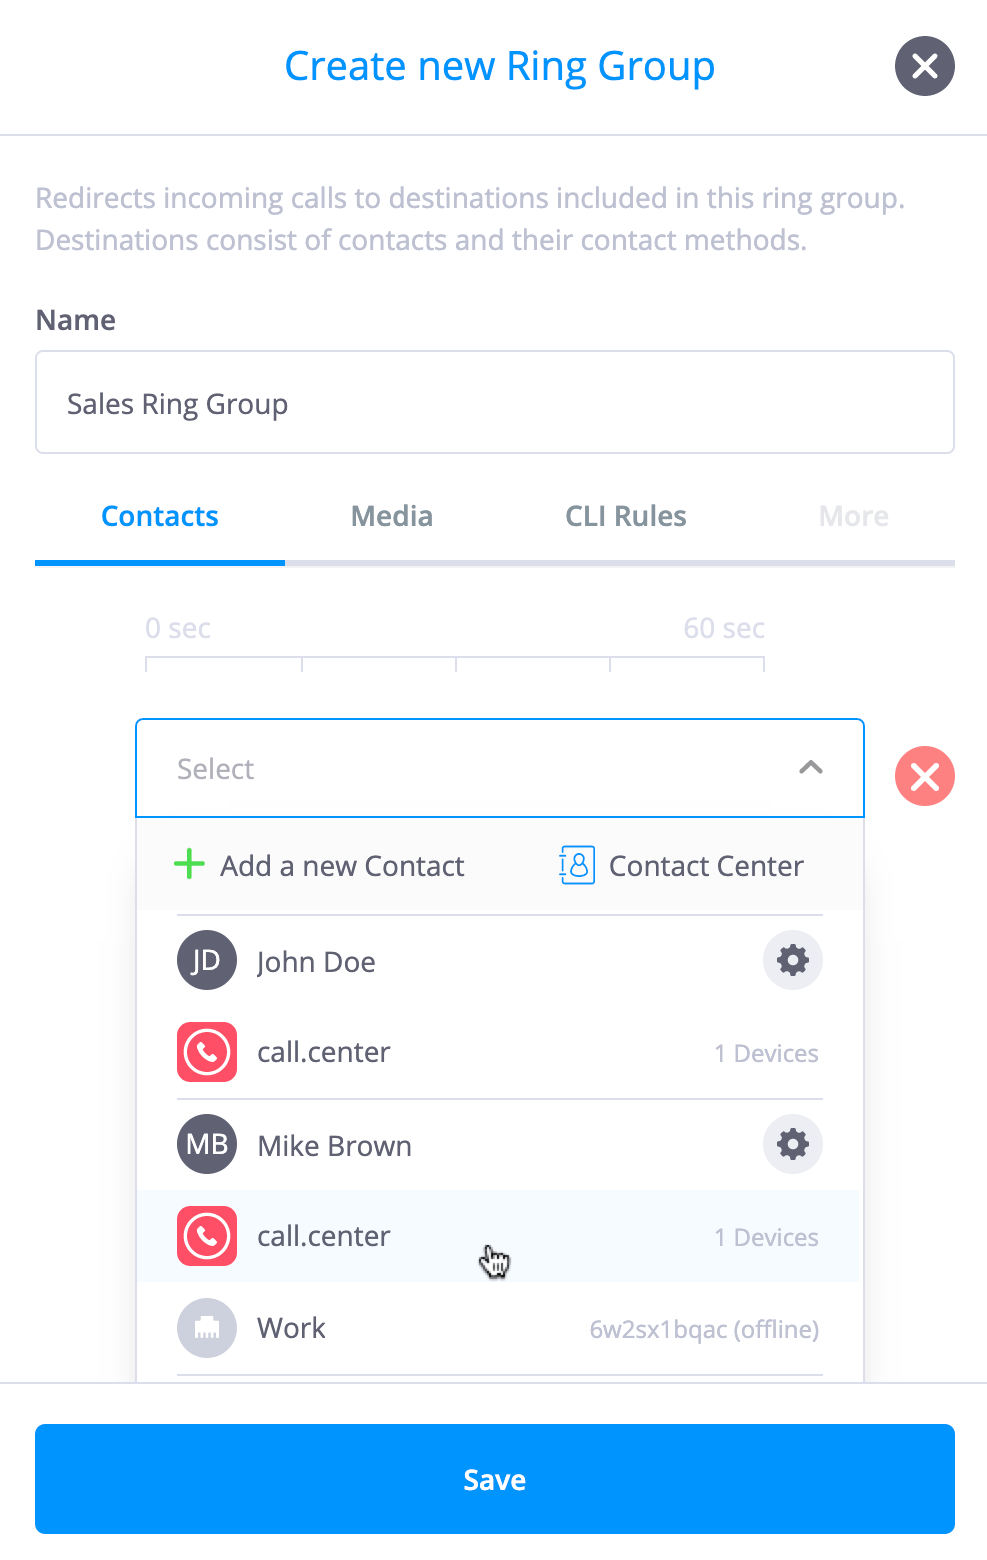
Contacts, defining a ring destination or multiple ring destinations to which incoming calls will be forwarded. Each ring destination consists of a contact and an associated contact method, and may be directly configured from the Ring Group object or may be pre-configured by using the Contact Center. The section Contact Center provides full details on how to configure contacts and contact methods.
Selecting
 allows the user to add a ring destination from a drop-down menu of pre-configured contacts and
their associated contact methods. Alternatively, a new contact may be added by selecting
 .
.
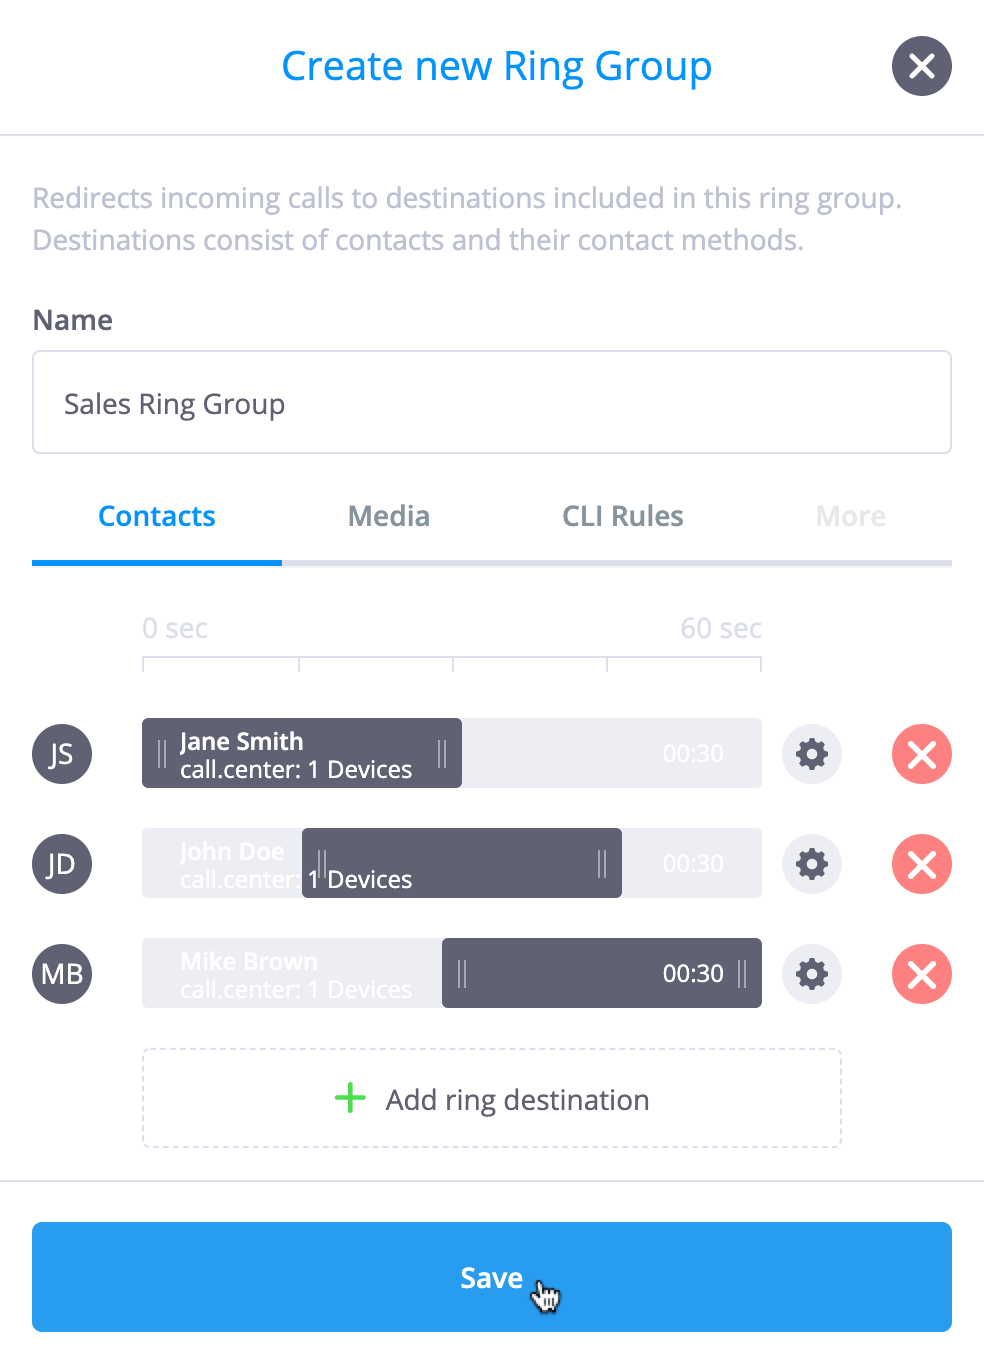
Once the ring destinations have been added to the Ring Group object, the ring times and, if applicable, the ring sequences may be configured. The ring times for each contact method are shown on a 60 second timeline bar, and each contact method may be placed as required along the timeline bar. This is achieved by positioning the mouse over the selected contact method, and then "dragging" the contact method along the timeline bar to the required position.
Note: At least one of the contact methods must have a ring time starting at the zero second mark.
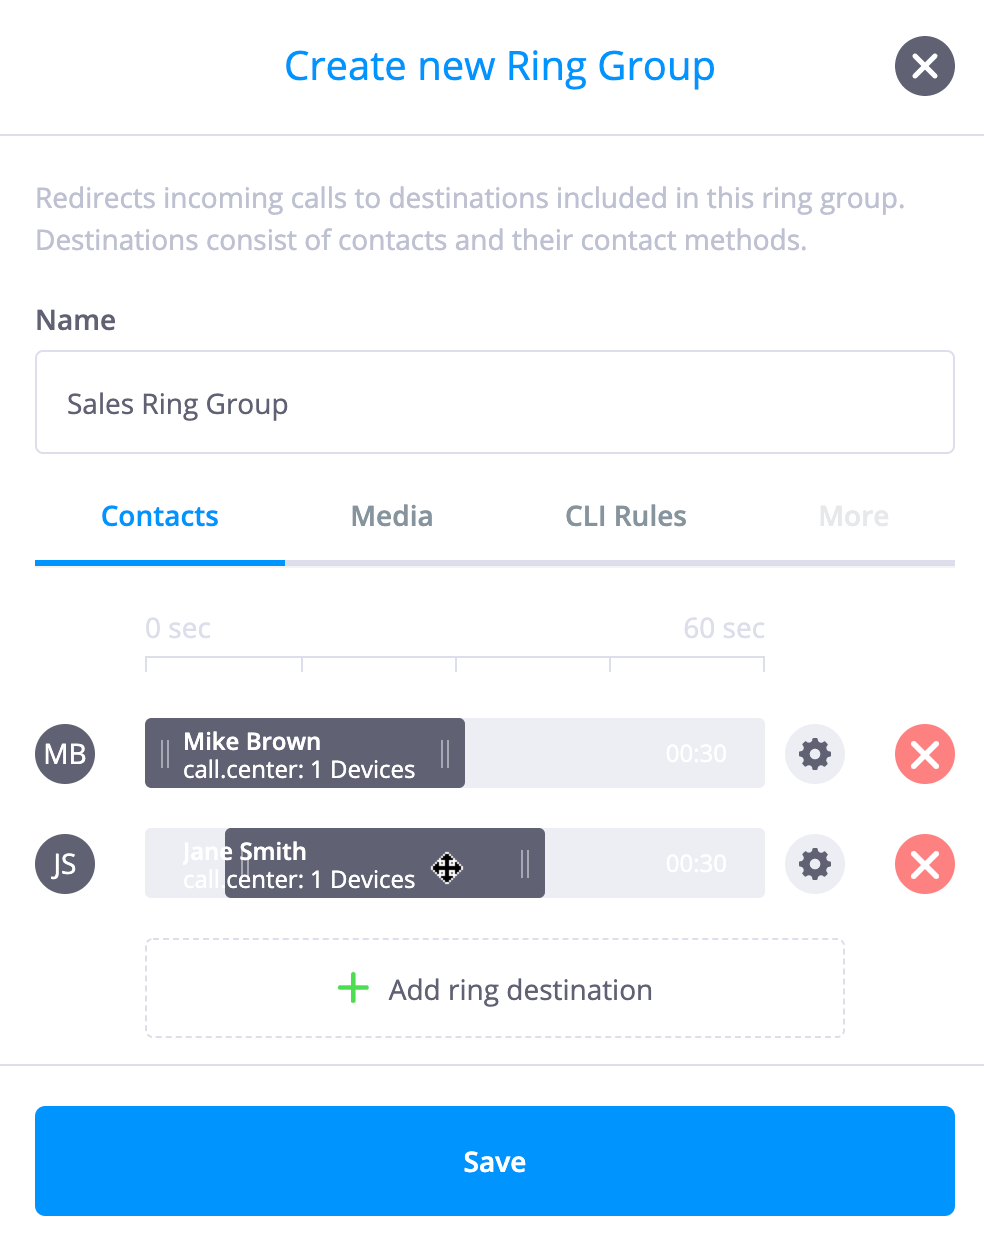
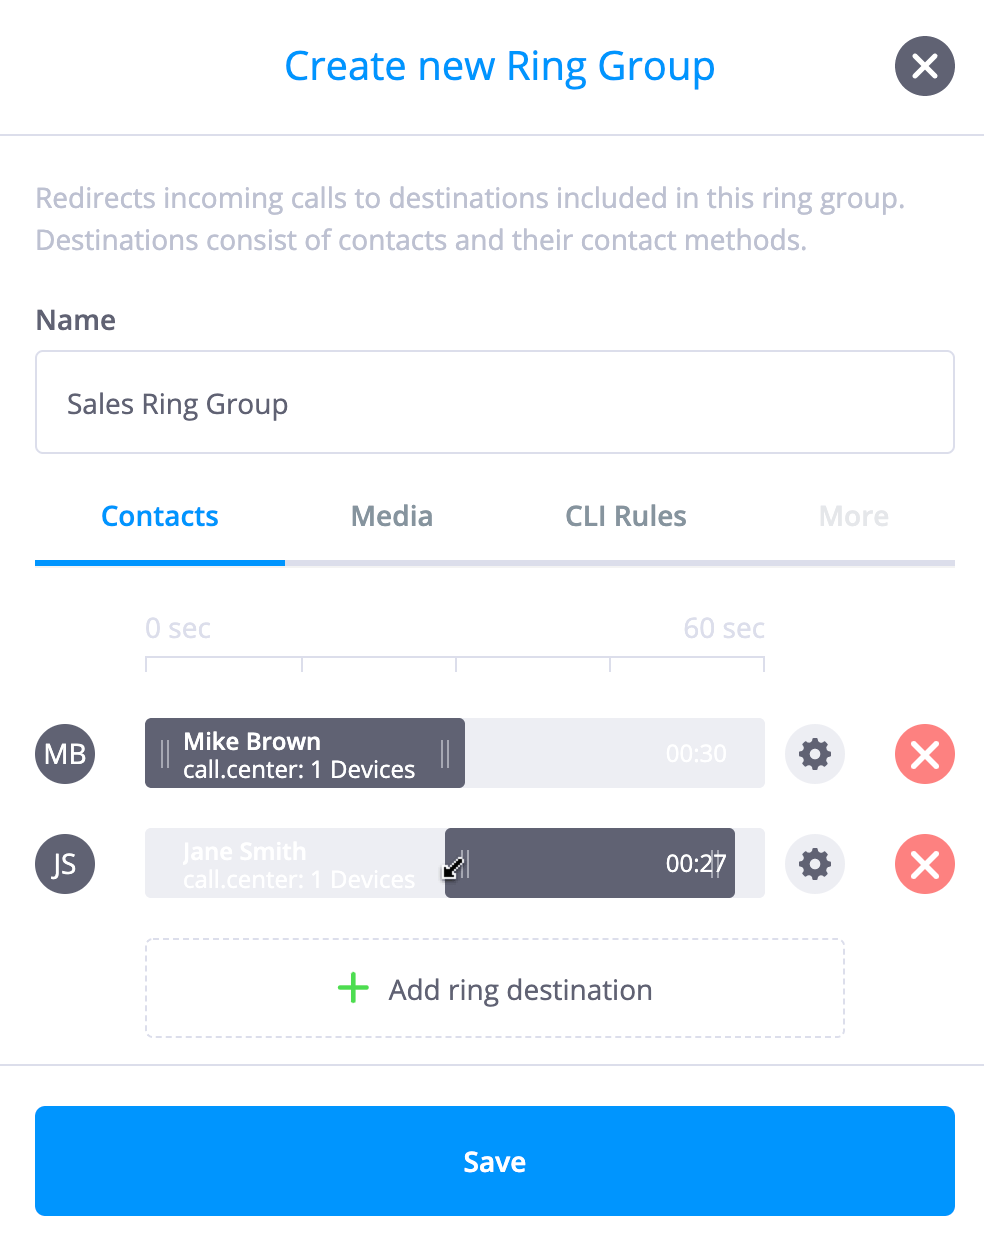
The ring start and end times for each contact method may be changed by "stretching" or "shrinking" that contact method. To do this, place the mouse over the left or right-hand edge of the contact method, and re-size that contact method by "dragging" the mouse in a left or right-hand direction as required.
Note: The position of the Contact Methods on the timeline bar are automatically adjusted to ensure that there are no time gaps between the end ring time of one contact method, and the start ring time of the next sequential contact method.
Back to the topMedia Tab
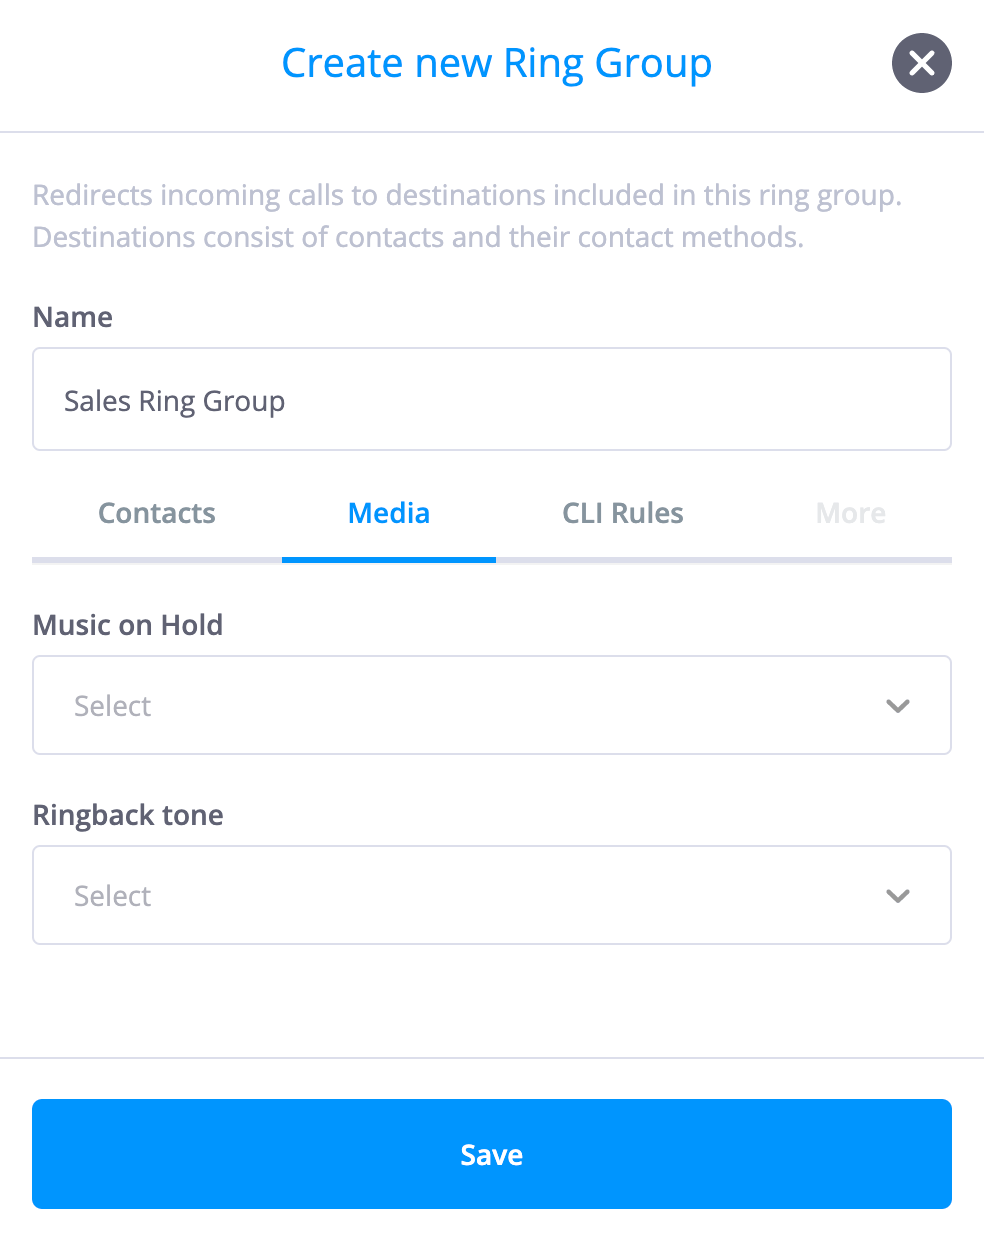
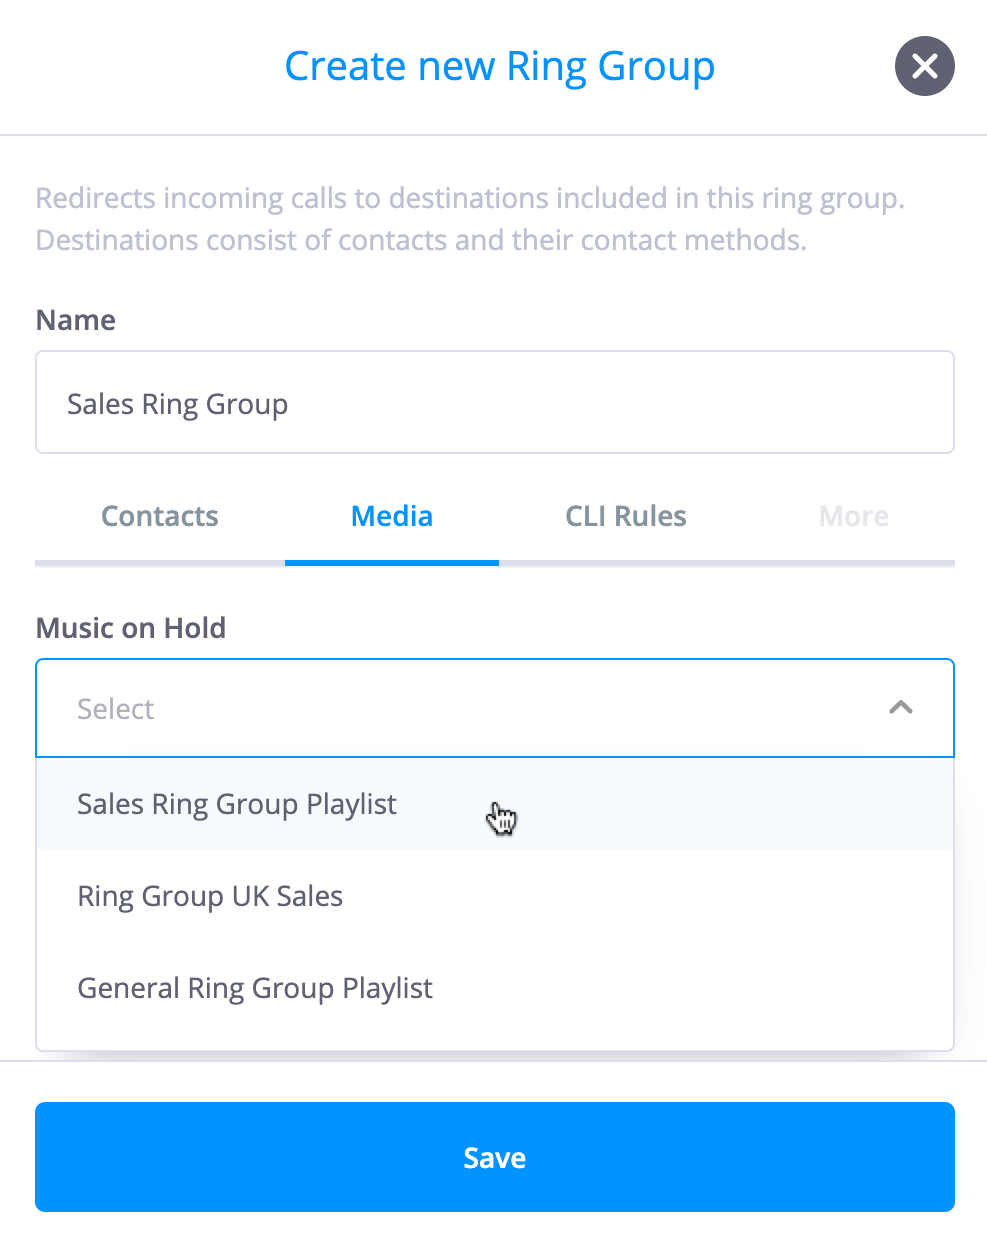
The Media tab is used to include media as both "music-on-hold" and "ringback tone" playlists. This allows pre-recorded music, messages, commercials or any other audio clips to be played to callers before their call is answered (ringback tone), or while an active call is put on hold (music-on-hold) . The section Media Center provides full details on how to configure and manage media files.
It should be noted that playlists must be pre-configured in the Media Center before adding objects to the workspace such as Ring Groups, which may include the use of these audio files.
CLI Rules Tab
The CLI Rules are used to override the Source Caller Name. This functionality allows flexible Caller Name configurations and may be used to differentiate SIP calls received from phone.systems™. CLI Rules will help you to identify from which Ring Group object the call is coming from.
Note: By default, the CLI Rules feature is disabled.
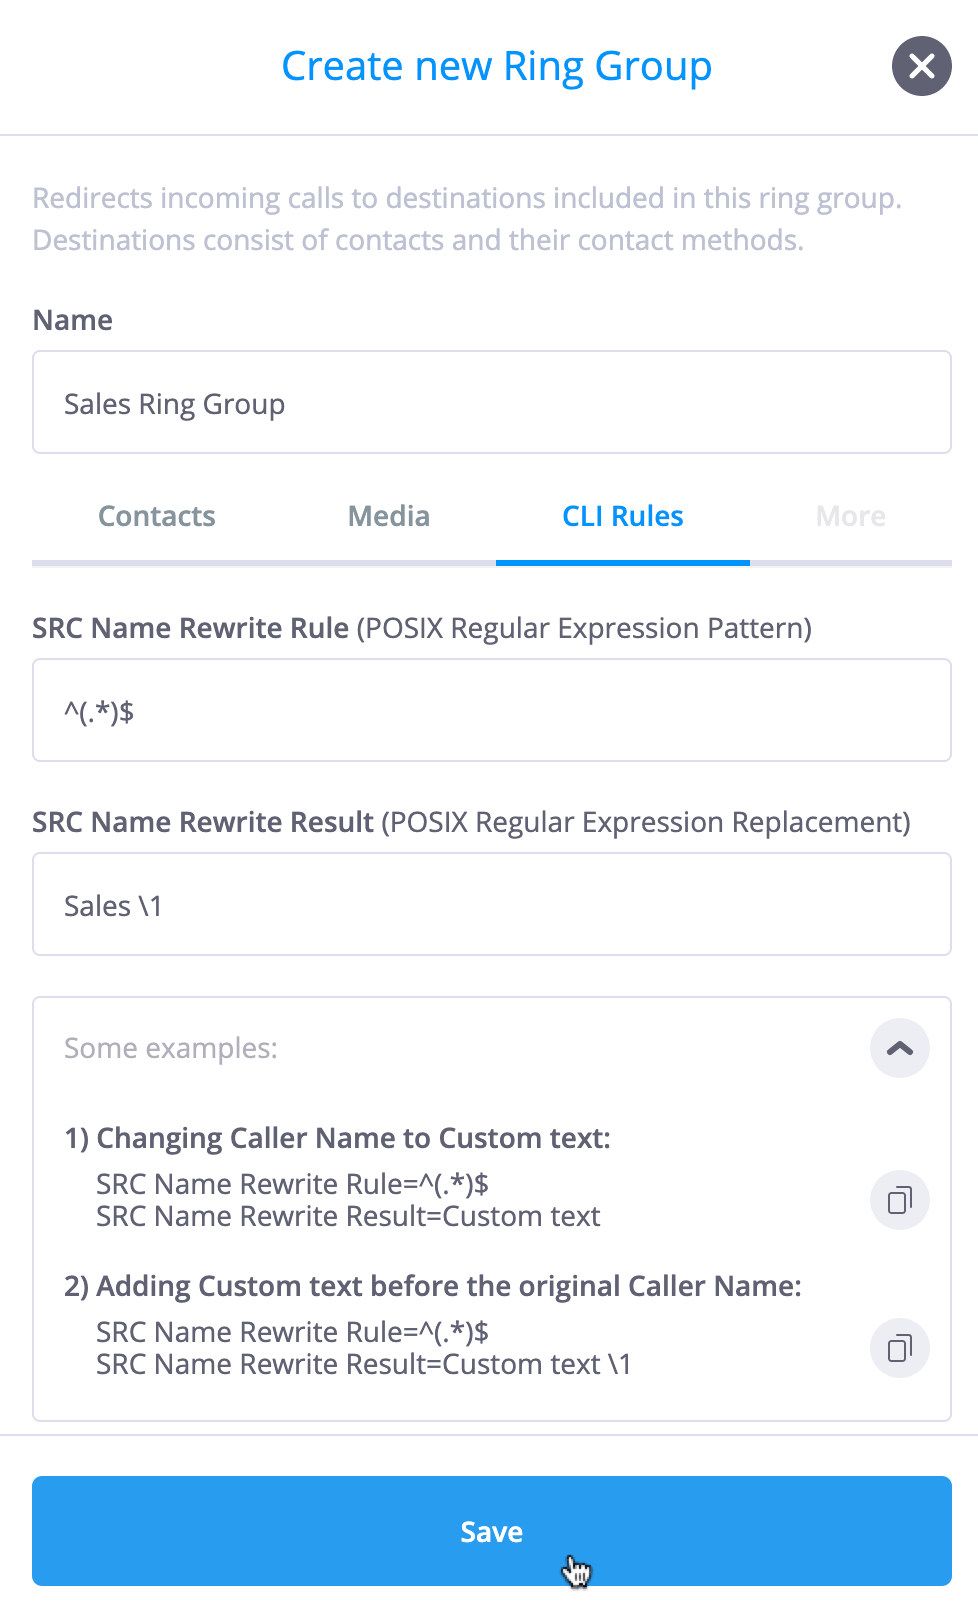
The only cable exiting the Ring Group object is for a “timeout” condition, defining the path if an incoming call is not answered within the maximum configured ring time.
A simple usage example of the Ring Group object is shown below, where an incoming call is directed to the Sales Ring Group. If the call is unanswered within the maximum configured ring time, then that call is forwarded to voicemail.
 Back to the top
Adding Multiple Destinations
Selecting
 allows the user to add a multiple ring destination from a drop-down menu of pre-configured
contacts and their associated contact methods.
 Back to the top
Object: Voice Menu
The Voice Menu object is used for implementing an IVR (Interactive Voice Response) or automated attendant system, allowing callers to listen to a recording and navigate to different destinations using their dial pad. This object acts as a virtual receptionist, and includes the ability to play key messages and pass information to callers.
On receiving an incoming call, the Voice Menu plays an audio message, prompting the caller to enter an extension number. The call is then passed to the connecting object with the matching extension number. Logic is included so that erroneously entered extensions or caller-entry timeouts may be properly handled.

The information to be entered for this object is:
-
The name of the Voice Menu object, for example, "Main Voice Menu".
-
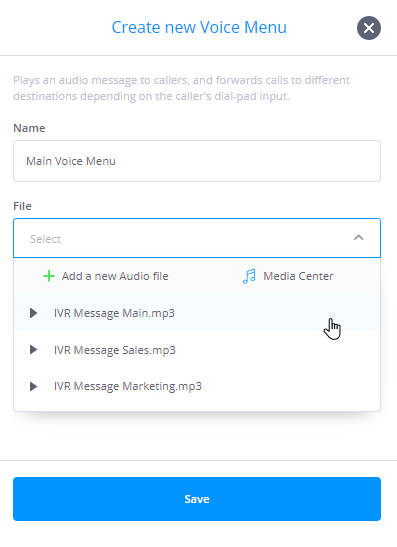
An audio file that may be uploaded from a local drive (in .mp3/.wav/.flac/.ogg format), may be recorded directly, or may be selected from files/playlists previously uploaded into the phone.systems™ Media Center (see Section Media Center ). Typically this audio message would include information pertaining to extension numbers that are to be entered by the caller on their dial pad in order to connect with people or departments.
-
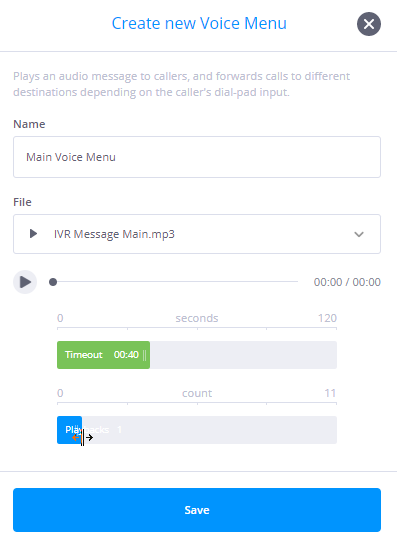
A timeout (from 1 second to 2 minutes), defining the maximum time allowed for the caller to enter an extension number using their dial pad. This timer starts immediately after the audio message has been played. The timeout value is changed by positioning the mouse over the right-hand edge of the timeout bar, and then "dragging" the edge in a left or right direction.
-
A playback counter (from 1 to 11) allows the sequence of playing the selected audio file and completing the caller-input timeout to be repeated before that call is forwarded in accordance with the “Reached timeout limit” logic as described below. The playback count is changed by positioning the mouse over the right-hand edge of the “Playbacks” bar, and then "dragging" the edge in a left or right direction.
It is important to note that cables exiting from the right-hand socket of the Voice Menu object serve three possible functions:
-
Extension - The cable forwards incoming calls to the appropriate object in response to a valid extension number entered by the caller.
-
IVR invalid selection - The cable forwards incoming calls to a specified object (such as an Audio Playback object) if the caller enters an invalid extension number.
-
Reached the timeout limit - The cable forwards incoming calls to a specified object (such as an Audio Playback object) if the caller does not enter an extension number within the defined timeout period.
When a cable is generated from a Voice Menu object and is connected to another object, a configuration menu is automatically displayed, prompting the user to select the Connection type ("Extension", "IVR invalid selection" or "Reached the timeout limit") for that cable.
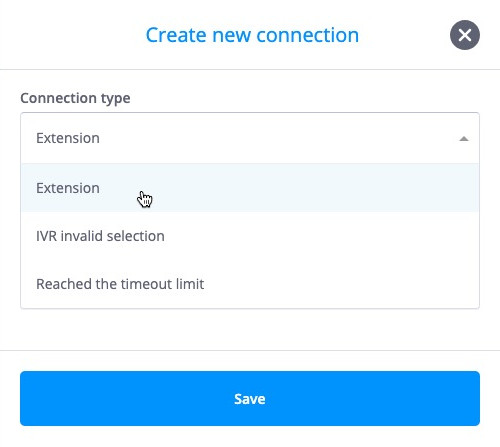
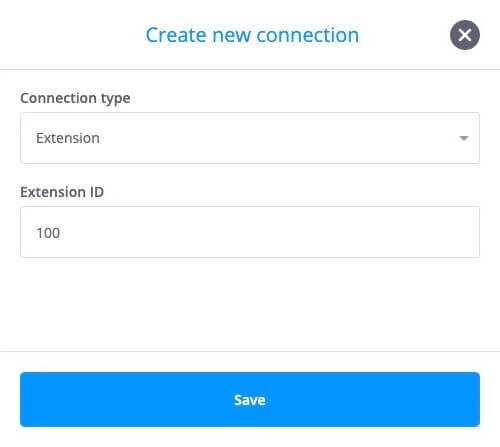
If a Connection type "Extension" is selected, an extension number must be entered to match the instructions in the voice message that is played to the caller. This extension number will be displayed on the cable that connects the Voice Menu object to the adjacent object.
In the usage example of the Voice Menu object shown below, a voice message is played to the caller, with the instructions “Press 100 for sales, and 200 for support". If the caller presses “100”, then the call will be forwarded to the sales ring group, and if “200” is pressed, then the call will be forwarded to the support ring group. Invalid extension and timeout conditions are forwarded to specified Audio Playback objects where appropriate messages are played to the caller.

Extension numbers may be changed by clicking on the configured number displayed on the cable. A configuration dialog window will be opened, and a new extension number may be entered.
It should be noted that in the case where the caller enters an invalid extension number or a timeout occurs, the call may be "looped" back to the Voice Menu object. This will cause the instructions regarding valid extension numbers to be replayed to the caller, and the caller will have an additional opportunity to contact the desired party. In the illustration below, calls generating error conditions are forwarded to Audio Playback objects where specified messages are played to the caller (for example, a message "You have entered an invalid extension number"). On completion of this audio playback, the call is returned to the Voice Menu object.
 Back to the top
Object: Audio Playback
Audio Playback allows an audio message such as a voice recording or music-on-hold to be played to caller. After the audio file has been played, the call is passed to the object connected to the right-hand socket of the Audio Playback object.

The information to be entered for this object is:
-
The name of the Audio Playback object.
-
An audio message that should be played to the caller. In general, this audio file will have previously been uploaded from a local drive or recorded, and stored in the phone.systems™ Media Center (see Section Media Center). New files may be added to the Media Center by selecting the
 option in the "File" dropdown menu.
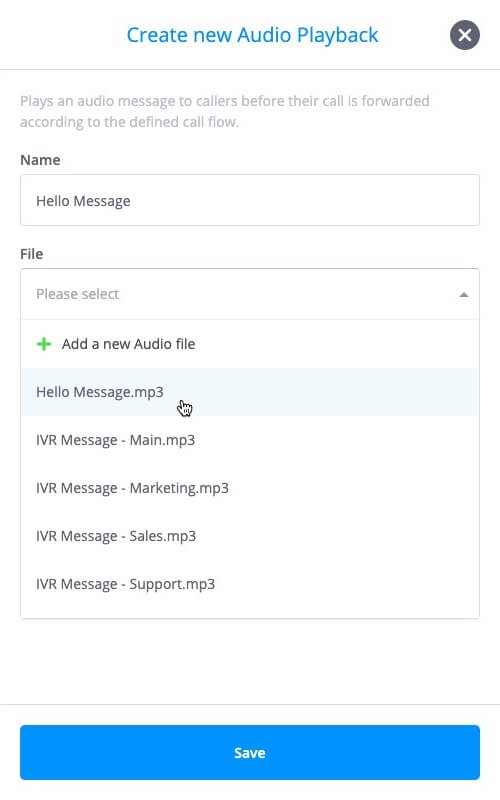
A usage example for the Audio Playback object is shown below, where a voice message is played to the caller, after which the call is passed to a Ring Group object (“Mike Brown”) for further processing.
 Back to the top
Object: Conference
The Conference object allows multiple callers to partake in a conference call. Phone.systems™ includes the real-time management of conferences, and participants may be muted and removed from the conference by an administrator.

The information to be entered for this object is:
-
The name of the Conference object.
-
A PIN (Personal Identification Number) for accessing the conference room, with a length of up to four digits. All callers wishing to take part in the conference must enter this PIN correctly. If no PIN is required, then this field should be left blank.

Once a conference is active, clicking on the
![]() icon on the Conference object opens a configuration window and allows for the
real-time management of conferences.
icon on the Conference object opens a configuration window and allows for the
real-time management of conferences.

Phone numbers of the participants are displayed, and the conference administrator may selectively mute participants (by using the
![]() button) and also remove participants from the conference (by using the
button) and also remove participants from the conference (by using the
![]() button).
button).
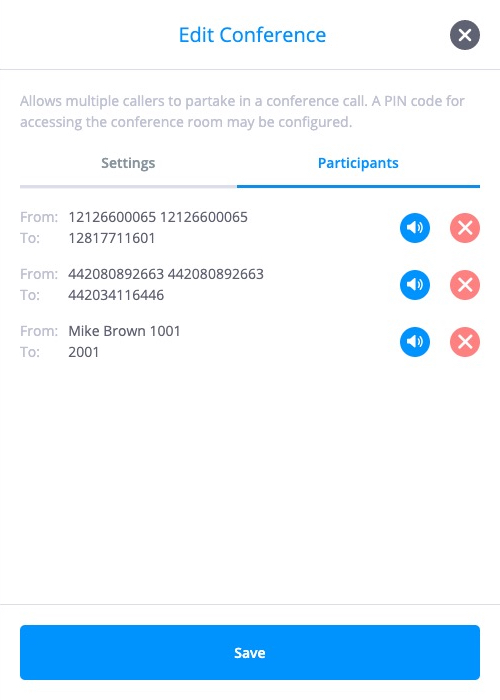
Additionally, a list of conference participants may be viewed by expanding the conference object. Clicking on the refresh button updates the current list of participants.
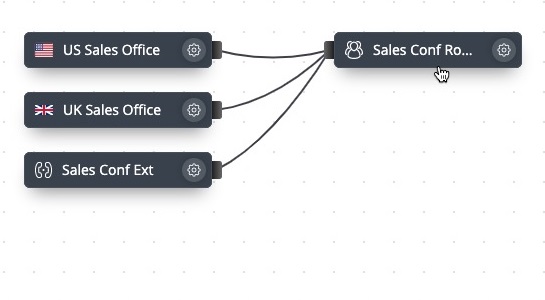
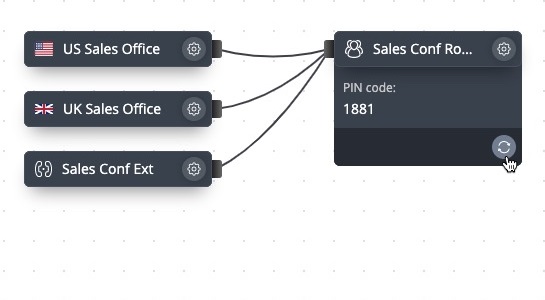
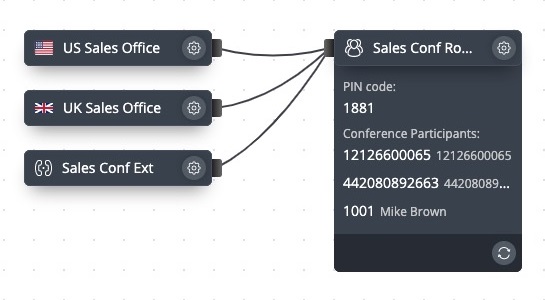
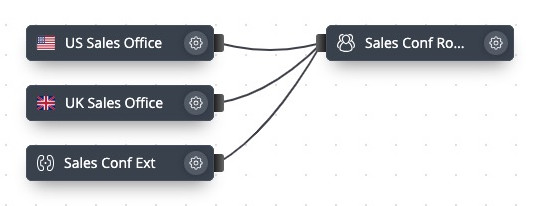
A simple usage example of the Conference object is shown below, where multiple international phone numbers as well as an internal number provide access to the conference facility.
 Back to the top
Object: Voicemail
The Voicemail object serves as a mailbox in which callers may leave voice messages, which are then immediately sent to a specified destination on the termination of each call.

The information to be entered for this object is:
-
The name of the Voicemail object.
-
The delivery method for the voicemail audio message, with the options being Email, Dropbox, FTP, SFTP, Google Drive or OneDrive. If the required delivery method has not previously been configured by using the Delivery Methods option listed under the "Settings" menu, a delivery method may be added by selecting the option
 in the dropdown menu. See the section
Delivery Methods
for further details.
-
An audio message that should be played to the caller. Generally, this audio file will have previously been uploaded from a local drive or recorded, and stored in the phone.systems™ Media Center (see Section Media Center ). However, new files may be added to the Media Center by selecting the
 option in the "File" dropdown menu.
-
The maximum length of the voicemail, with valid values being from 1 to 60 minutes. The call will automatically be terminated after this configured time period, unless the caller hangs up before the expiration of this timer.
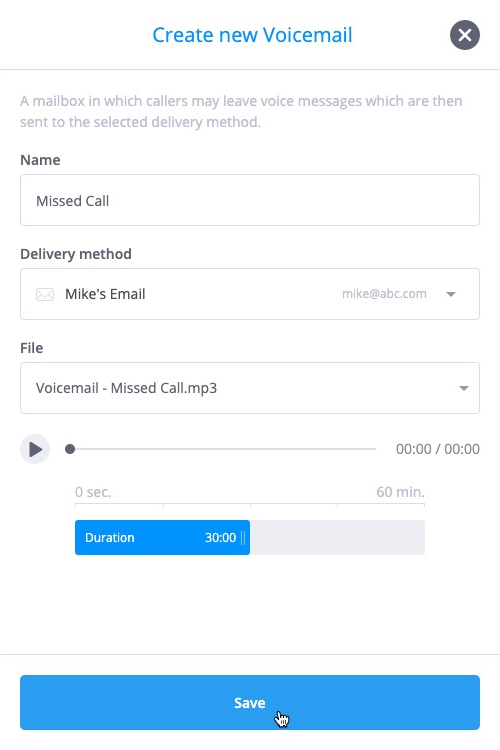
A simple usage example of the Voicemail object is shown below, where an incoming call is forwarded to the ring group Mike Brown. If Mike does not answer the call within the defined ring timeout period then that call is sent to voicemail, where the caller may leave a message.
 Back to the top
Object: Fax
The Fax object allows incoming faxes to be stored in PDF format, with multiple file delivery options being available. G.711 pass-through and T.38 fax protocols are supported.

The information to be entered for this object is:
-
The name of the Fax object.
-
The delivery method for the fax PDF file, with the options being Email, Dropbox, FTP, SFTP, Google Drive or OneDrive. If the required delivery method has not previously been configured by using the Delivery Methods option listed under the "Settings" menu, a delivery method may be added by selecting the option
 in the dropdown menu. See the section
Delivery Methods
for further details.
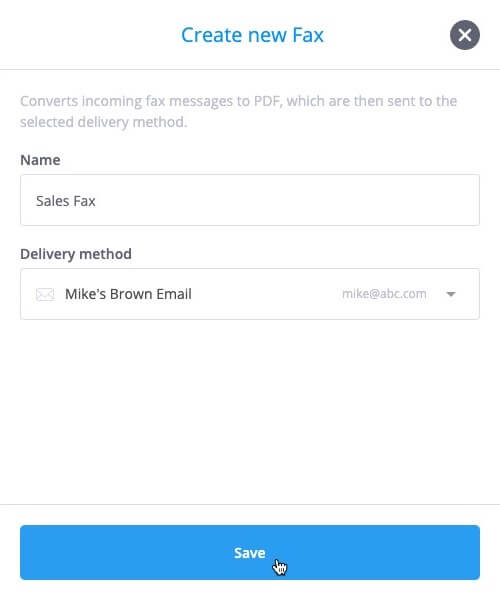
A simple usage example of the Fax object is shown below, where an incoming call is forwarded to the Sales Fax object.
 Back to the top
Object: Call Recorder
The Call Recorder object allows phone calls to be recorded. The call contents are sent to a predefined destination immediately after the termination of each call.

The information to be entered for this object is:
-
The name of the Call Recorder object.
-
The delivery method for the file containing the contents of the recorded call, with the options being Email, Dropbox, FTP, SFTP, Google Drive or OneDrive. If the required delivery method has not previously been configured by using the Delivery Methods option listed under the "Settings" menu, a delivery method may be added by selecting the
 option in the dropdown menu. See the section
Delivery Methods
for further details.
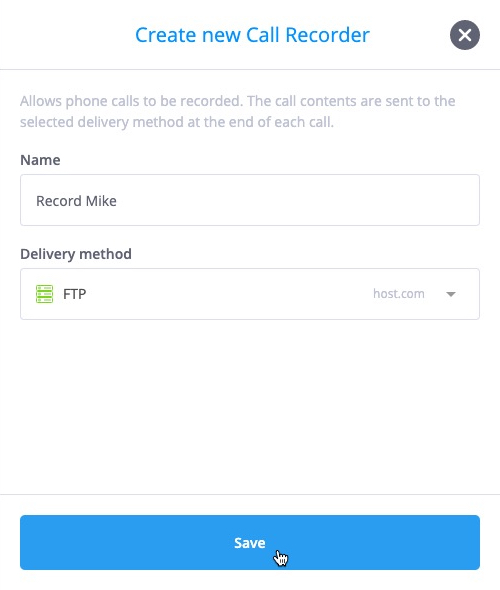
A usage example for the Call Recorder object is shown below, where this object is inserted between a Phone Number and Ring Group object. All incoming calls to Mike Brown are recorded, and the audio file is forwarded to a predefined destination immediately after the termination of each call.
 Back to the top
Object: Caller Router
The Caller Router object allows incoming calls to be forwarded to different objects, depending on the originating phone number or CLI (Calling Line Identity). Users have the option of matching complete phone numbers, or forwarding calls according to number prefixes.

Caller routing is based on a simple “Allow/Disallow” logic, depending on the setting of the "behavior" indicator associated with each listed number/prefix. The Caller Router object must be connected to two child objects such as Ring Group or Voicemail objects, to which calls are forwarded according to this “Allow/Disallow” logic.
The Caller Router object includes both green ("Allow") and red ("Disallow") right-hand sockets for cable connections. A cable originating from the green socket corresponds to the “Allow” option, while a cable originating from the red socket corresponds to the “Disallow” option.
In the figure below, the Caller Router object is configured to include the phone number prefixes 1416,1437, and 1647, with the "behavior" set to "Allow" for all the listed prefixes. Therefore, if incoming calls are received with a CLI matching any of these prefixes, then those calls are routed via the green socket to the Toronto Voice Menu. All other incoming calls are sent to the Ontario Voice Menu.

The information to be entered for this object is:
-
Name - The name of the Caller Router object.
-
Default Route - Specifies which route ("Allow" or "Disallow") to which the call will be forwarded if the incoming phone number does not match any of the configured routing rules.
-
Algorithm - An algorithm to be used for number routing, with the options being "Prefix" or "Number". "Prefix" matches are determined according to "number starts with" logic, while "Number" matches require an exact CLI match. Note that either the "Prefix" or "Number" option may be selected, and these algorithms may not be mixed on a single Caller Router object.
-
Numbers and Behavior - A list of phone number/s or prefix/es required for the caller routing logic, together with an “Allow/Disallow” indicator that defines the call routing behavior for that specific number or prefix. Alphanumeric inputs (both letters and numerals) are supported, with letters being case sensitive. There are no limitations on the format (such as E.164) or the number of characters used in listing these phone numbers/prefixes, so as to allow for maximum flexibility in CLI matching. Multiple numbers or prefixes may be added as required.
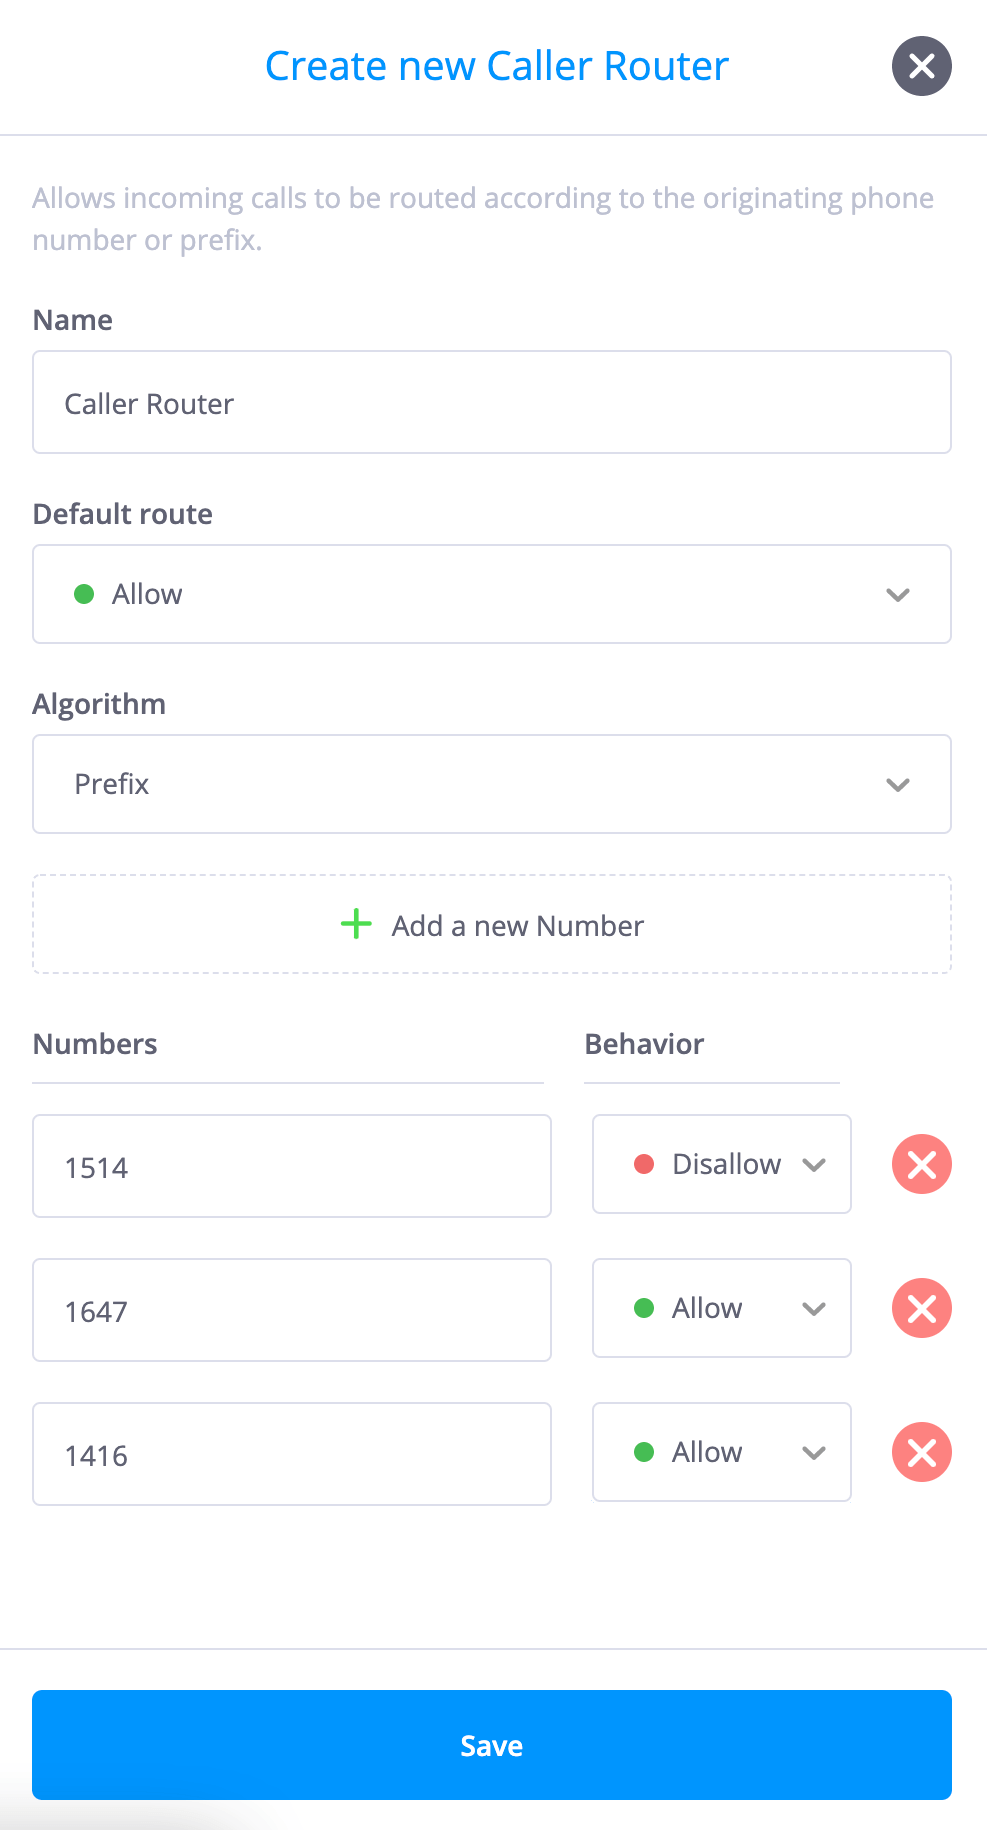
In the figure above, incoming calls with a CLI prefix of 1647 or 1416 will be forwarded to the object connected to the green ("Allow") socket of the Caller Router object, while calls having a prefix of 1514 will be forwarded to the object connected to the red ("Disallow") socket.
Phone numbers or prefixes previously added to the Caller Router object may be deleted by
clicking on the
![]() icon to the right of the number.
icon to the right of the number.
Object: Blacklist
The Blacklist object is used to block incoming calls received on specific phone numbers. If the calling number exactly matches a blacklisted phone number, then the incoming call will be terminated and will not be passed to objects connected to the right-hand side of the Blacklist object.

The information to be entered for this object is:
-
The name of the Blacklist object.
-
The blacklisted phone number/s. There are no limitations on the format (such as E.164) or the number of digits used in listing these phone numbers, so as to allow for maximum flexibility in CLI matching. Multiple numbers may be added as required.
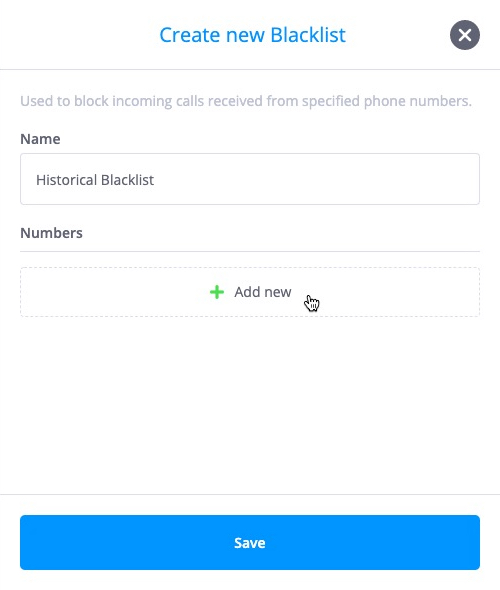
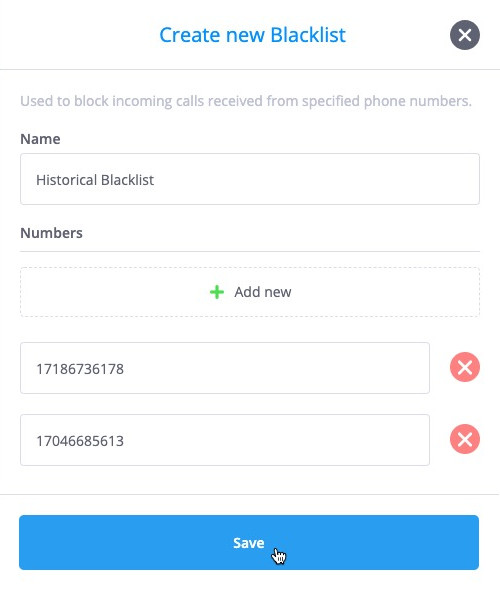
Phone numbers previously added to the Blacklist object may be deleted by clicking on the
![]() icon to the right of the number.
icon to the right of the number.
A simple usage example of the Blacklist object is shown below, where the blacklist filter is applied to all incoming calls before those calls are processed by the company’s voice menu.
 Back to the top
Object: Queue
The Queue object causes incoming calls to be placed in a queue before those calls are passed on to queue members (destinations). This allows a large number of calls to be handled, such as in a call center. The Queue object includes a ring strategy that is used to define how the calls are divided between queue destinations. Music or other messages may be played to callers while they are waiting in the queue, and ringback tones are supported, allowing audio clips to be played to callers before their call is answered.

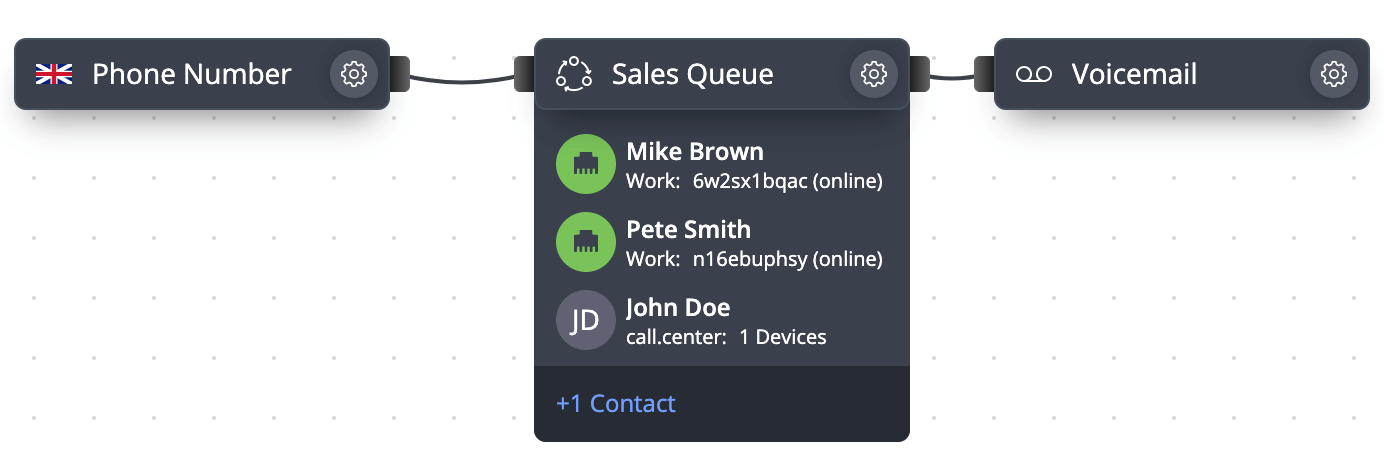
The Queue object includes multiple destinations to which calls are forwarded as per the selected ring strategy, and these destinations are added to the Queue object as "contacts". The only cable exiting the Queue object is for a “queue timeout”, defining the call path if the queue wait time exceeds the maximum configured value.
In the figure below, incoming calls are forwarded to the Queue object, which includes three queue destinations. If a call is not answered within the configured queue timeout, then that call is sent to the “Queue Timeout” Voicemail object.
 Back to the top
Queue Configuration
The information to be entered for this object is:
-
The name of the Queue object.
-
The ring strategy to be used for this queue.
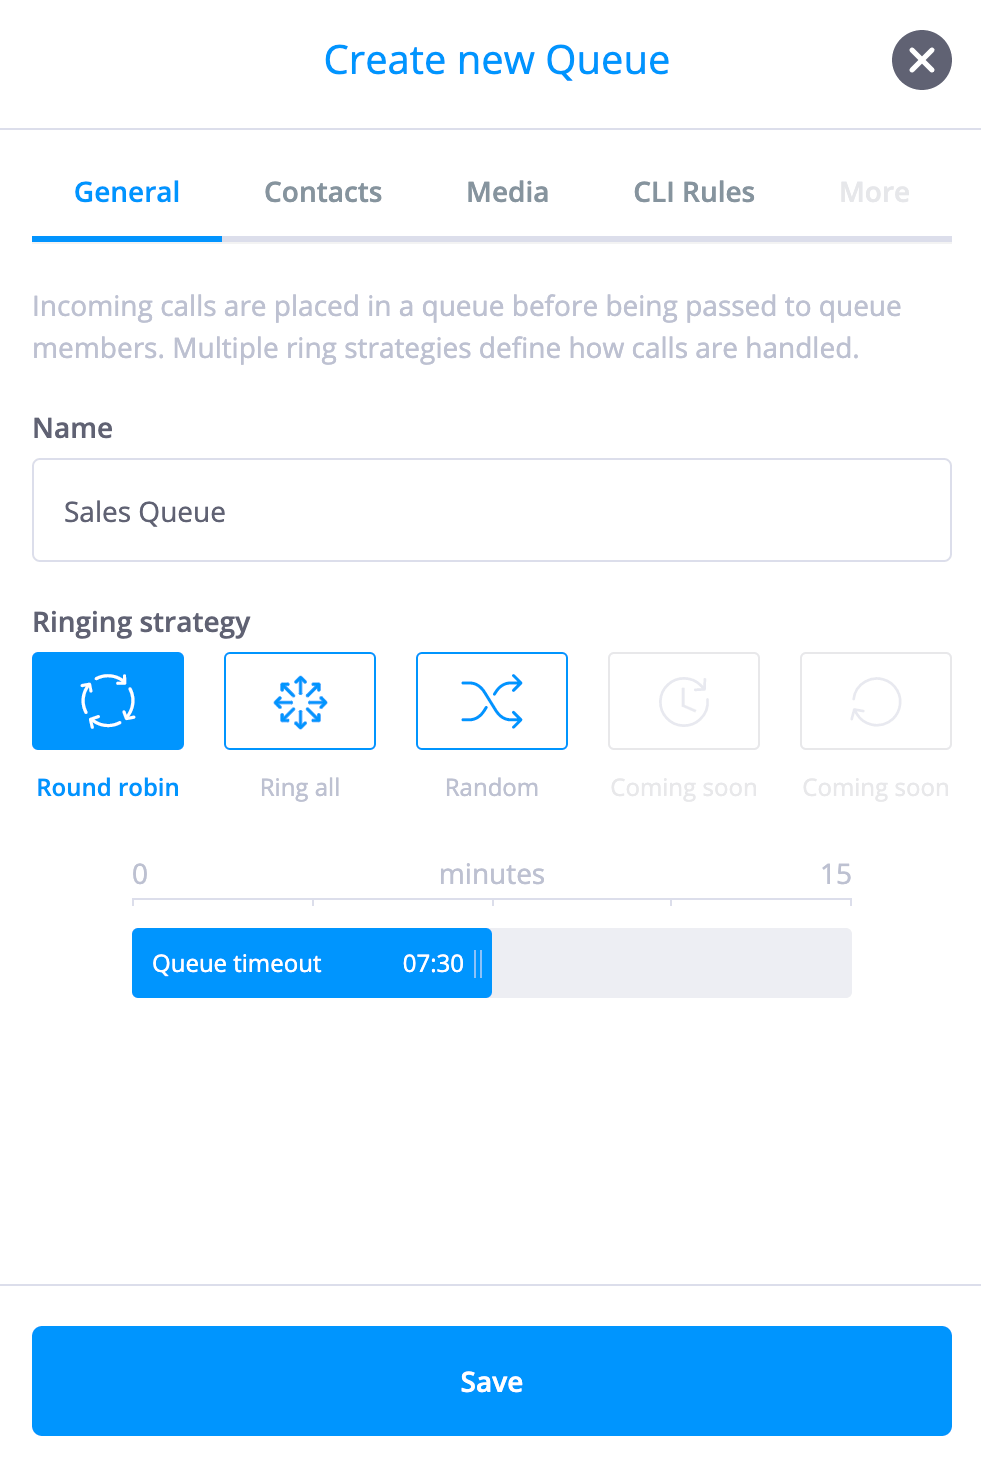
The options for the ring strategy are as follows:
-
Round robin – calls are allocated to members using a round robin policy, noting the last member who answered a call.
-
Ring all - ring all available queue members simultaneously until one answers.
-
Random – randomly ring a single queue member.
-
-
Additional ring strategies such as least recent and fewest calls will be implemented in future versions.
-
The queue timeout defines the maximum time that a call may remain in the queue without being answered, before that call is forwarded to a connected object according to the “queue timeout” logic. Valid values are from 00:05 (five seconds) to 15:00 (fifteen minutes). Note that if there is no call path defined for such a timeout event, then the call will be terminated on the occurrence of a “queue timeout”.
Contacts Tab
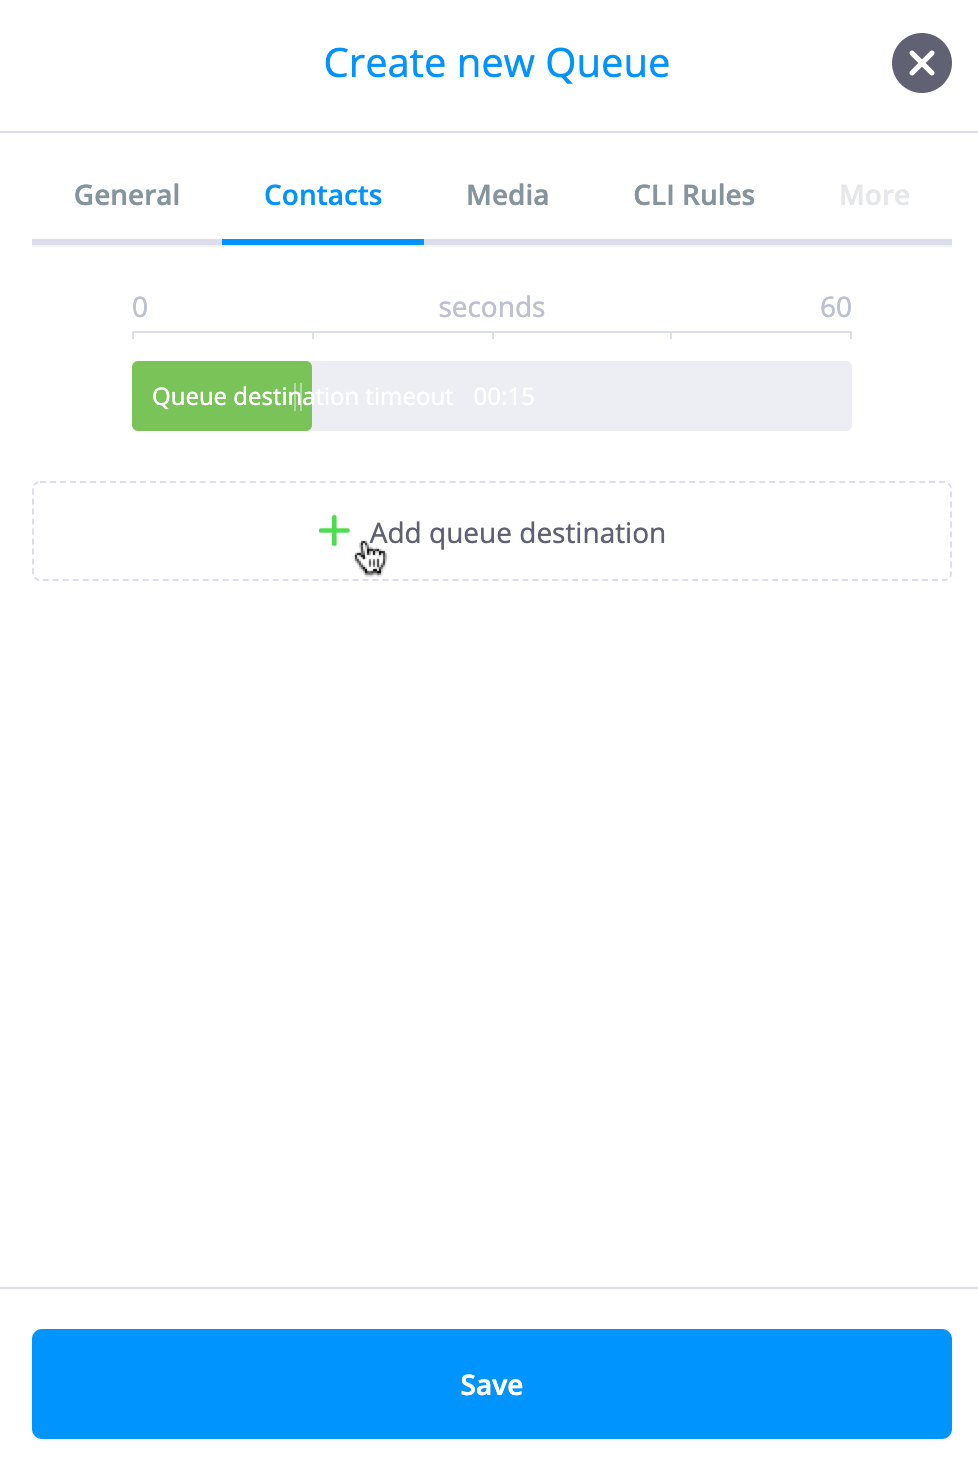
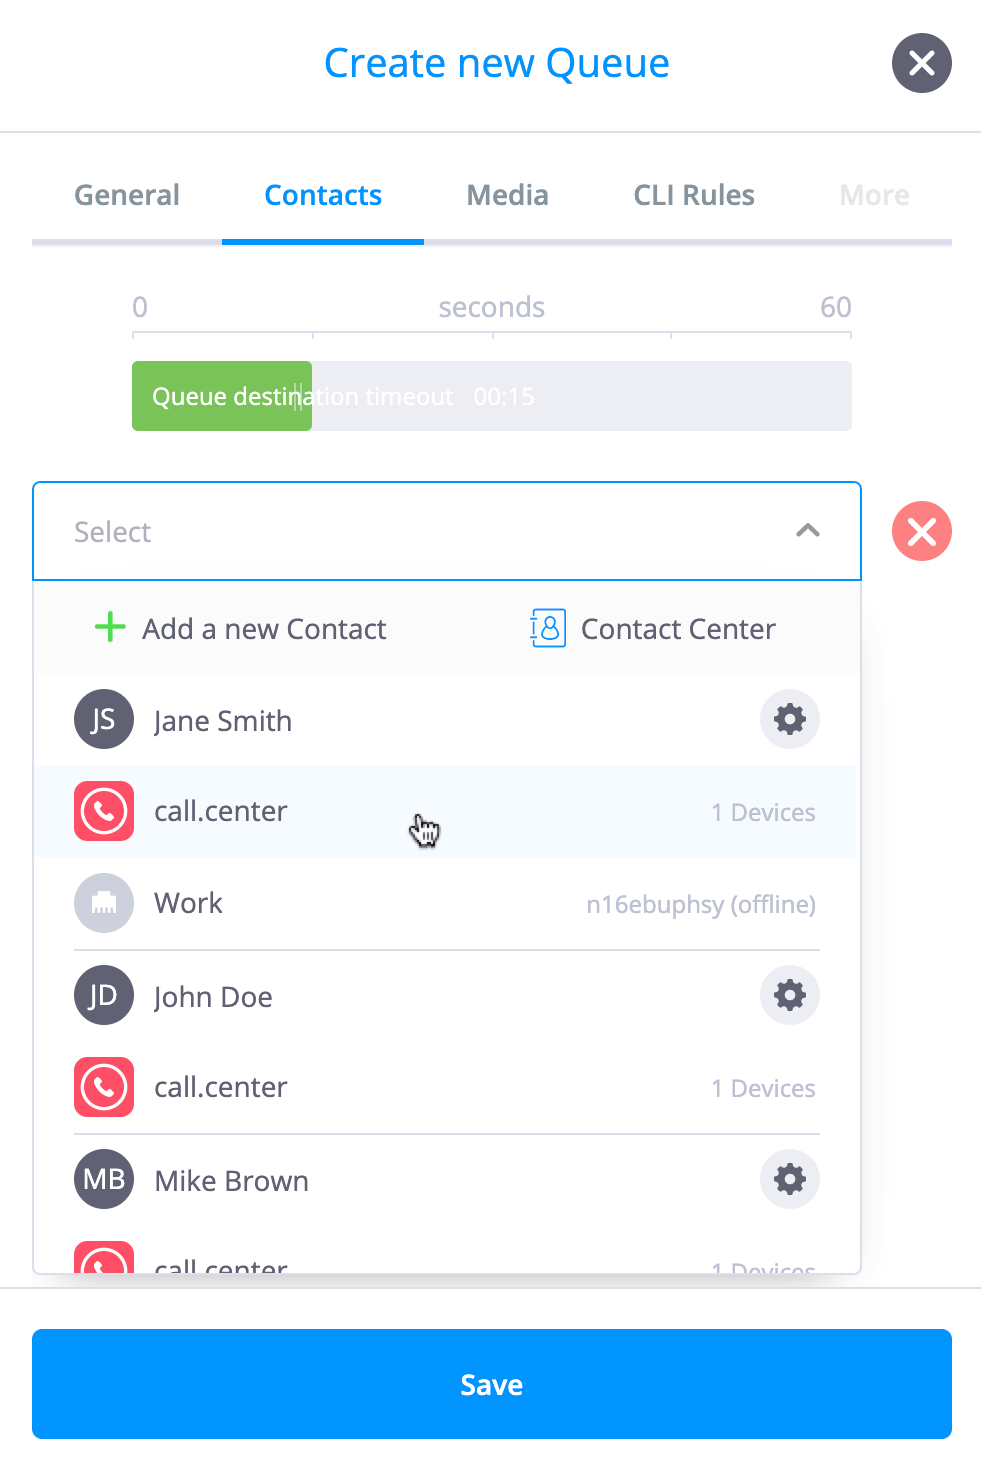
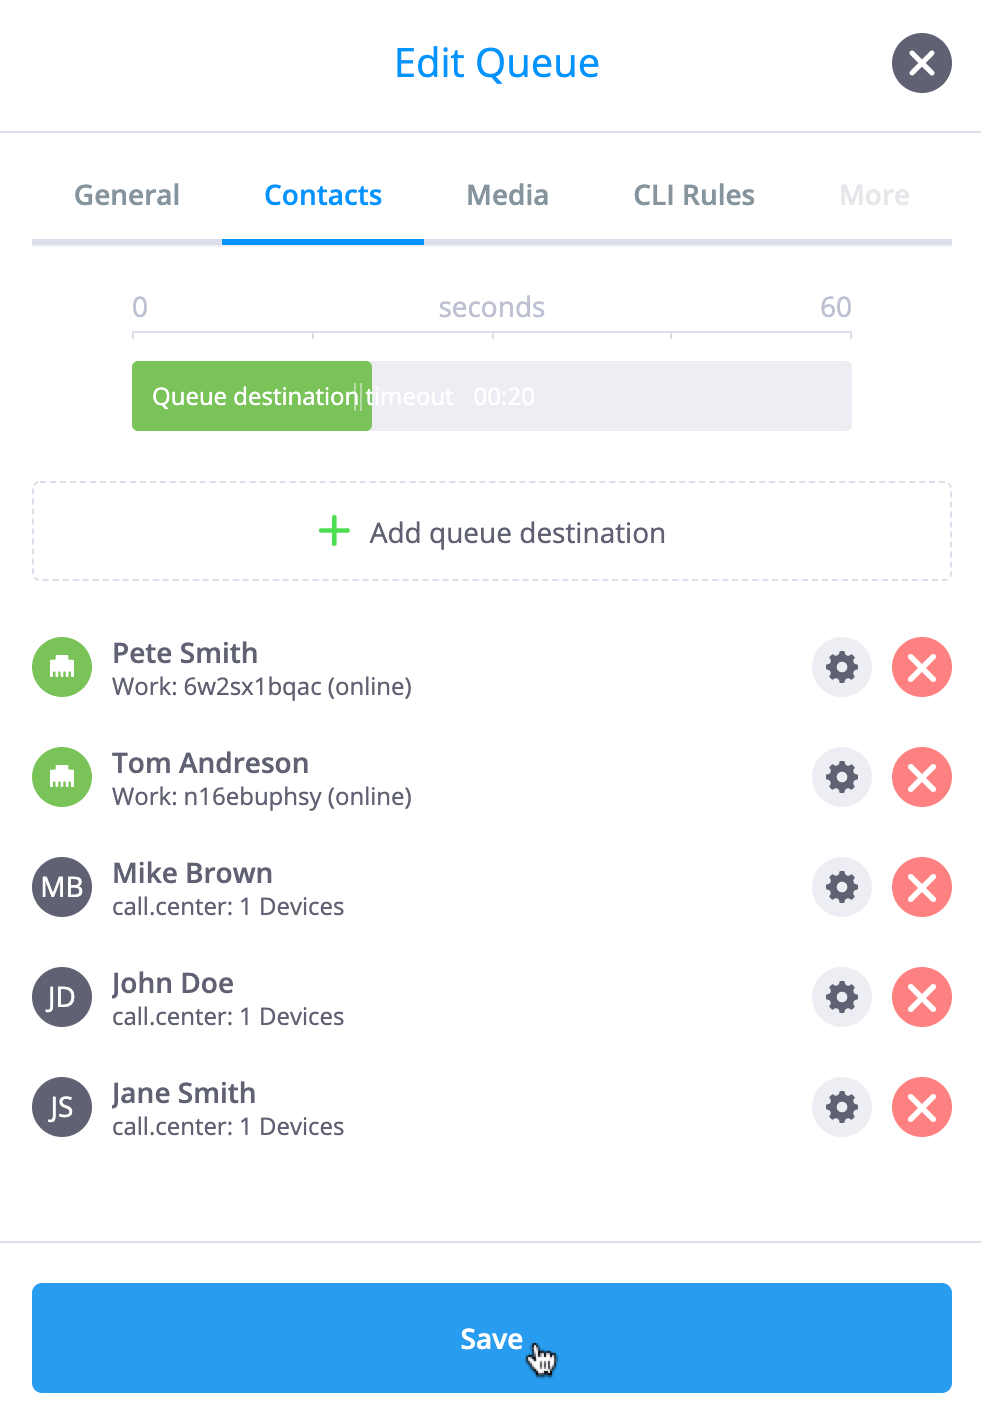
The Contacts tab is used to define the queue members or destinations. Each queue destination consists of a contact and an associated contact method, and these contacts may be directly configured from the Queue object or may be pre-configured by using the Contact Center. The section Contact Center provides full details on how to configure contacts and contact methods.
Selecting
 allows the user to add a queue destination from a drop-down menu of pre-configured contacts and
their associated contact methods. Alternatively, a new contact may be added by selecting
 .
.
Media Tab
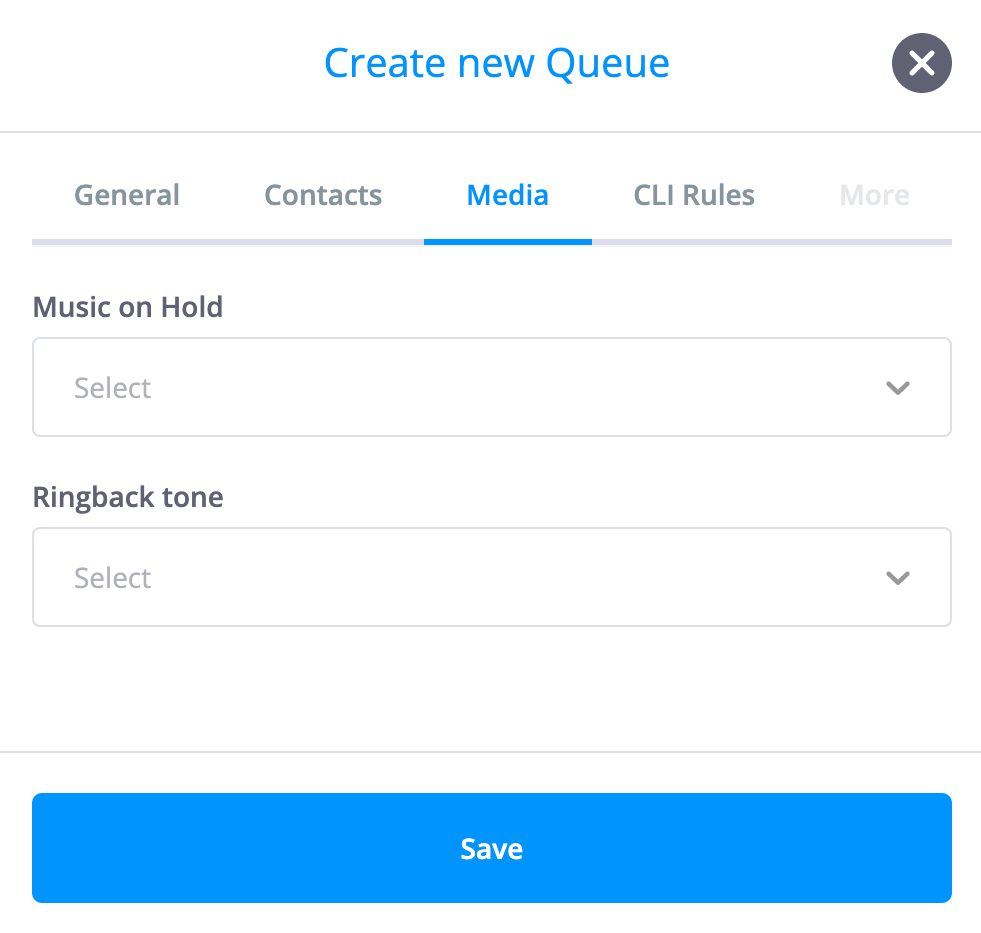
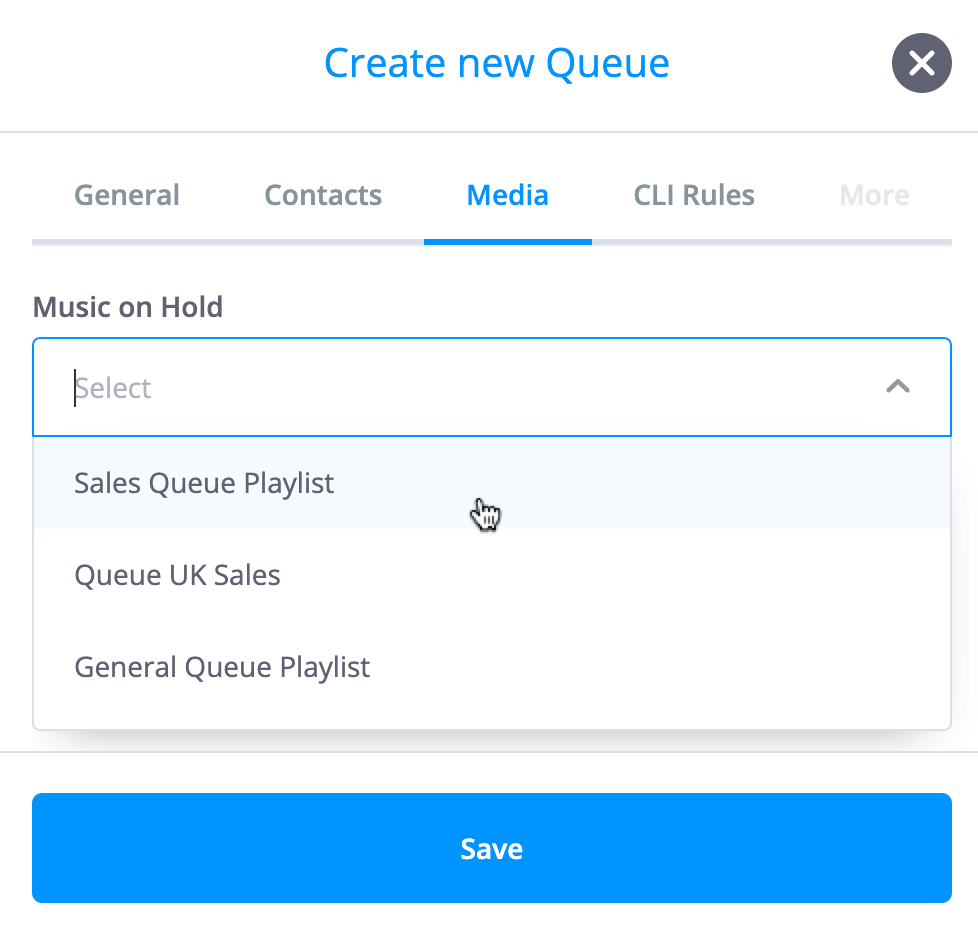
The Media tab is used to set both "music-on-hold" and "ringback tone" playlists. This allows pre-recorded music, messages, commercials or any other audio clips to be played to callers before their call is answered (ringback tone), or while an active call is put on hold (music-on-hold). The section Media Center provides full details on how to configure and manage media files. It should be noted that playlists must be pre-configured in the Media Center before adding objects to the workspace such as Queues, which may require these audio files.
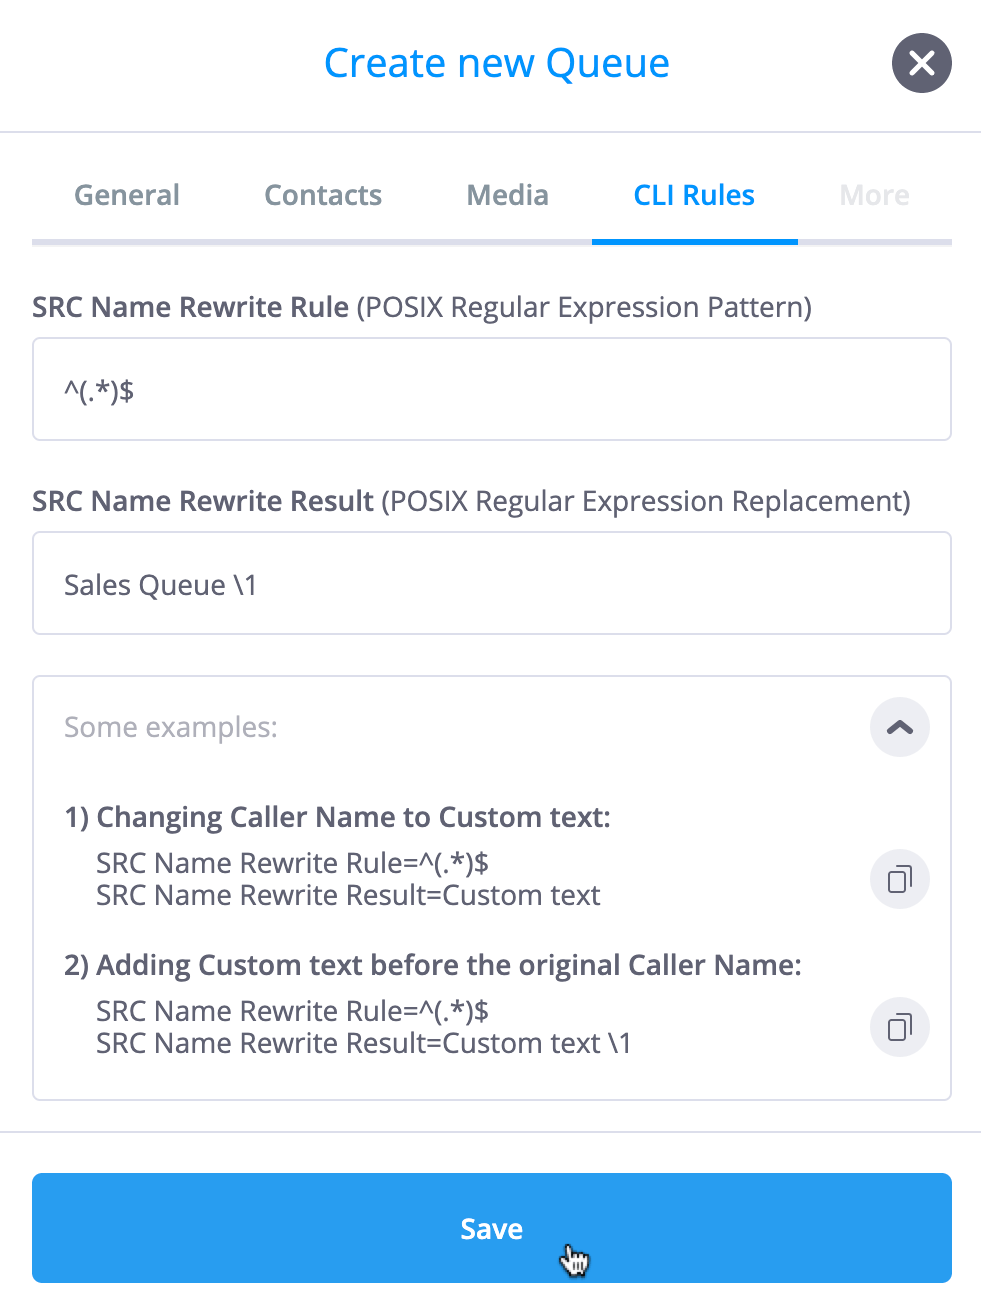
CLI Rules Tab
The CLI Rules tab is used to override the Source Caller Name. This functionality allows flexible Caller Name configurations and may be used to differentiate SIP calls received from phone.systems™. CLI Rules will help you to identify from which Queue object the call is coming from.
Note: By default, the CLI Rules feature is disabled.
 Back to the top
Adding Multiple Destinations
Selecting
 allows the user to add a multiple ring destination from a drop-down menu of pre-configured
contacts and their associated contact methods.
 Back to the top
Object: Time Router
The Time Router object allows incoming calls to be forwarded to different objects, depending on user-defined day and time intervals. .

This object includes flexible time intervals, and call routing is based on a simple “Yes/No” logic. The Time Router object must be connected to two child objects such as Ring Group or Voicemail objects to which calls are forwarded according to this “Yes/No” logic.
A cable originating from the green socket on the right-hand side of the Time Router object corresponds to the “Yes” option, defining the routing of calls that are received within the configured day/time interval. A cable originating from the red socket corresponds to the “No” option, defining the routing of calls that are received outside of the configured day/time interval.
In the figure below, if incoming calls are received within the configured day/time parameters, then those calls will be forwarded to the sales queue. Otherwise, the calls will be forwarded to the Voicemail object where a pre-recorded "after hours" message is played to the caller, and the caller may leave voicemail.

The information to be entered for this object is:
-
The name of the Time Router object.
-
The time zone that is applicable to the configured time routing intervals. Note that a “System” time zone option is available, designating the time zone for this Time Router object, to be the same as the time zone selected under General Settings.
-
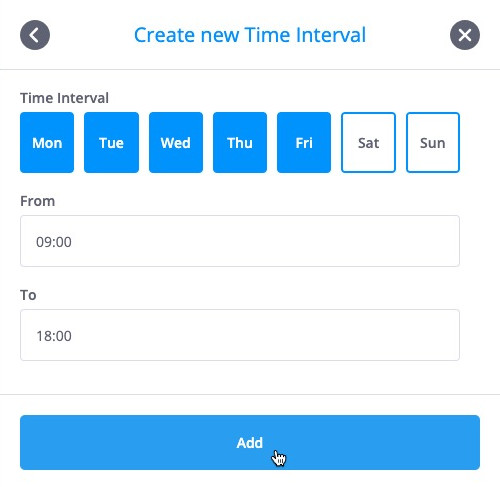
The time routing intervals. By selecting
 ,
day/time intervals are created, defining the days of the week and the start/stop times
for which incoming calls will be routed according to “Yes/No” logic. For each time interval,
the day/days of the week to be included in this rule must be selected by clicking on that
particular day, highlighting it in blue. Thereafter, "from" and "to" times must be configured
for this interval. Times may be configured by using the simple time-selection menu provided,
or may be entered manually in the form HH:MM using a 24-hour format.
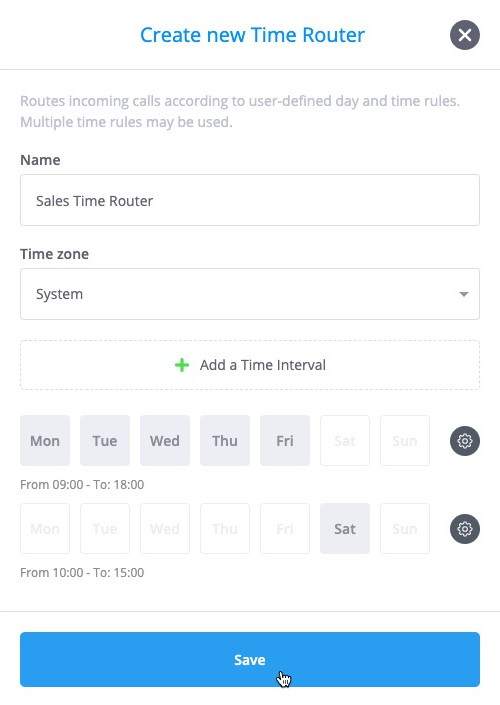
Each Time Router object may have multiple time intervals, allowing highly flexible options for forwarding calls. In the figure below, two separate time intervals have been configured, with incoming calls received from Monday to Friday from 08:00 to 17:00, as well as calls on Saturday from 09:00 to 13:00 being sent to the object connected to the cable labeled "Yes".
Object: Notification
The Notification object is used to provide alerts via email when a specified event occurs. For example, a notification may be issued when a caller joins a conference or when a queue timeout occur.

The information to be entered for this object is:
-
The name of the Notification object.
-
The delivery method for the notification message, with the only option being Email. If the required email address has not previously been configured by using the Delivery Methods option listed under the "Settings" menu, a delivery method may be added by selecting the
 option in the dropdown menu. See the section
Delivery Methods
for further details.
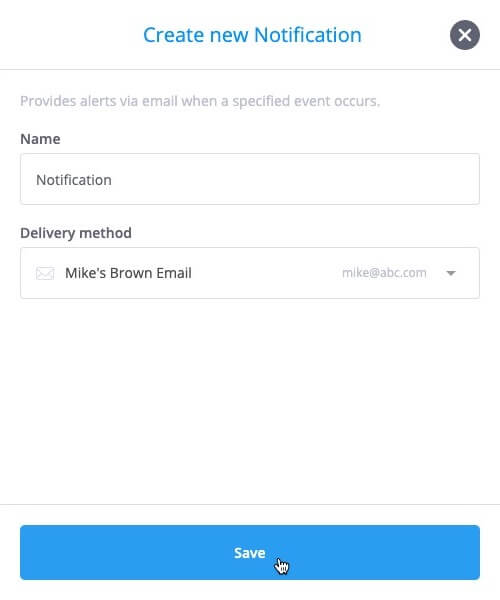
A simple usage example of the Notification object is shown below. Calls that are not answered by any of the members of the sales queue within the defined timeout period are passed to the Notification object, and a notification email is issued.
 Back to the top
Tabs and Multiple Pages
phone.systems™ allows users to segment voice systems into logical groups and functions that may be arranged over multiple workspace pages. This feature is very useful when building complex voice systems, such as a virtual PBX for a multi-branch business.
As detailed in the previous Workspace Tab Menu section, additional workspace pages may be added as required, and the various workspace pages are accessed via the tabs on the Workspace Tab menu.
This section serves to illustrate how to use multiple workspace pages in order to build advanced voice scenarios.
Back to the topMoving Objects between Workspace Pages
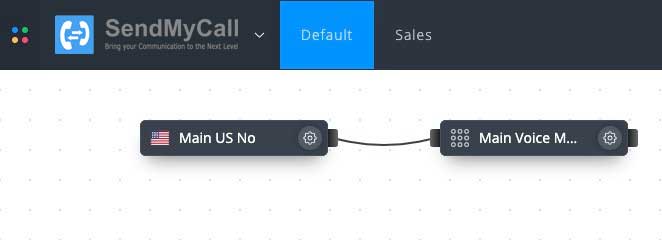
Objects may be moved between workspace pages. In the illustration below, two workspace pages are available: Default and Sales, with the Default workspace comprising a number of objects, including an object "Sales Voice Menu". Note that the name of the active workspace page (i.e., the page that is currently being displayed) is shown in blue.
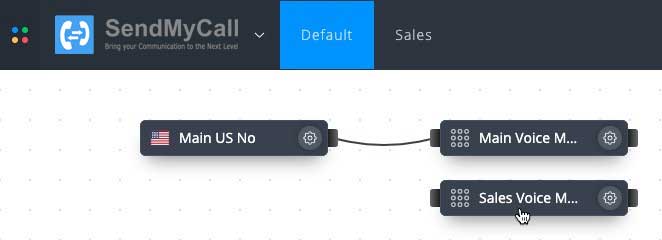
If it is required that the voice system logic for the sales division should be assembled on the Sales workspace page, then the "Sales Voice Menu" object should be moved to that page. To achieve this, "drag" the "Sales Voice Menu" object over the Sales workspace tab, until that tab is shown in blue to indicate that the Sales workspace is active. Do not release the object.
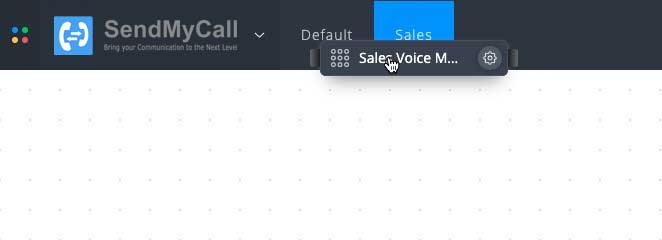
Continue "dragging" the "Sales Voice Menu" object downwards into the active Sales workspace, and release that object in the desired position on that workspace. Further assembly of the voice system logic for the sales division may now continue on this workspace.
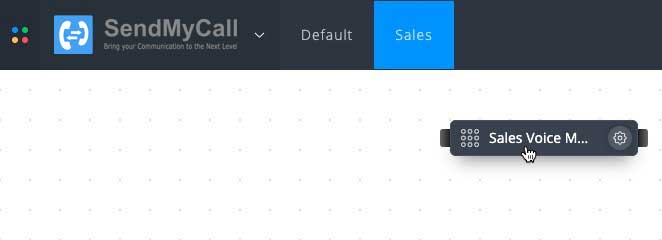
Note that re-selecting the Default workspace tab shows the objects remaining on this page. The "Sales Voice Menu" object is no longer present, as it has been moved to the Sales workspace page.
 Back to the top
Connecting Cables Between Objects on Different Workspace Pages
Partial voice scenarios assembled on different workspace pages must be interconnected in order to build complete voice systems. In the example above, calls must be passed from the "Main Voice Menu" on the Default workspace page to the "Sales Voice Menu" on the Sales workspace page.
To generate a cable between these two objects, "drag" a cable from the right-hand socket of the "Main Voice Menu" object, placing the mouse pointer over the Sales workspace tab, until that tab is shown in blue to indicate that the Sales workspace is active. Do not release the cable.
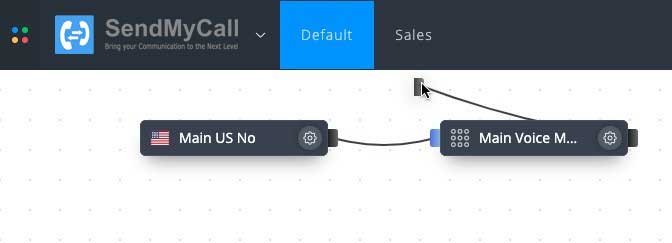
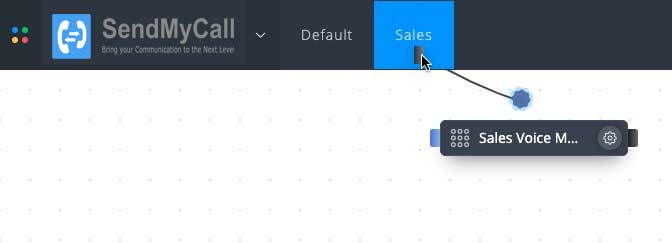
Continue "dragging" the cable downwards into the active Sales workspace, and position that cable over the left-hand socket of the "Sales Voice Menu" object. Release the cable.
The cable connection between the "Main Voice Menu" on the Default workspace page and the "Sales Voice Menu" on the Sales workspace page is now complete.
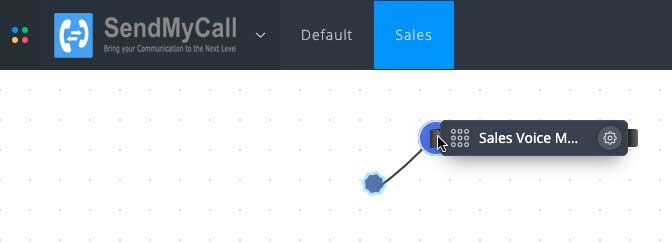
The logical connectivity between objects on different workspace pages is
represented by a cable terminating in a
![]() icon. By clicking on this
icon. By clicking on this
![]() icon, the alternate workspace page associated with this connection will be displayed.
icon, the alternate workspace page associated with this connection will be displayed.
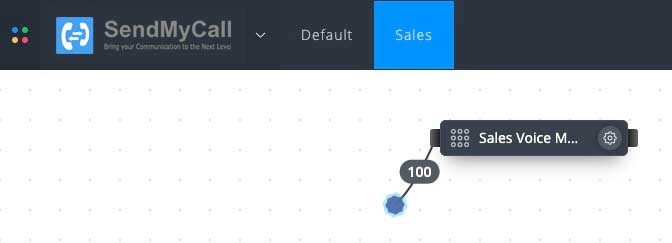

Note that the cable termination icon
![]() may be dragged and repositioned
independently on each individual workspace page, without affecting the
position of the logically connected termination icon on the other workspace
page.
may be dragged and repositioned
independently on each individual workspace page, without affecting the
position of the logically connected termination icon on the other workspace
page.
Important - if two objects on the same workspace page are connected, then
moving one of the objects to a different workspace page will not disconnect
the objects. Instead, these objects will remain connected, with the
![]() icon indicating the cable continuity over the different workspace pages.
icon indicating the cable continuity over the different workspace pages.
Usage Example - Multiple Workspace Pages
In the PBX configuration below, the main voice menu directs incoming calls to either a sales or support departmental voice menu, and then these calls are further distributed to members within each department.

This PBX configuration may be logically divided into three separate functional groups:
-
The main PBX logic consisting of the incoming phone numbers and the main voice menu.
-
The PBX logic for the sales division (starting with the sales Voice Menu object).
-
The PBX logic for the support division (starting with the support Voice Menu object).
In order to segment this voice scenario, additional workspace pages must be added and workspace tabs are labeled Main, Sales and Support.
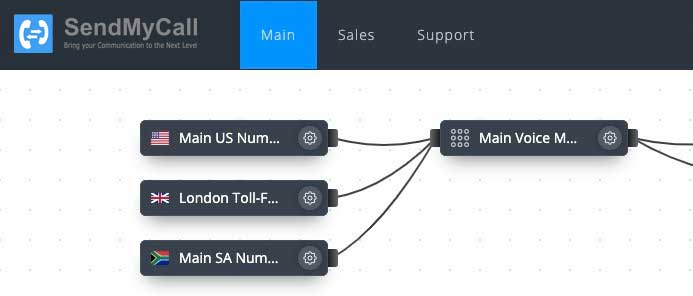
In order to logically segment this voice system, objects on the Main workspace page may now be moved to other workspace pages as detailed in the section Moving Objects between Workspace Pages above.
IMPORTANT: Instead of assembling the complete voice system on a single workspace page and then moving objects to other pages, it is easier and more practical to first create the required workspace pages and assemble the voice "sub-systems" on each of those pages. Once this has been done, then the partial voice scenarios on different workspace pages may be interconnected as described in the section Connecting Cables Between Objects on Different Workspace Pages.
Referring to the voice scenario described above, the logical segmentation results in three separate workspaces pages as follows:
-
The Main workspace

-
The Sales workspace

-
The Support workspace

Phone Numbers
Phone numbers that are to be used by phone.systems™ are managed by accessing the
 option from the "Settings" menu
![]() .
.
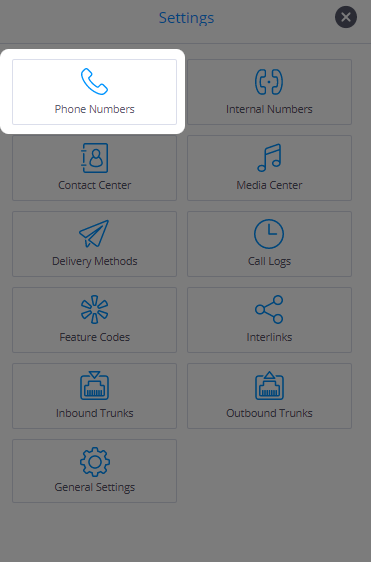
These phone numbers are used for:
-
Configuring Phone Number objects, being the phone number to be dialed for inbound calling.
-
Selecting the caller ID to be displayed when making outbound calls from VoIP devices.
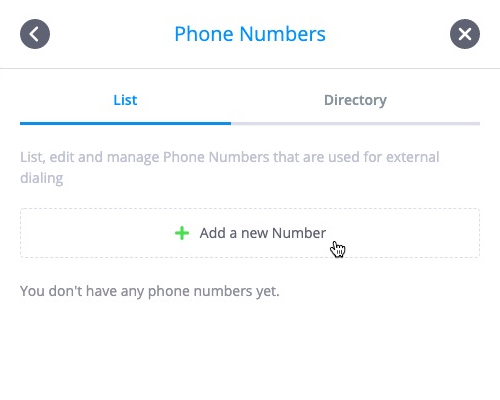
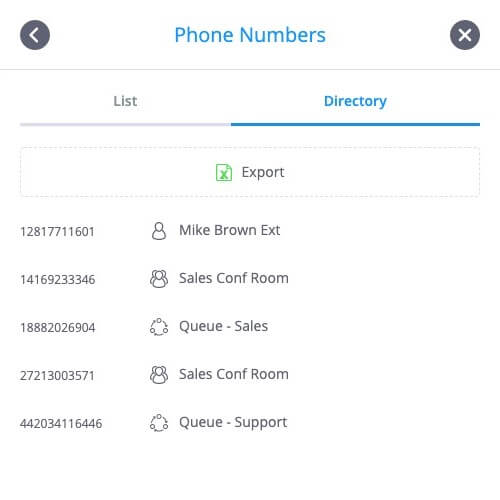
The Phone Numbers window includes two tabs; a "List" tab for managing the Phone Numbers, and a "Directory" tab for displaying the mapping between the configured numbers and objects on the workspace, with an option to export that directory.
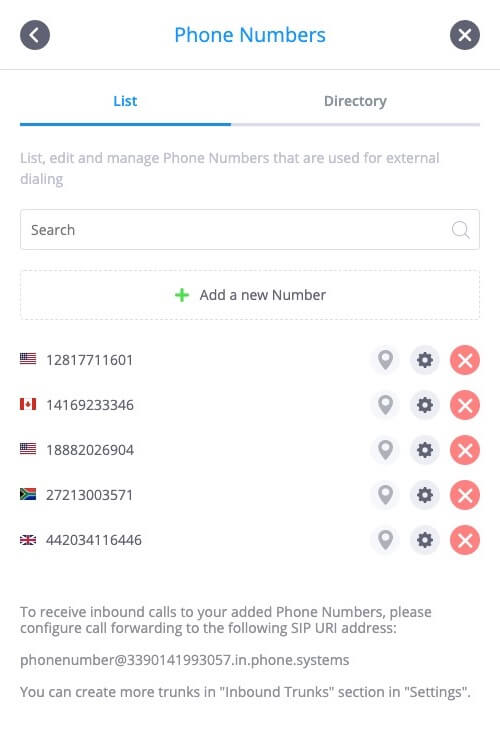
When the "List" tab is selected, new phone numbers may be added by clicking on
the
 option, with numbers being entered in E.164 format:
<CountryCode> <City/AreaCode> <LocalNumber>
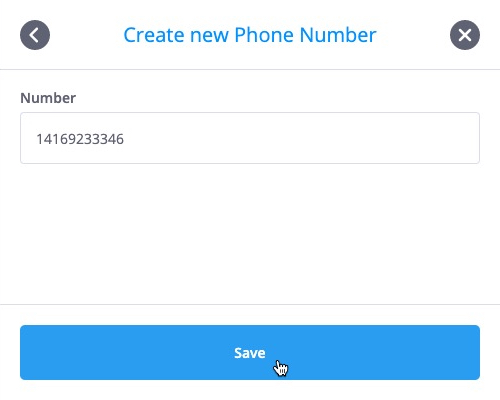
The country code is 1-3 digits long, while the length of the city/area code and local number may vary. Some examples of phone numbers in E.164 are 14169233346 for Toronto, Canada and 442034116446 for London, United Kingdom.
These configured numbers may be allocated to Phone Number objects as and when those objects are added to the phone.systems™ workspace.
To change a Phone Number, the
![]() icon should be selected. Clicking on the
icon should be selected. Clicking on the
![]() icon closes the Phone Numbers window, and the object associated with that number
oscillates for a short duration on the workspace, making it easily
identifiable.
icon closes the Phone Numbers window, and the object associated with that number
oscillates for a short duration on the workspace, making it easily
identifiable.
Phone numbers that are no longer required may be deleted by clicking on the
![]() icon to the right of the number. Note that numbers currently in use by the PBX
logic and allocated to Phone Number objects may not be deleted.
icon to the right of the number. Note that numbers currently in use by the PBX
logic and allocated to Phone Number objects may not be deleted.
Selecting the "Directory" tab displays a list of numbers allocated to configured Phone Number objects,
together with the name of the objects on the workspace to which those Phone Number objects have been
logically connected. This directory may be optionally exported in
.csv format by clicking on the
 button.
 Back to the top
Internal Numbers
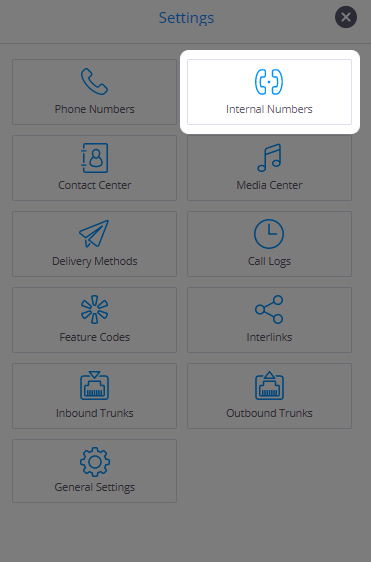
Internal numbers that are to be used by phone.systems™ are managed by
accessing the
 option from the "Settings" menu
![]() .
.
The Internal Numbers window includes two tabs; a "List" tab for managing the Internal Numbers, and a "Directory" tab for displaying the mapping between the configured numbers and objects on the workspace, with an option to export that directory.
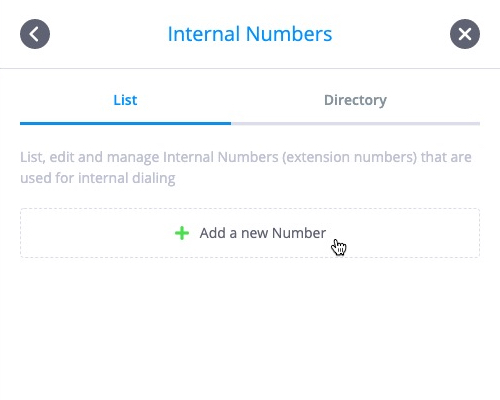
When the "List" tab is selected, new Internal Numbers are added by clicking on
the
 option, with numbers being from 1 to 4 digits in length.
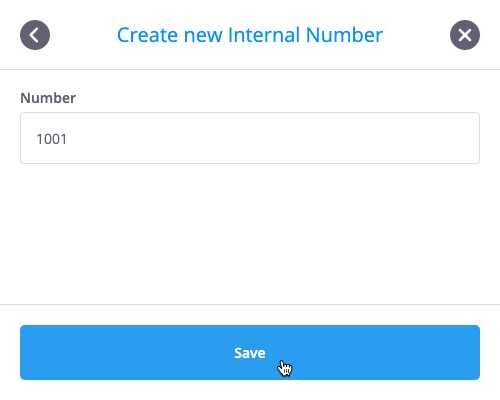
These numbers may be allocated to Internal Number objects as and when those objects are added to the phone.systems™ workspace.
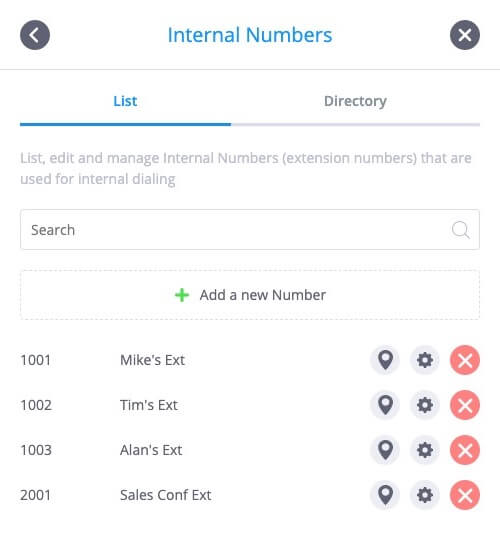
To change an
Internal Number, the
![]() icon should be selected. Clicking on the
icon should be selected. Clicking on the
![]() icon closes the Internal Numbers window, and the object associated with that
number oscillates for a short duration on the workspace, making it easily
identifiable.
icon closes the Internal Numbers window, and the object associated with that
number oscillates for a short duration on the workspace, making it easily
identifiable.
Internal numbers that are no longer required may be deleted by clicking on the
![]() icon to the right of the number. Note that numbers currently in use by the PBX
logic and allocated to Internal Number objects may not be deleted.
icon to the right of the number. Note that numbers currently in use by the PBX
logic and allocated to Internal Number objects may not be deleted.
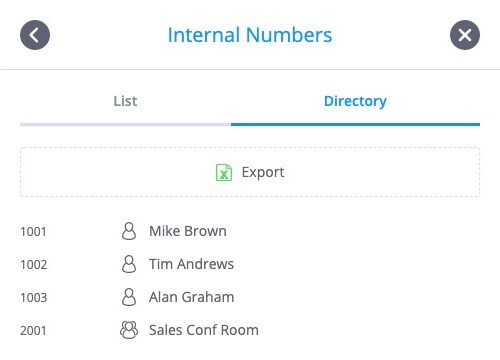
Selecting the "Directory" tab displays a list of numbers allocated to Internal Number objects, together with the name of the objects on the workspace to which the Internal Numbers objects have been logically connected. Additionally “Directory” may be used to display those Internal Numbers, which are accessible through Interlink connections.
This directory may be optionally exported in .csv format by clicking on the
 button.
 Back to the top
Contact Center
The Contact Center manages the contacts and contact methods used by phone.systems™. Specifically, the entries in the Contact Center serve to list the destinations (such as people and departments) to which incoming calls are redirected, and also the methods (such as landline, mobile phones or SIP Accounts) by which these destinations are contacted.
The Contact Center is accessed by clicking on the
![]() button in the upper right-hand corner of the workspace. This opens the
Settings menu, which includes the
button in the upper right-hand corner of the workspace. This opens the
Settings menu, which includes the
 option.
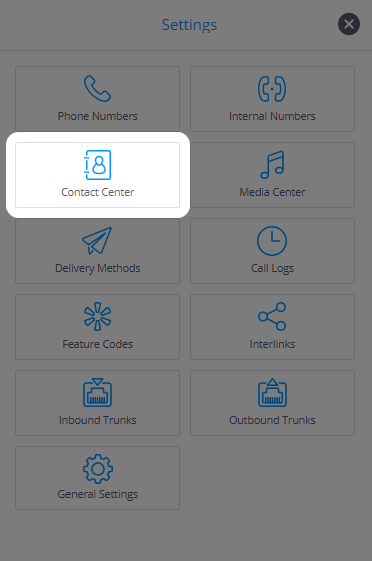
It should be noted that contacts and contact methods may be pre-configured in the Contact Center before adding objects such as Ring Groups (which require these contacts for call forwarding) to the workspace. However, the Contact Center is made available to users during object configuration, and contacts/contact methods may be added and edited at that time.
There are two components for each contact:
-
The actual contact, such as a person or a department of an enterprise. The contact is identified by a first and last name.
-
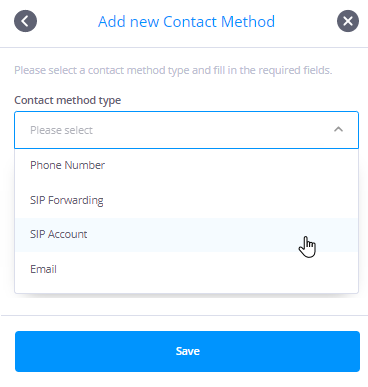
The contact method/s associated with the contact. Multiple contact methods may be allocated to each contact, and the options are:
-
Phone Number - Lists the PSTN phone number (landline or mobile) to which inbound calls may be forwarded.
-
SIP Forwarding - Allows the forwarding of calls to a SIP network, such as that of an ITSP.
-
SIP Account - Enables the use of a VoIP compatible end-device, such as a softphone. SIP credentials such as username, password and domain are provided by phone.systems™ for configuration of the SIP device. The SIP Account contact method supports internal dialing and outbound calling, as well as optional call recording.
-
Email - Used by objects such as Voicemail to specify the email address to which files containing voice messages must be sent.
-
-
Each contact method includes a Label (for example, Work, Home, Office, Mobile) that serves to identify the contact method, as well as the required configuration details for that particular contact method.
A typical list of contacts is shown below, together with the number of
contact methods configured for each contact. Each configured contact and
their contact methods may be edited by clicking on the
![]() icon next to that contact, and new contacts may be added by selecting the
icon next to that contact, and new contacts may be added by selecting the
 option.
 Back to the top
Creating a new contact
Selecting the option
 within the Contact Center window opens a form for creating a new contact. There is an
option to include this Contact in the company directory (Show in Company Directory) which
is enabled by default. The first and last names for the contact must be entered, and optional
details for the fields Company, Job Title and Contact Numbers may be entered. It is
not required to create a dedicated Sip-Account for each call.center device, as this can be
replaced by the automatically created call.center contact method. However, if needed, additional
SIP-Accounts may be added to each call.center device. Contacts that have the company directory
feature enabled will be provisioned to the call.center application and are updated/synchronised
automatically. The call.center contact method may be used with Ring Groups and
Queues
directly.
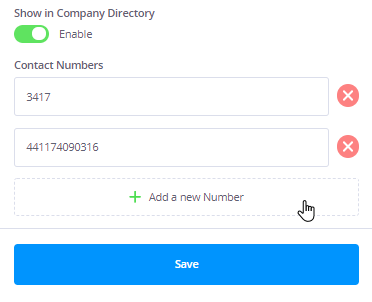
Note: Contact numbers will be used when calling the contact from call.center’s company directory.
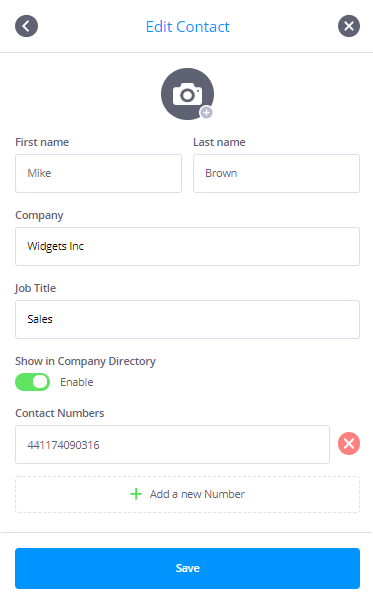
By selecting the
 option, you can enter an internal number or phone number (landline or mobile) for the contact.
Phone numbers are in E.164 format:
<CountryCode> <City/AreaCode> <LocalNumber>
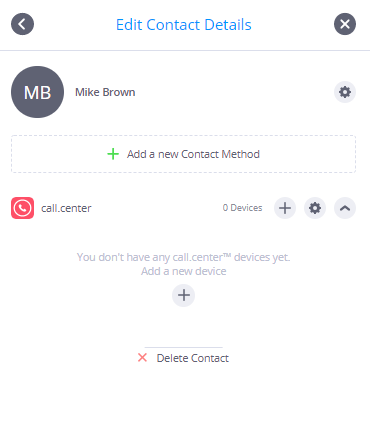
After a new contact has been added, an avatar may be selected for that contact.
Note: A default avatar based on the contact’s name and surname will be automatically allocated to the contact.

To change the avatar, click on the
![]() button to open up the settings window for the selected contact. Click on the
button to open up the settings window for the selected contact. Click on the
![]() icon at the top of the window to open up the native file explorer, and select the image you would
like to use as the avatar for the contact.
icon at the top of the window to open up the native file explorer, and select the image you would
like to use as the avatar for the contact.
After the picture has been selected, an avatar editor window will open for the optional resizing and cropping of the image. Click on the Save button once the editing has been completed.
Avatars that are added in phone.systems™ will also appear in the call.center™ management portal and the end-user’s call.center™ softphone applications.
Back to the topSetting up a contact using a Wizard
The contact Setup Wizard will guide users through the main steps in configuring a Contact for internal and external calls, and automatically preconfigure numbers, and call.center™ contact method with a device. The required objects will also be created on the phone.systems™ workspace.
Important - The phone number and internal number listed are selected from those previously configured in phone.systems™.
To use this feature, enable Setup using Wizard and click Save.
Note: By default, the Setup using Wizard feature is disabled.
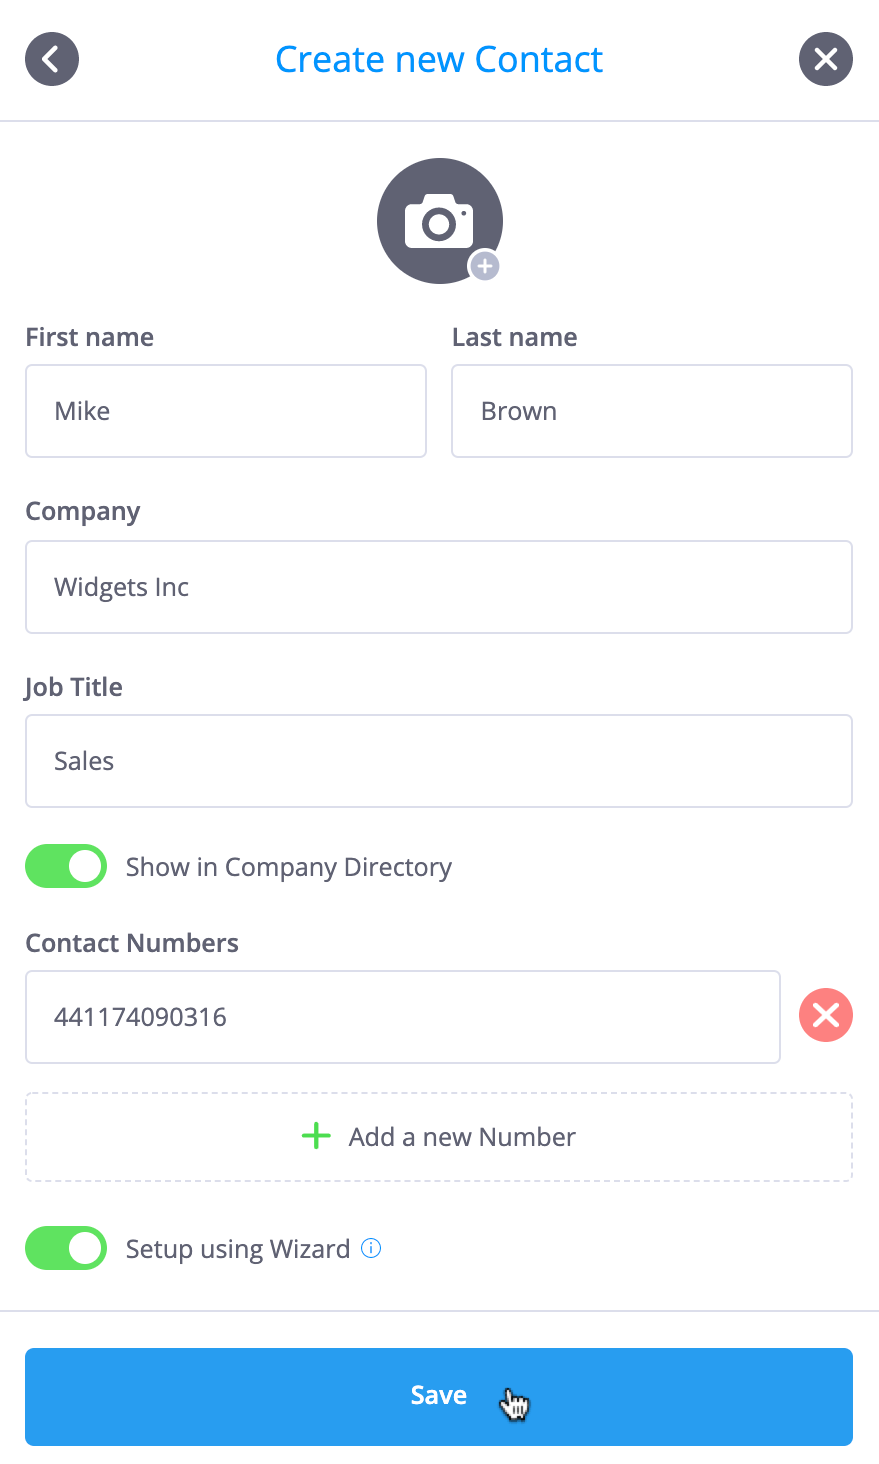
To Setup a contact using the Wizard, specify the required parameters:
-
Select the Internal Number (optional) from the drop down menu and click Next
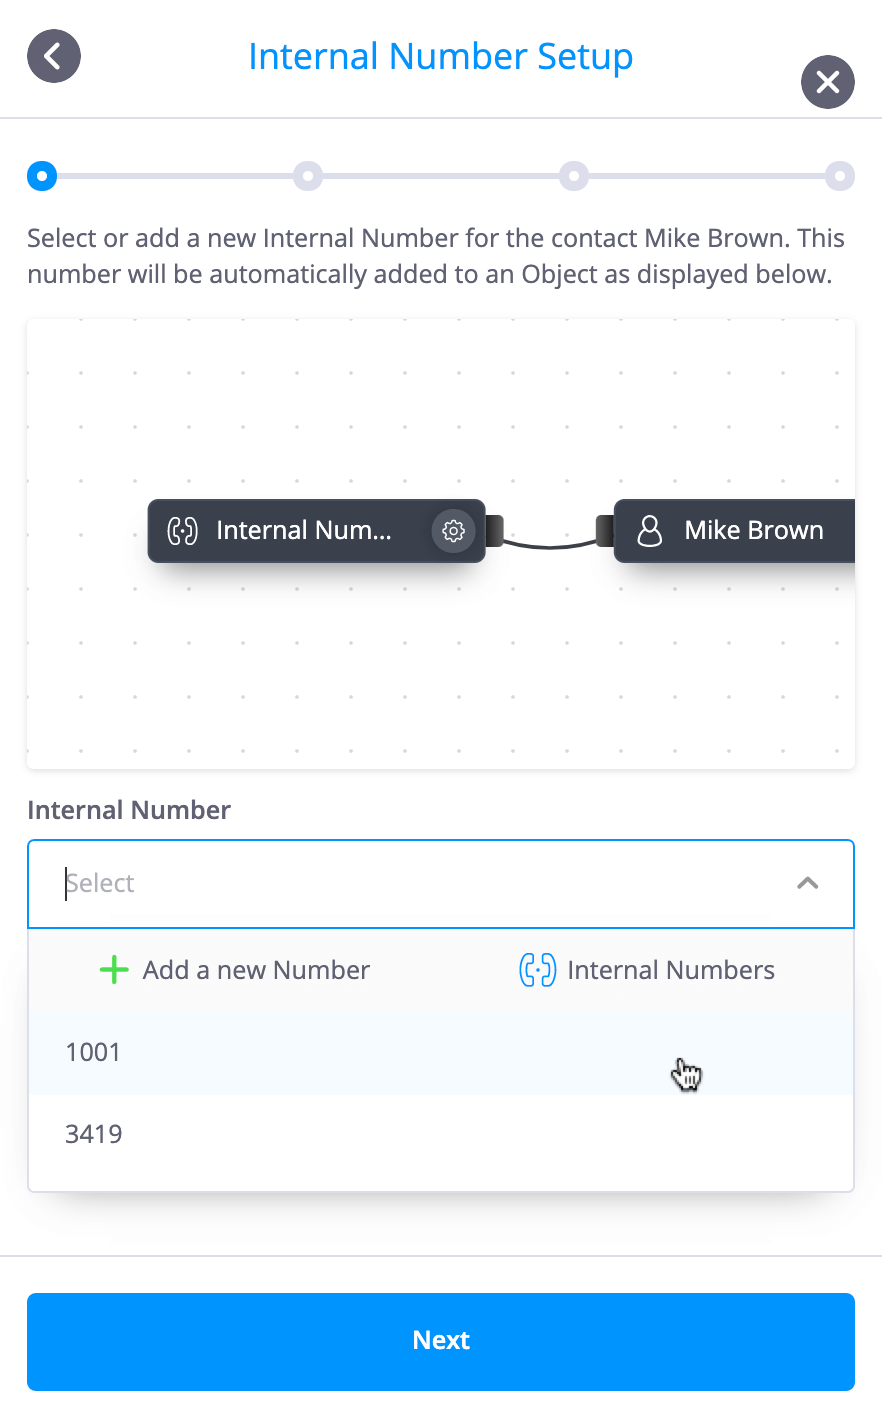
If an internal number is required but has not yet been configured, click
 to add a new Internal Number for the contact.
Note: The Internal number will be reachable internally and will be used as the main contact number within the Company Directory.
-
Select the Phone Number from drop down menu and click Next
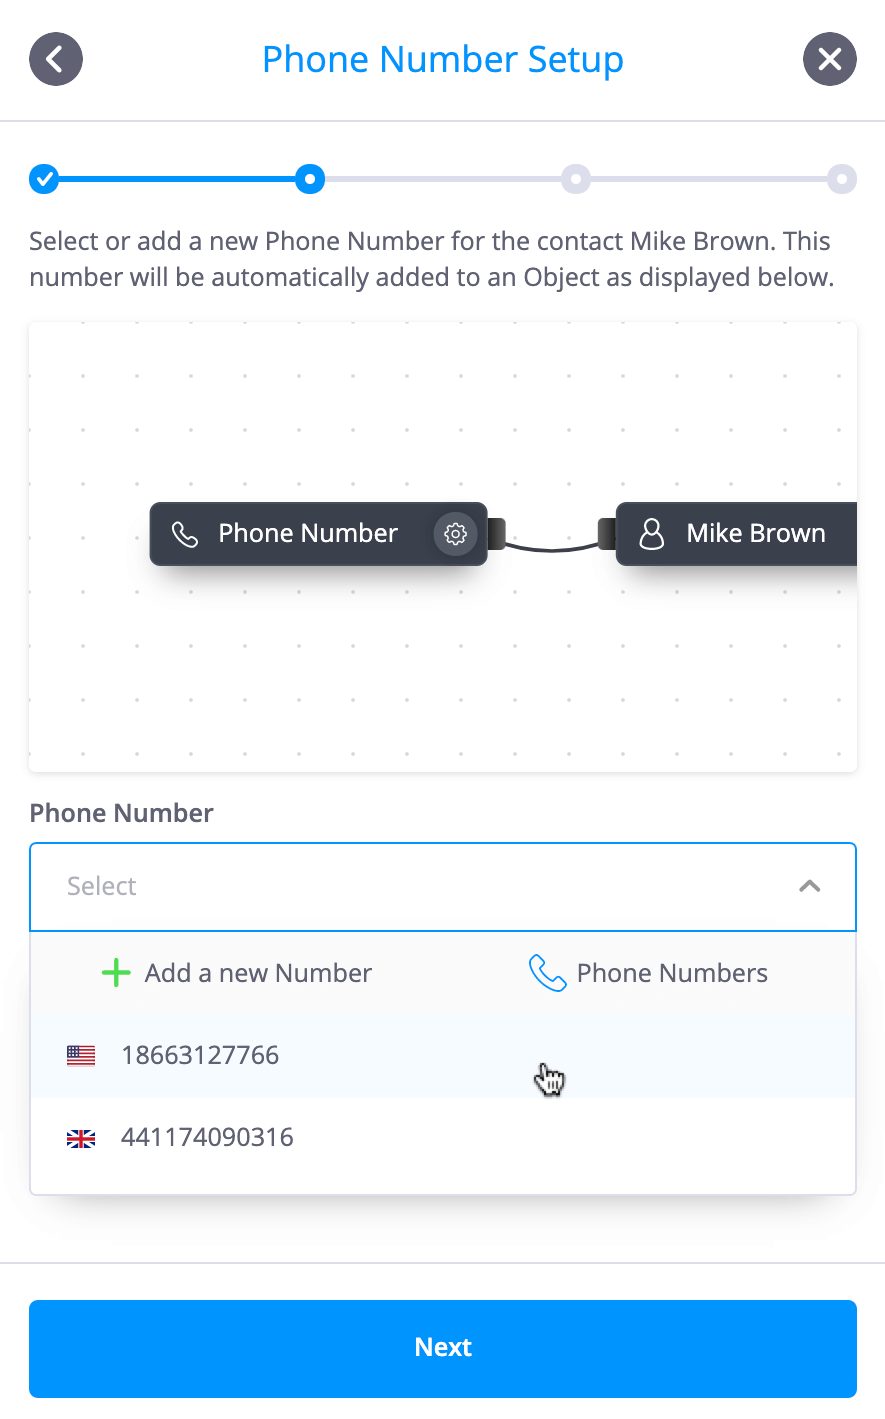
If the phone number has not yet been added, click
 to add a new Phone Number for the contact.
Note: The Phone Number will be used for external inbound calls, will be visible in the Company Directory, and will be used as an optional external caller ID for outbound calls.
-
Select the workspace tab from the drop down menu that will be populated with the objects referred to in the previous steps, and click Next.
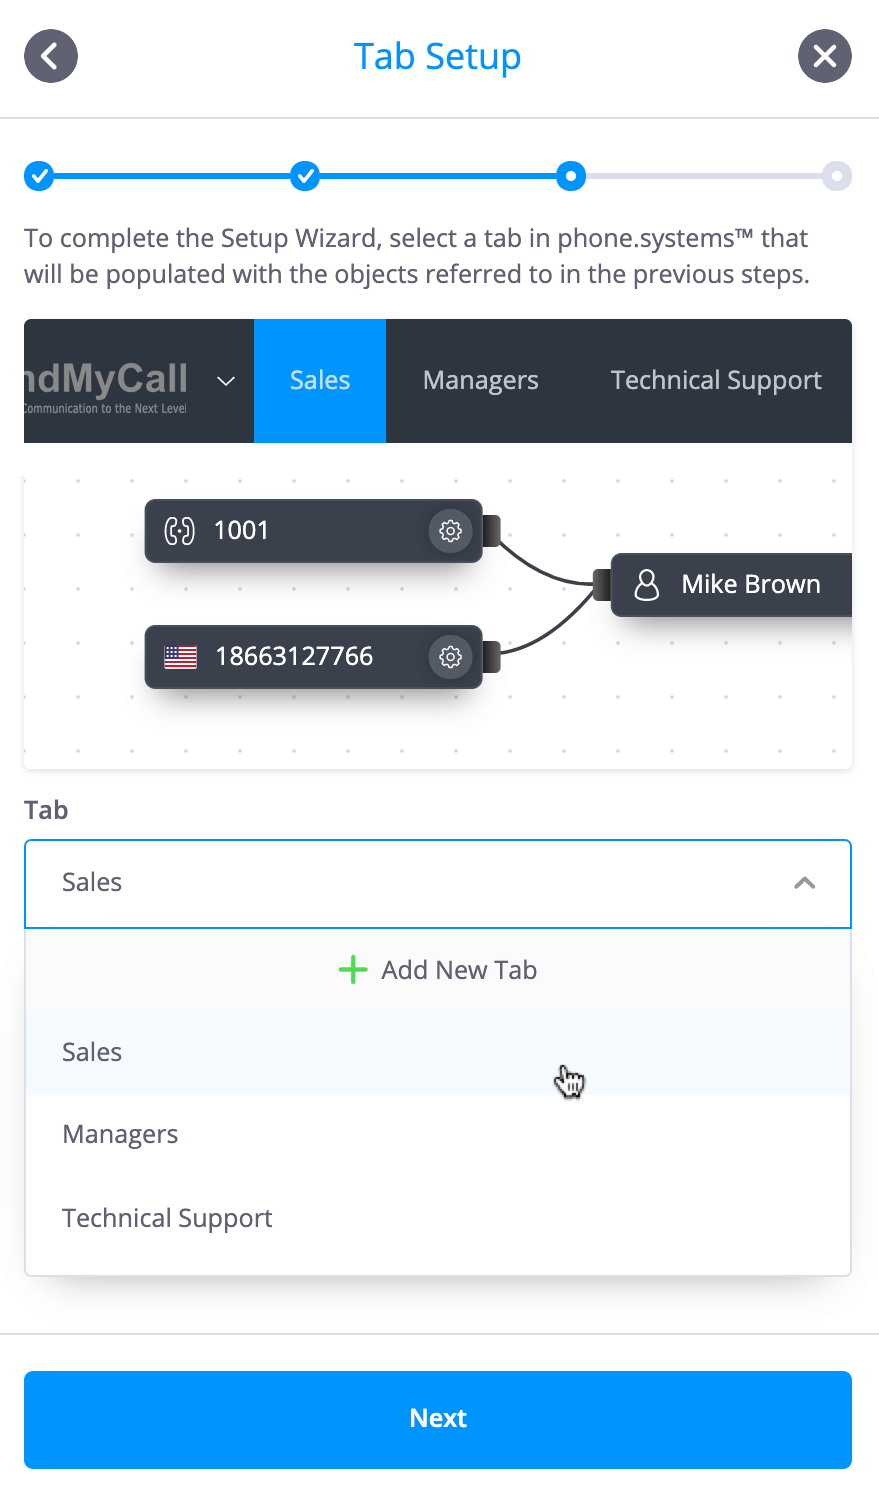
If there is only one workspace tab and an additional tab is required, click
 to add a tab for the additional objects.
-
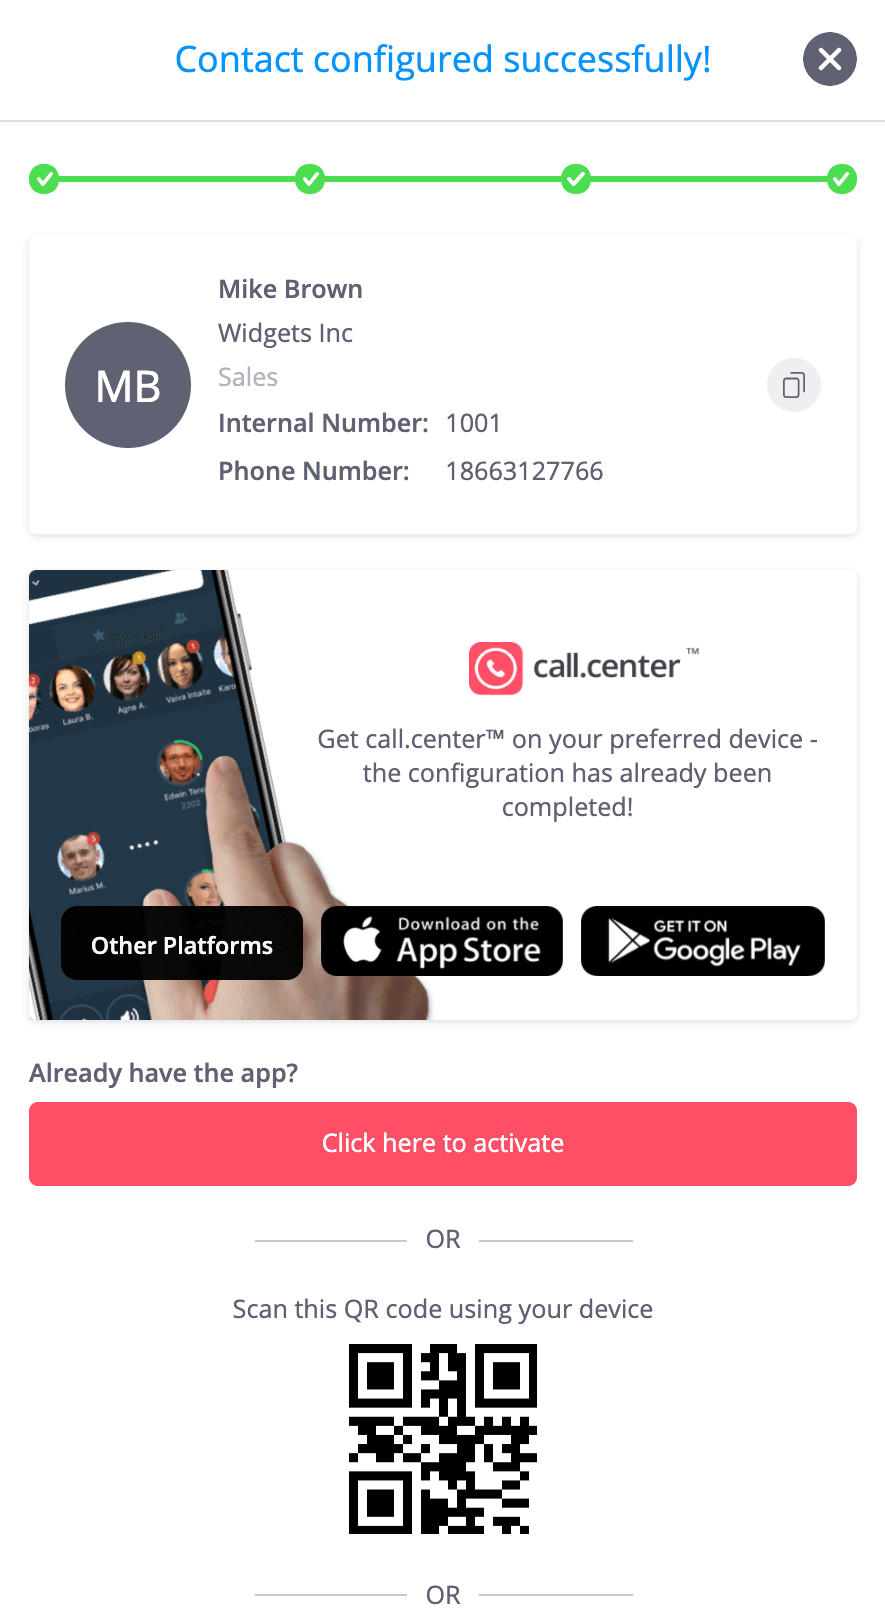
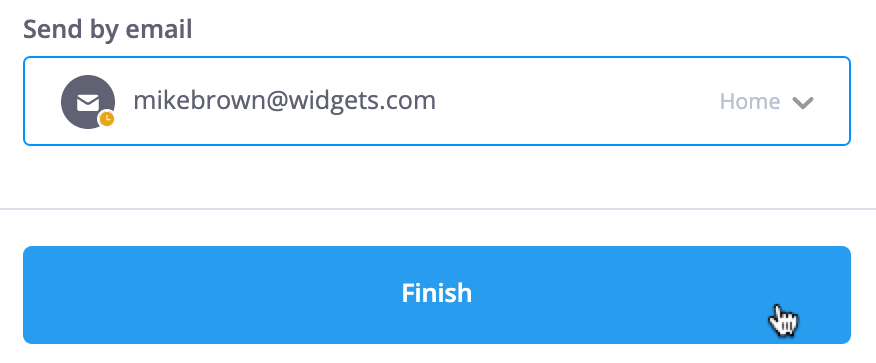
After the Contact Setup has been completed, the call.center™ device preconfigured with previously selected numbers may be activated. This may be achieved by selecting
 or by sending the activation instructions to the user via email.
Adding a new contact method
Selecting the option
 within the contact window opens a menu for adding a new contact method. Once the required
contact method has been selected from the drop-down list, configuration details for that
particular contact method must be entered.
The configuration details for each of the contact methods are as follows:
Back to the topContact method: Phone Number
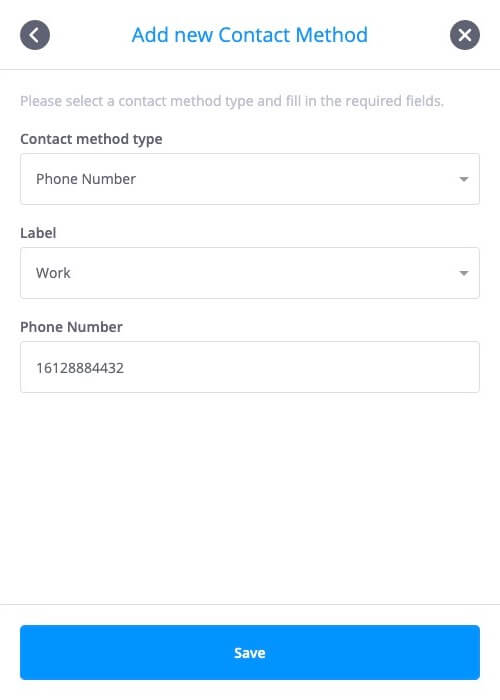
The information to be entered is:
-
A label (or identifier) for this Phone Number contact method, for example, "Work". An existing label may be chosen, or a new label may be defined by selecting
 .
.
-
The actual phone number (landline or mobile) to which incoming calls should be forwarded, in E.164 format:
<CountryCode> <City/AreaCode> <LocalNumber>
The country code is 1-3 digits long, while the length of the city/area code and local number may vary. Some examples of phone numbers in E.164 are 16128884432 for Minneapolis, US.
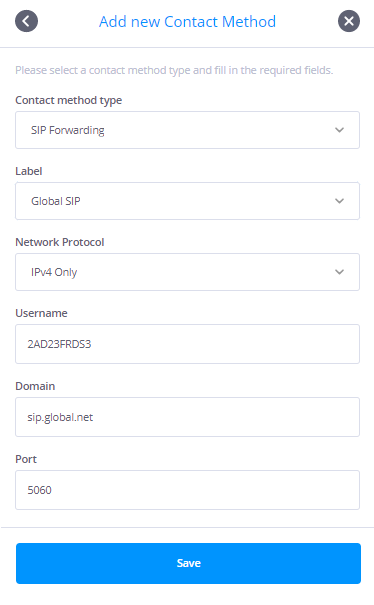
Contact method: SIP Forwarding
The information to be entered is:
-
A label (or identifier) for this SIP Forwarding contact method, for example, "Global SIP". An existing label may be chosen, or a new label may be defined by selecting
 .
.
-
The username, domain and port number for the SIP service, obtained from the service provider or system administrator.
Contact method: SIP Account
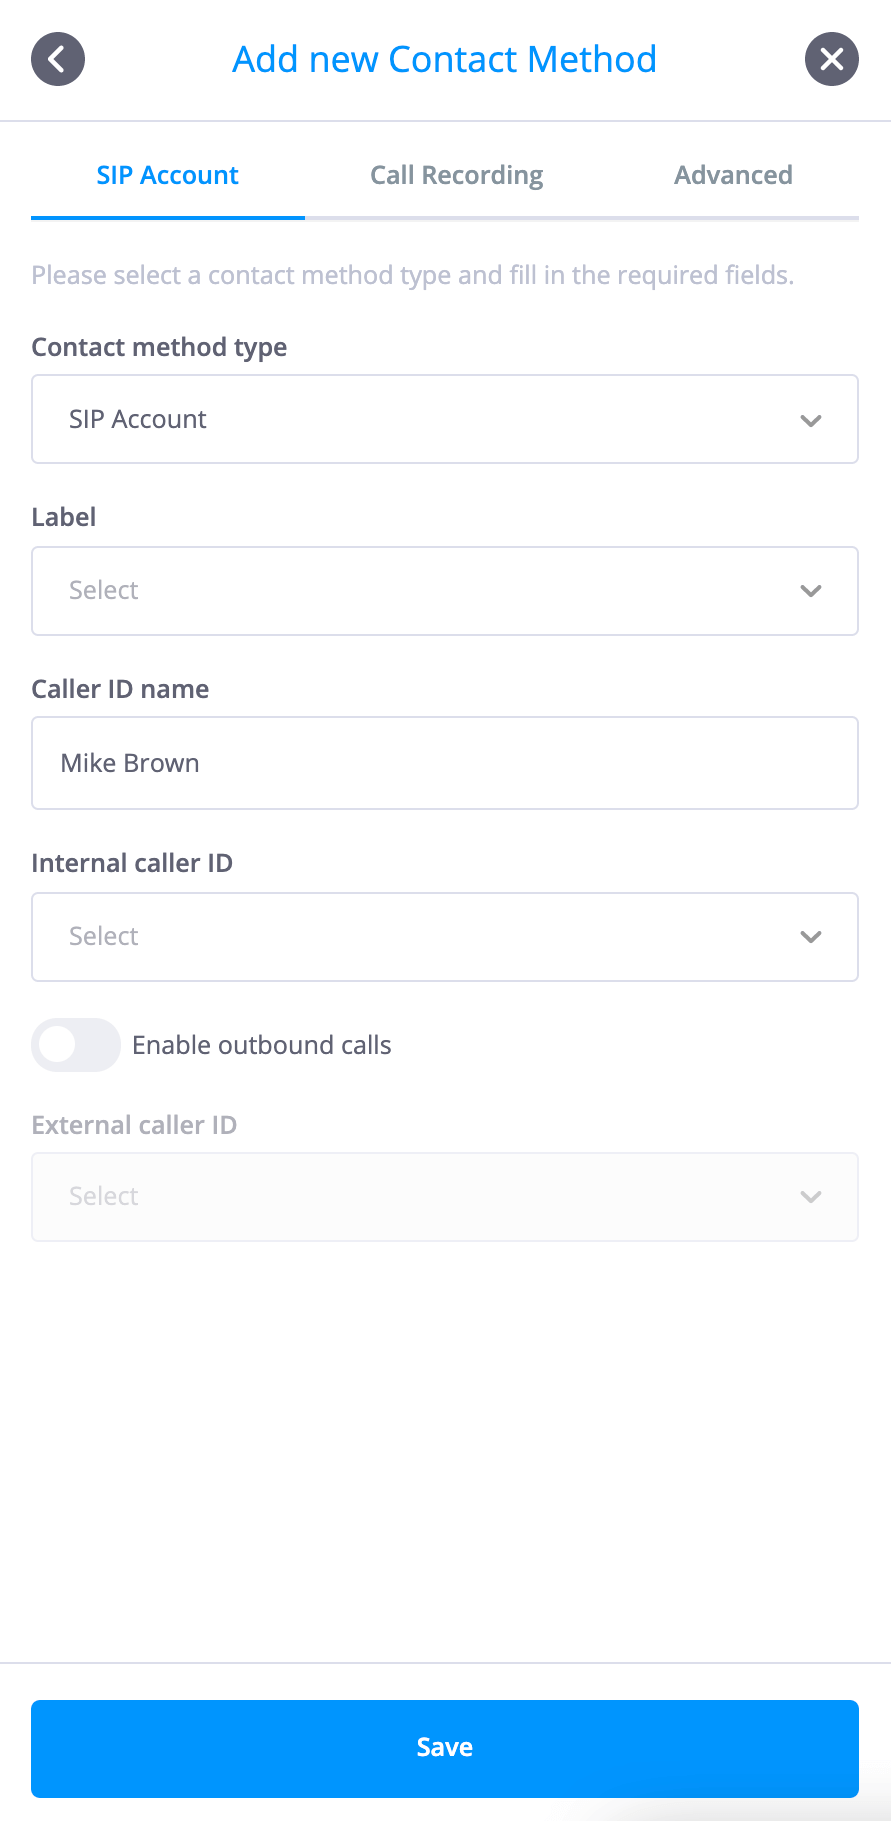
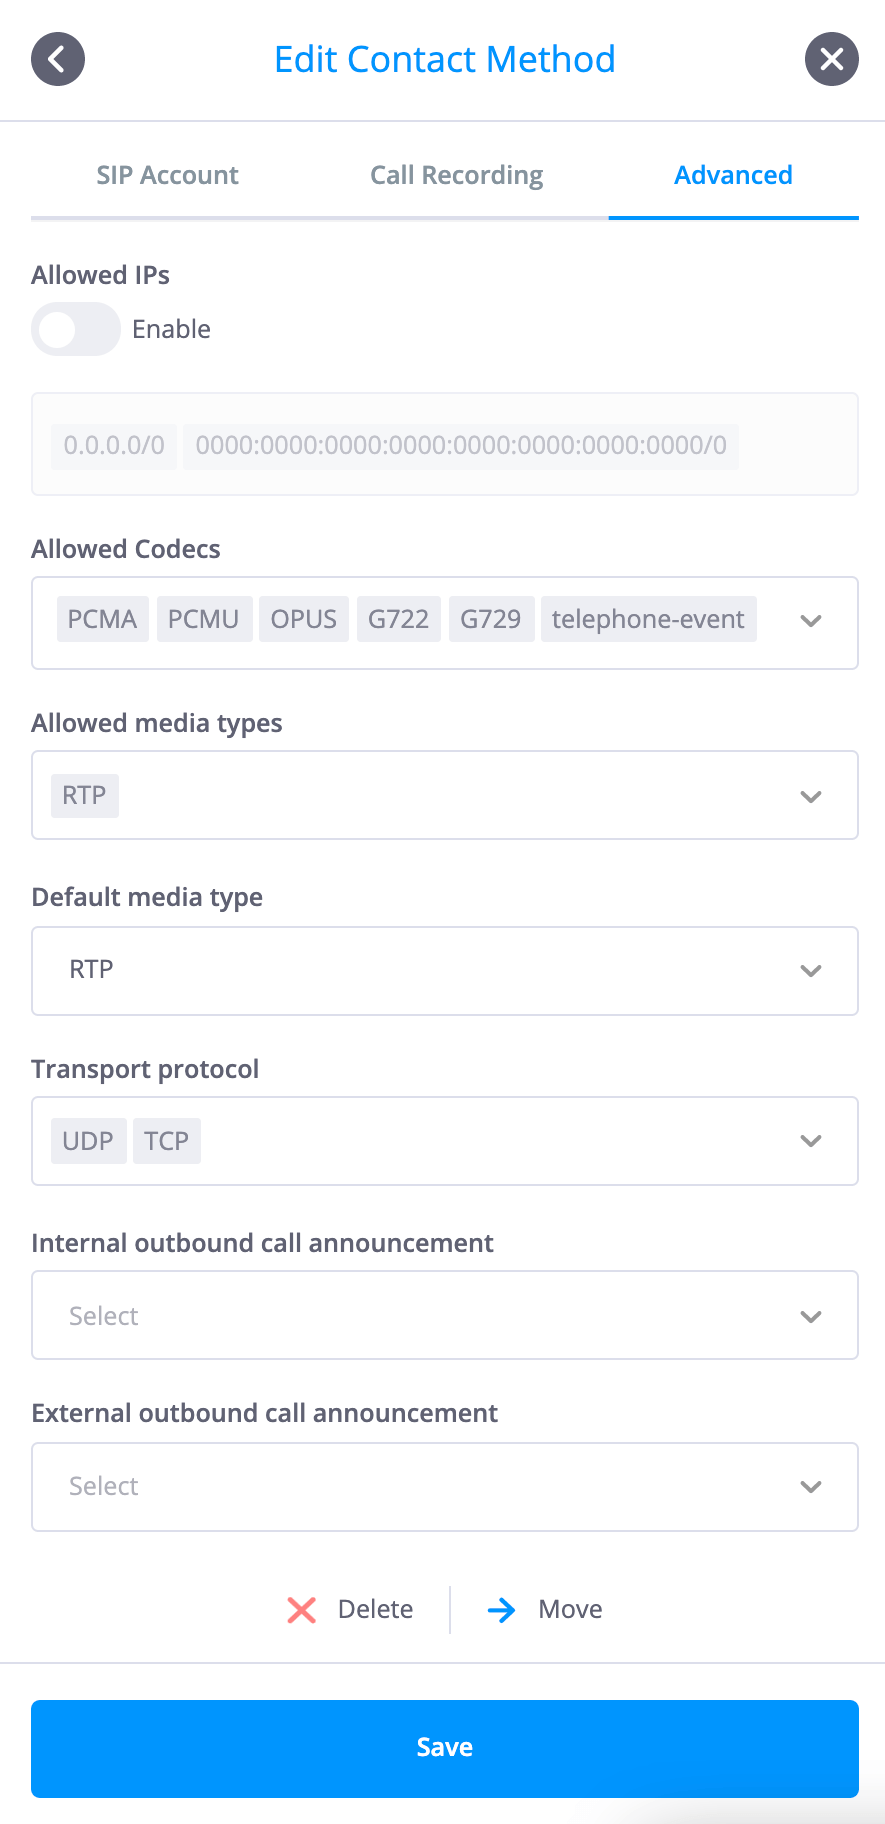
There are three tabs in the SIP Account configuration window, one for configuring the actual SIP Account parameters, another to optionally enable call recording, and the third to select outbound call announcements and advanced settings for this SIP Account.
SIP-Account Tab
-
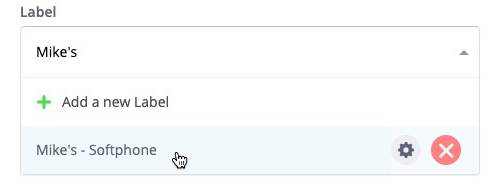
A label (or identifier) for this SIP Account contact method, for example, "Mike’s-Softphone". An existing label may be chosen, or a new label may be defined by selecting
 .
.
-
The caller ID name, which will be displayed on end devices that support this feature. By default, this name is the same as the actual contact name to which this contact method is attributed.

-
An optional Internal caller ID number may be selected from the dropdown menu of the extensions configured for Internal Number objects that are currently on the workspace. This number will be displayed as the Caller ID when making outbound calls to other extensions within the phone.systems™ network.
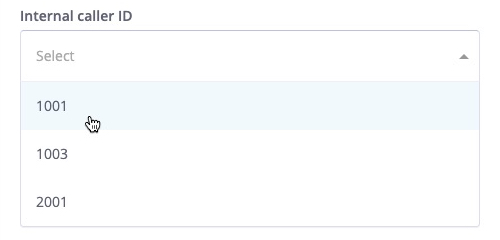
Note: The dropdown list of internal numbers that is displayed consists of numbers (or extensions) allocated to configured Internal Number objects. Therefore it is recommended that Internal Number objects be configured and placed on the workspace prior to adding SIP Account contact methods.
-
An option to enable outbound calling from this SIP device. By default, outbound calling is disabled.
-
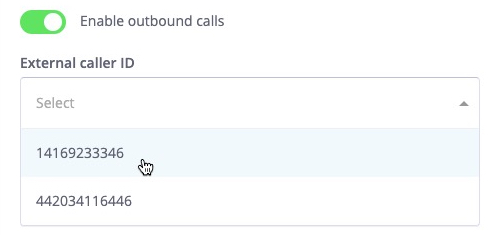
If outbound calling is enabled, an external caller ID must be selected that defines the phone number to be displayed as the Caller ID when making outbound calls. This Caller ID may be chosen from the dropdown menu that lists numbers previously added to phone.systems™ by using the Phone Number option under the "Settings" menu. Therefore, it is recommended that phone numbers should be added prior to configuring SIP Account contact methods.
Call Recording Tab
The SIP Account contact method (and also the External Line contact method if applicable) provides users with the option of enabling call recording, including the ability to define the recording direction (inbound and/or outbound) and to record internal and/or external calls. In addition, a "record on demand" feature is available, where the user may dial a predefined feature code to activate call recording.
Note that by default, call recording is disabled.
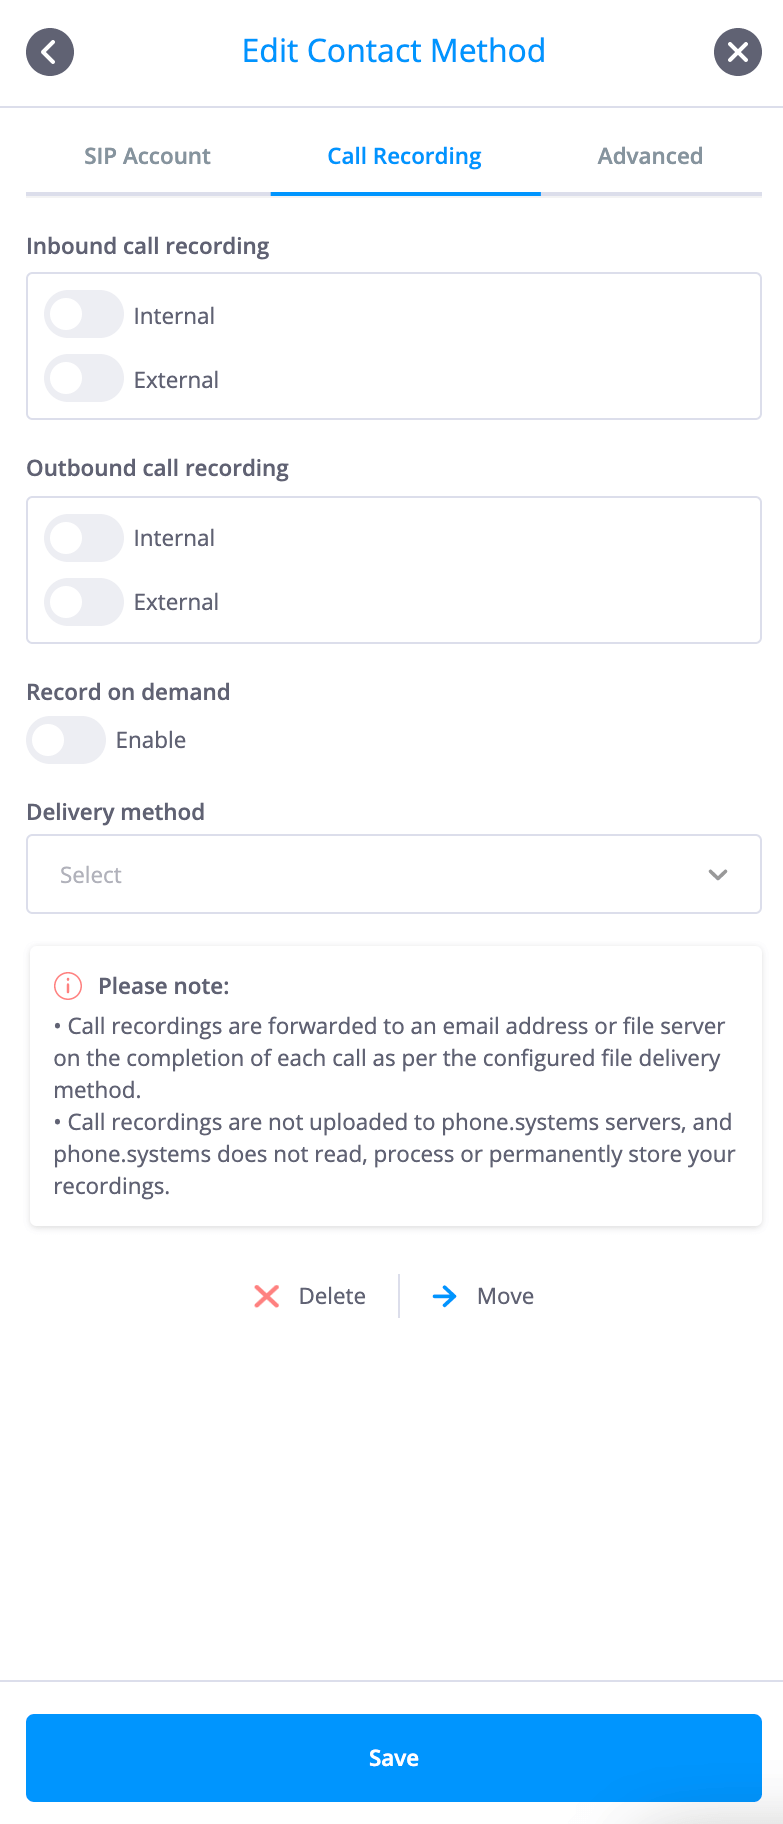
If call recording is enabled, then the delivery method for the file containing the contents of the
recorded call must be selected, with the options being Email, Dropbox, FTP, SFTP, Google Drive,
OneDrive. If the required delivery method has not previously been configured by using the Delivery
Methods option listed under the "Settings" menu, a delivery method may be added by selecting the
 option in the dropdown menu. See the section
Delivery Methods
for further details.
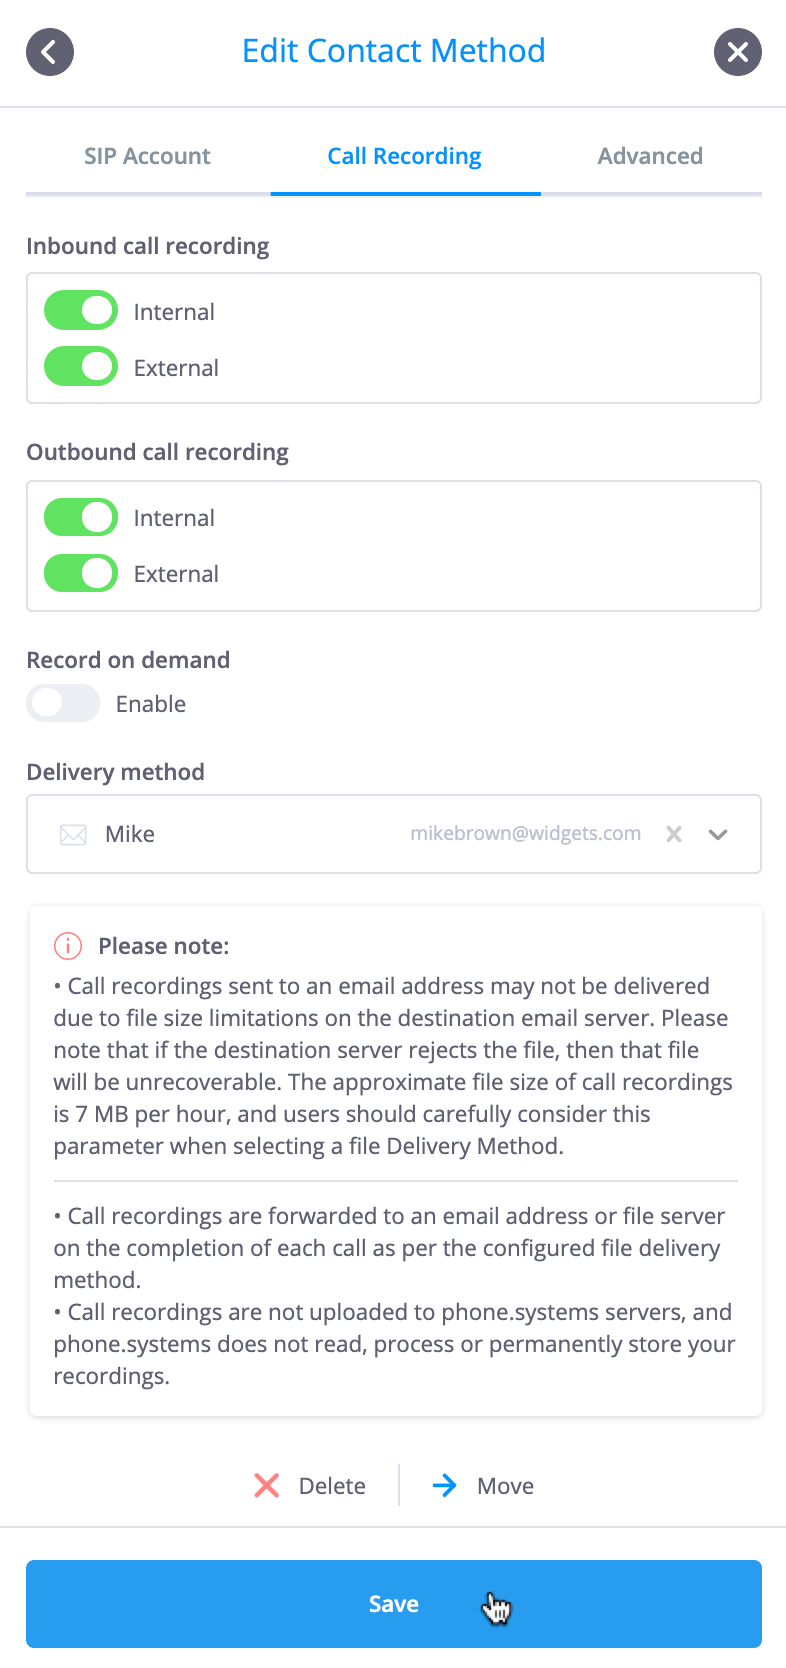
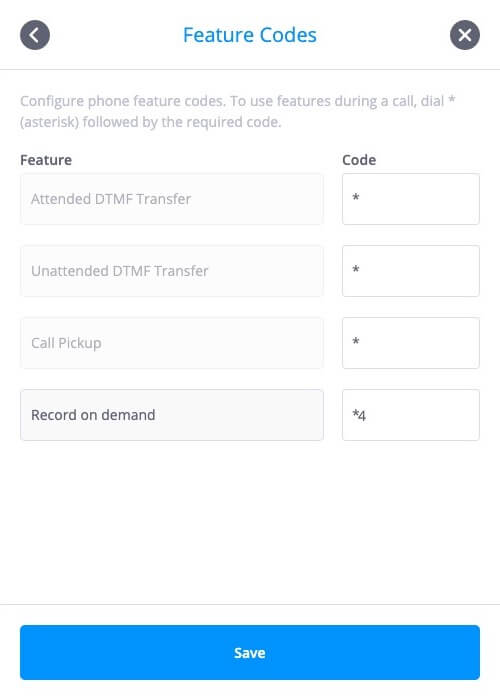
If the "record on demand" feature is enabled, then a dialing feature code must be defined in order to activate call recording.

Feature codes are configured by selecting the
 option under the Settings menu (See the section
Feature Codes
for further details).
 Back to the top
Advanced Tab

Each listed IP address is displayed with
![]() icon at the end of the address. Clicking on this icon causes the relevant IP address to be
deleted.
icon at the end of the address. Clicking on this icon causes the relevant IP address to be
deleted.
-
The “Enable Allowed IPs” option, which if activated, is used to limit device registration to specific, listed IP addresses. This option prevents possible security violations or fraud by disallowing device registration from unlisted IP addresses. If the “Enable Allowed IPs” option is not enabled, then registration from all IP addresses is permitted.
-
If the “Enable Allowed IPs” option is enabled, then the “Allowed IPs” list must include the IP addresses to which device registration is limited. Both IPv4 and IPv6 addresses may be listed, with the use of the “SPACE” character indicating the completion of an address. In addition, an IP address range may be defined using the standard CIDR (Classless Inter-Domain Routing) “/” subnet mask notation.
-
The codecs to be supported by this SIP Account. Multiple codecs may be added from the dropdown list, and the options are:
OPUS
G722
PCMU
PCMA
G729
GSM
telephone-event
-
If multiple codecs are listed, then codec priorities may be set by dragging the included codecs into their desired positions of preference.
Important - the telephone-event codec must be included in the list of “Allowed Codecs” if interactive menus or feature codes requiring the input of digits are to be used.

-
The “Media types” field allows the selection of the network protocol used for delivering audio and video over IP networks.
The following options are available:
RTP (Unsecured Real-time Transport Protocol)
-
SRTP-SDES (Secure Real-time Transport Protocol - Session Description Protocol Security Descriptions)
-
SRTP-DTLS (Secure Real-time Transport Protocol - Datagram Transport Layer Security)
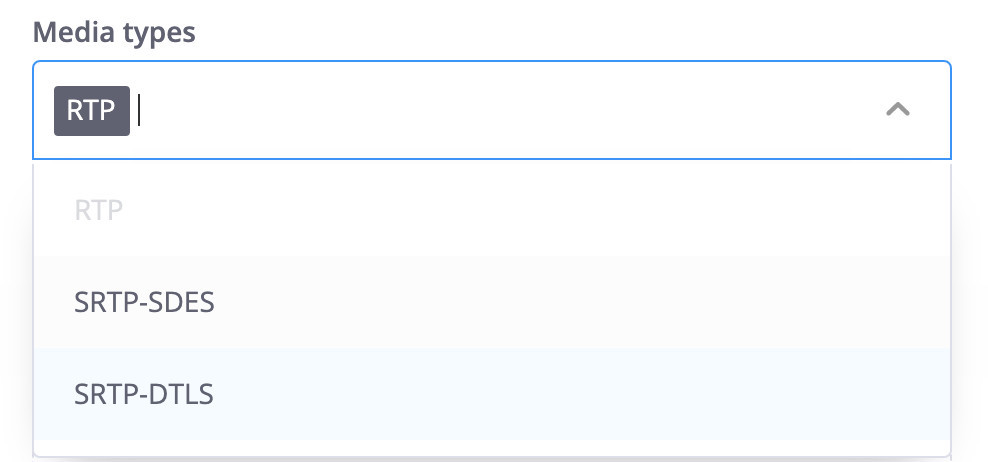
-
The “Transport protocol” field allows for the selection of protocols used for communication between phone.systems™ and end-user’s IP Phone or softphone application. Multiple transport protocols may be selected, with the following options being available:
TCP (Transmission Control Protocol)
UDP (User Datagram Protocol)
TLS (Transport Layer Security)
WSS (WebSocket Secure)
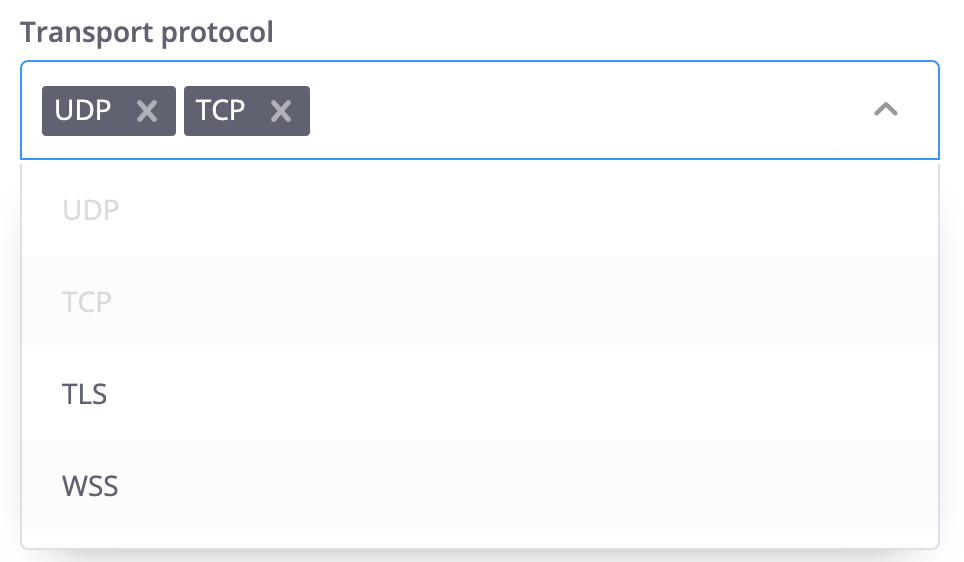
Note that encrypted media types and transport protocols are disabled by default on phone.systems™ accounts. Contact your phone.systems™ provider to enable these features.
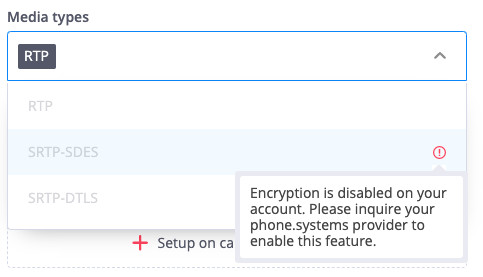
The SIP Account contact method provides users with the option of enabling outbound call announcements, with the announcement being made to the operator once the call has been connected with the end point. Users may set an outbound call announcement for both internal and external calls. When using this feature, the caller will hear on hold music and the end point will hear the selected announcement. To enable this feature, click on the “Internal/External outbound call announcement” section in the dropdown menu and select the relevant audio file for the announcement.
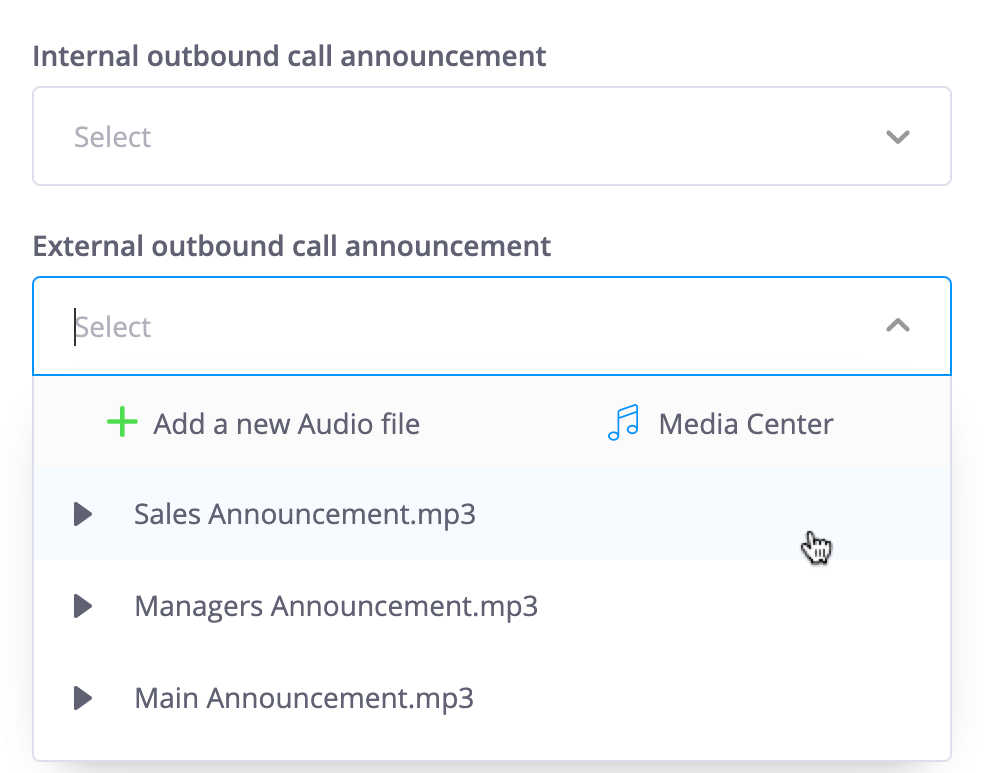
On completion of the configuration of a SIP Account contact method, the SIP credentials may be viewed by expanding the SIP details window.
Back to the topLocating the SIP account details
There are two ways to find a contact in the Contact Center. You may select the contact directly from the displayed list of configured contacts, or by using the search option. Please refer to the user guide section Search for further details on how to use the “Search” option.
Click on the
![]() icon next to the contact to open the Contact Details.
icon next to the contact to open the Contact Details.
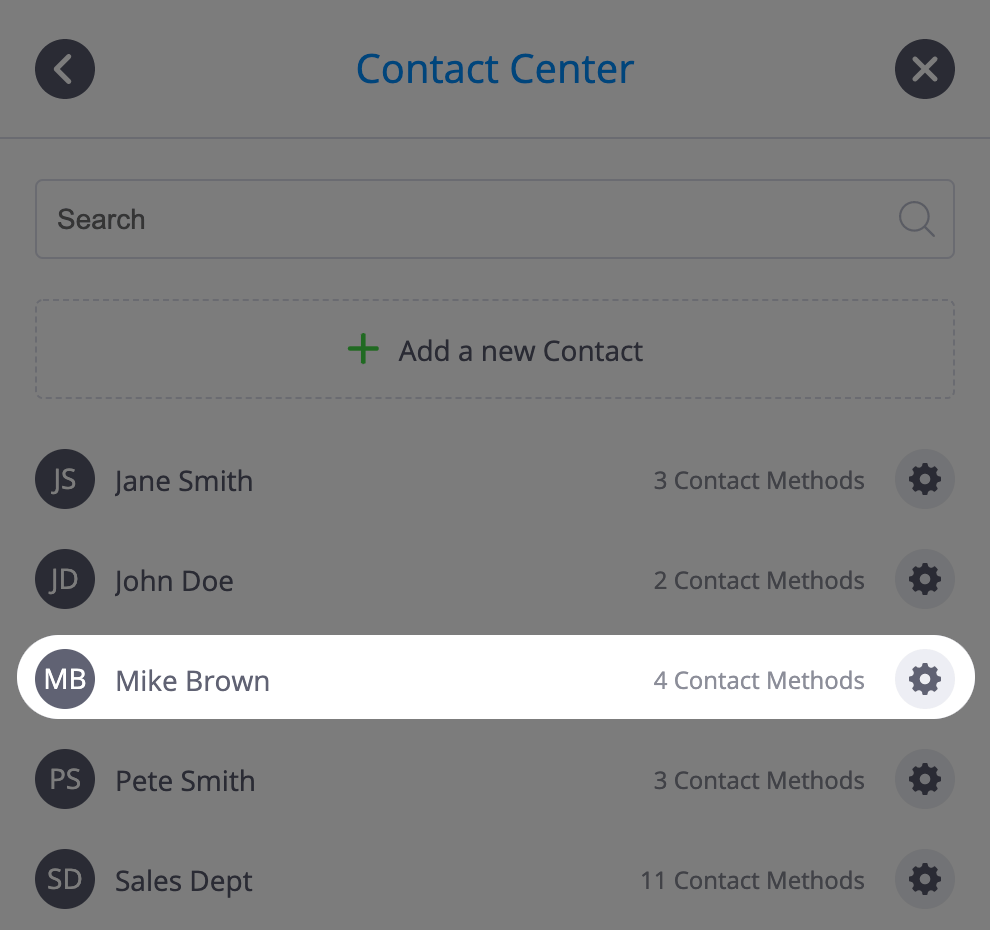
Click on the
![]() icon next to the selected contact to open a SIP Account configuration window.
icon next to the selected contact to open a SIP Account configuration window.
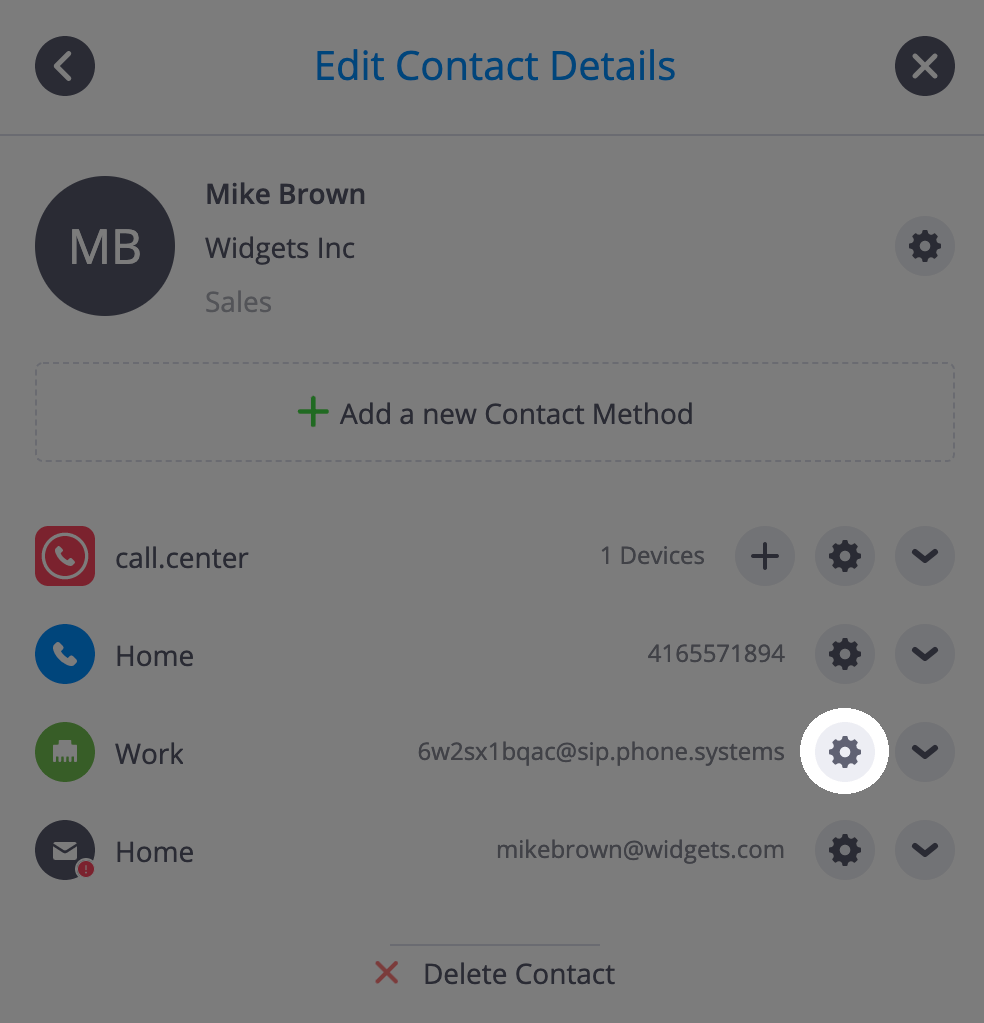
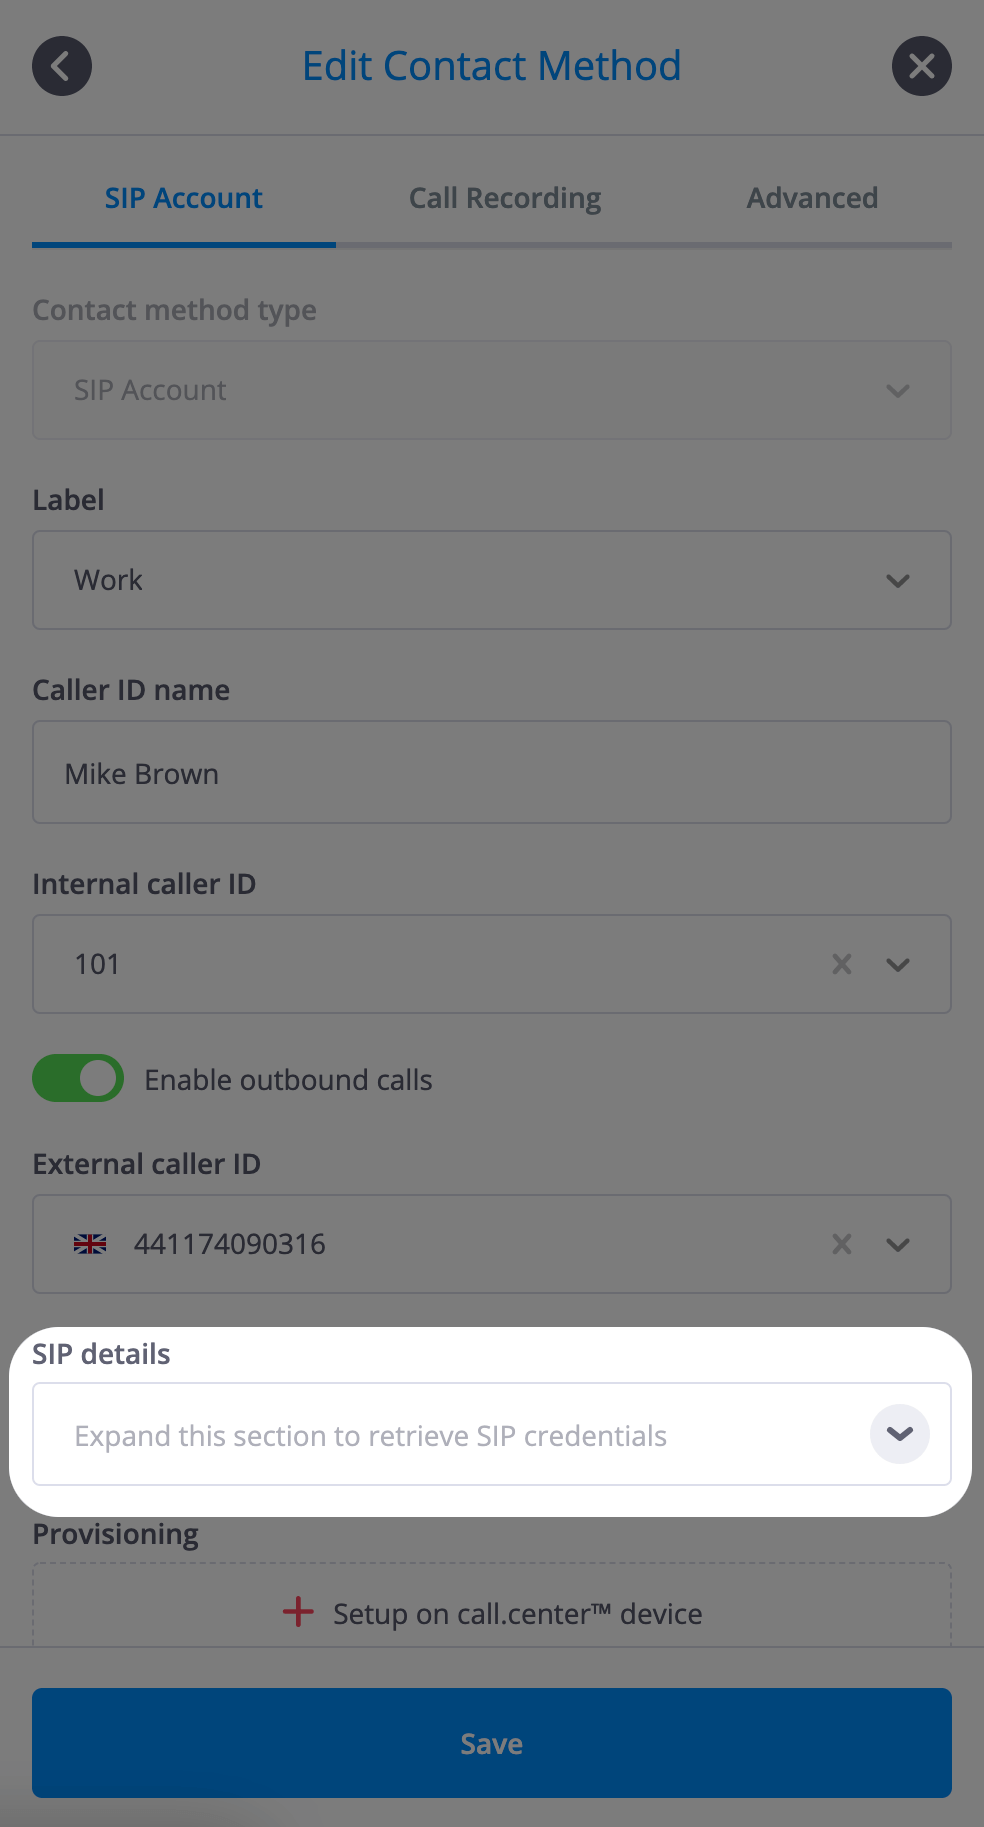
Clicking on the
![]() icon will expand the SIP details window. This window includes the SIP credentials (such as
username, password and domain) automatically generated by phone.systems™ and are required for
configuring a SIP device. In addition, the current status of the SIP device (Offline or
Online) is shown.
icon will expand the SIP details window. This window includes the SIP credentials (such as
username, password and domain) automatically generated by phone.systems™ and are required for
configuring a SIP device. In addition, the current status of the SIP device (Offline or
Online) is shown.
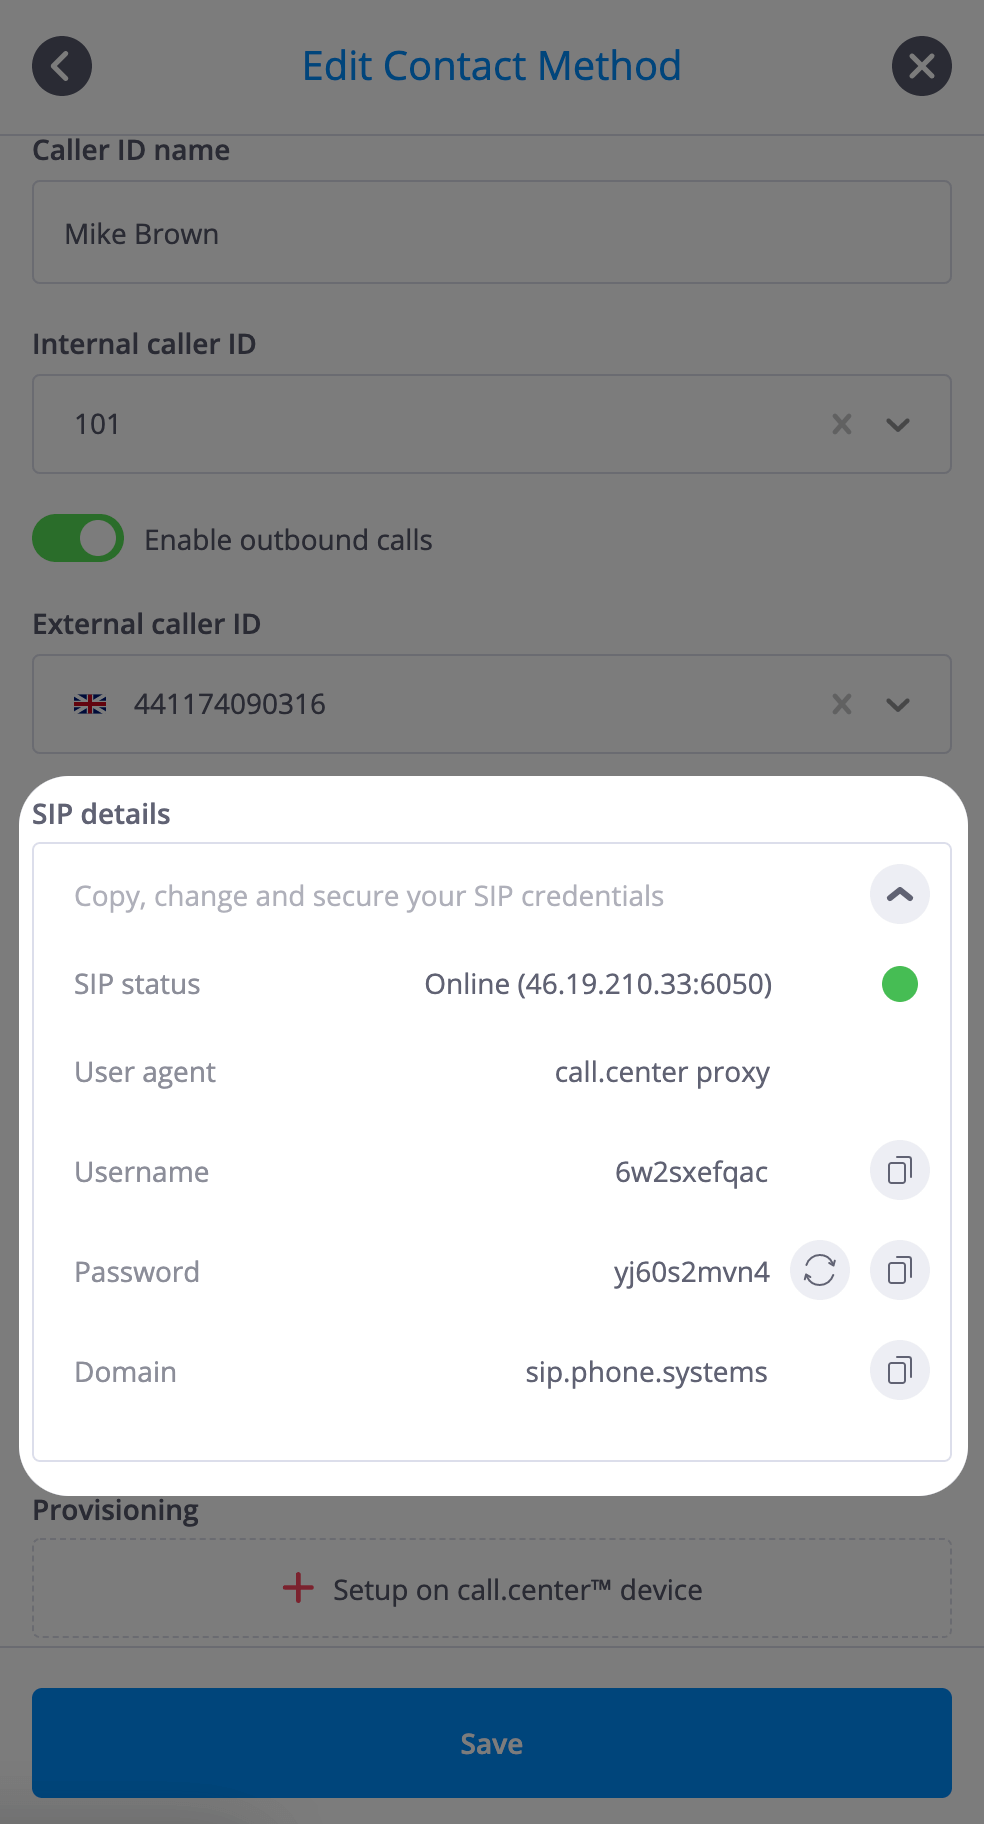
Clicking on the
![]() icon
next to the Username, Password and Domain fields copies the configuration data to a clipboard for
convenient use in configuring the SIP device.
icon
next to the Username, Password and Domain fields copies the configuration data to a clipboard for
convenient use in configuring the SIP device.
Contact method: Email
The Email Contact Method now supports email verification. All newly added email contact methods must be verified in order to receive emails from phone.systems™. Additionally, emails that are sent from phone.systems™ will contain an unsubscribe link, allowing the email owner to be easily removed from phone.systems™ notifications without contacting their system administrator.
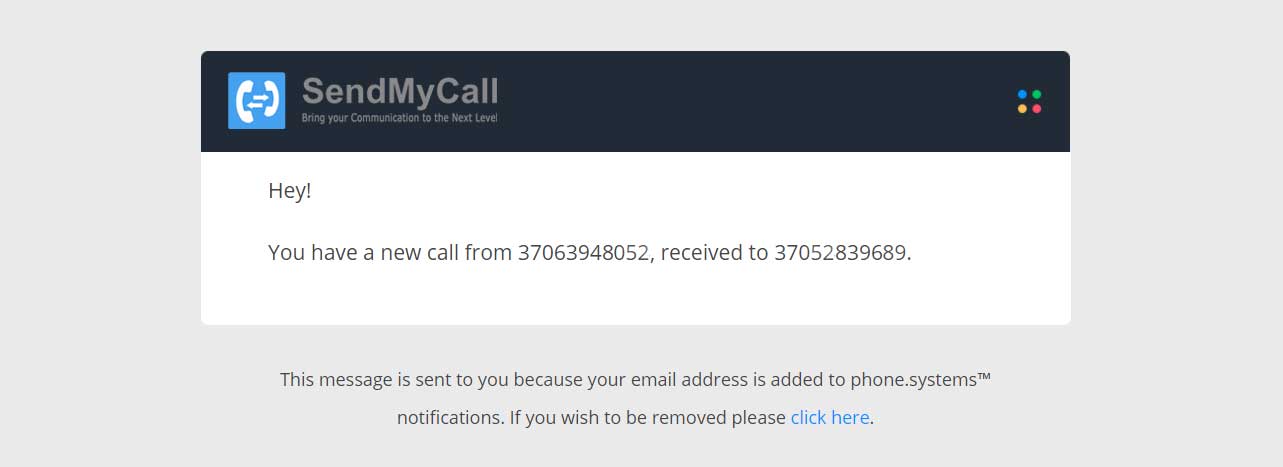
The information to be entered is:
-
A label (or identifier) for this email address Contact Method, for example, "Work". An existing label may be chosen, or a new label may be defined by selecting
 .
.
The email address.
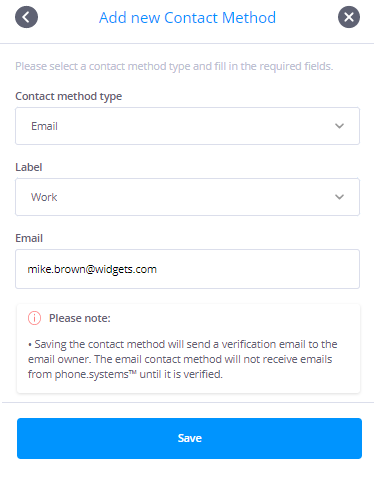
The following statuses for email contact method are available:
-
Verified - The Email Contact Method has been verified and is ready to be used within phone.systems™
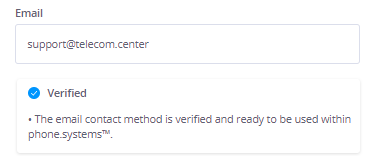
-
Pending Verification - A verification email was sent to the email owner and is awaiting confirmation.
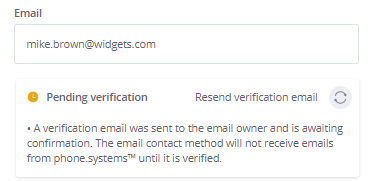
-
Unsubscribed - The email owner has manually unsubscribed from phone.systems™ emails.
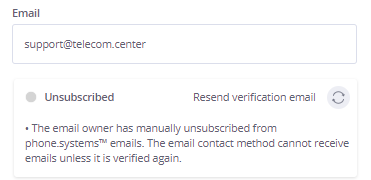
-
Verification expired - The email owner did not complete the verification process in a timely manner, and the verification email has expired.
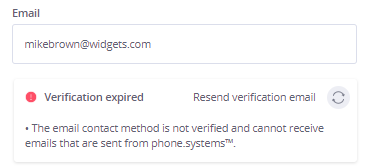
Contact method: call.center™
A call.center™ contact method is automatically linked to all call.center™ devices. The call.center™ Contact Method allows users to assign an available Internal and Phone numbers that may be used as caller IDs for outbound calling. From the UI point of view, the call.center™ contact method will act as the main group for call.center™ devices within that Contact. All call.center™ devices that belong to this contact will appear “under” the call.center™ contact method.

Selecting the option
![]() in the “Contact Details” window opens up a form to edit the call.center™ contact method for the
selected contact.
in the “Contact Details” window opens up a form to edit the call.center™ contact method for the
selected contact.
Caller IDs Tab
The information to be entered is:
-
A caller ID name - The caller ID name, which will be displayed on end-user devices that support this feature. By default, this name is the same as the actual contact name to which this contact method is attributed.
-
Internal caller ID - This number will be displayed as the Caller ID when making outbound calls to other extensions within the phone.systems™ network. An optional Internal caller ID number may be selected from the dropdown menu of the extensions configured for Internal Number objects that are currently on the workspace.
Note: The dropdown list of internal numbers that is displayed consists of numbers (or extensions) allocated to configured Internal Number objects. Therefore it is recommended that Internal Number objects should be configured and placed on the phone.systems™ workspace prior to adding SIP Account contact methods. -
An option to enable outbound calling from this device. By default, outbound calling is disabled.
-
External caller ID - If outbound calling is enabled, an external caller ID must be selected that defines the phone number to be displayed as the Caller ID when making outbound calls. This Caller ID may be chosen from the dropdown menu that lists phone numbers previously added to phone.systems™.
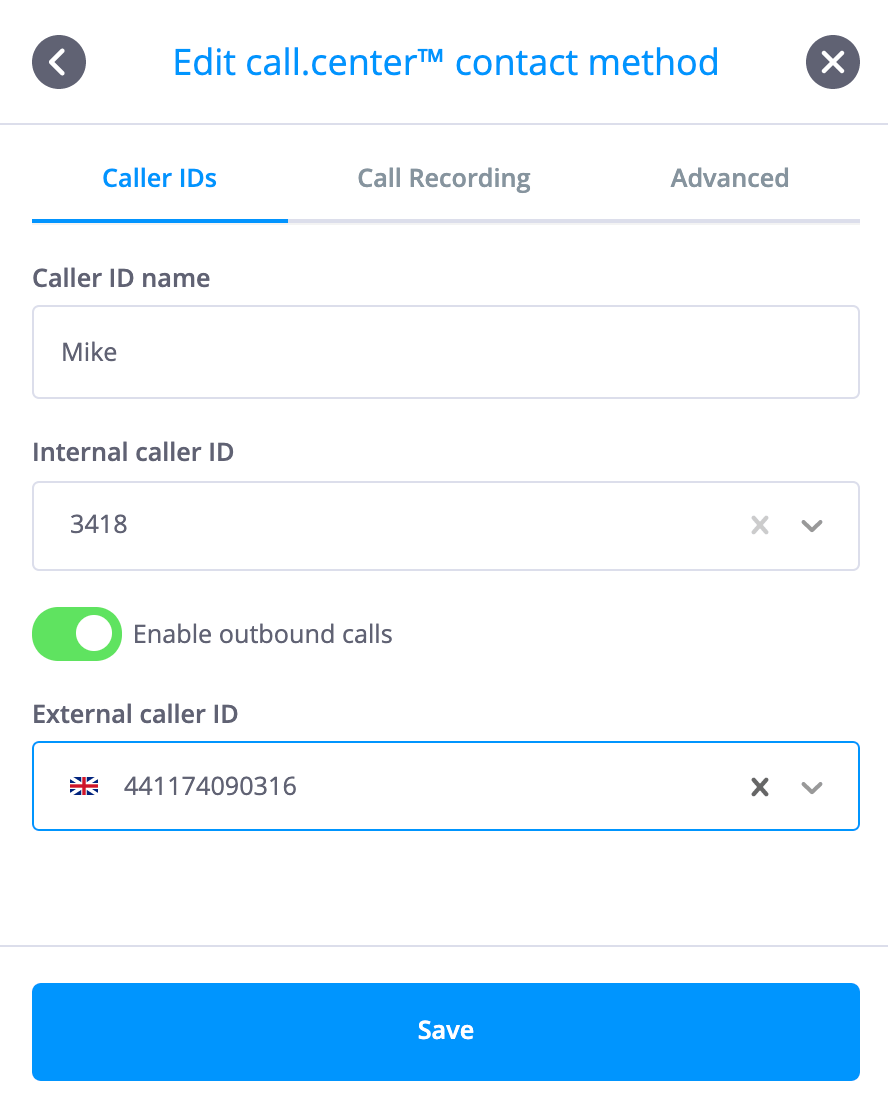 Back to the top
Call Recording Tab
The call.center™ contact method provides users with the option of enabling call recording, including the ability to define the recording direction (inbound and/or outbound) and to record internal and/or external calls. In addition, a "record on demand" feature is available, where the user may dial a predefined feature code to activate call recording.
Note: By default, call recording is disabled.
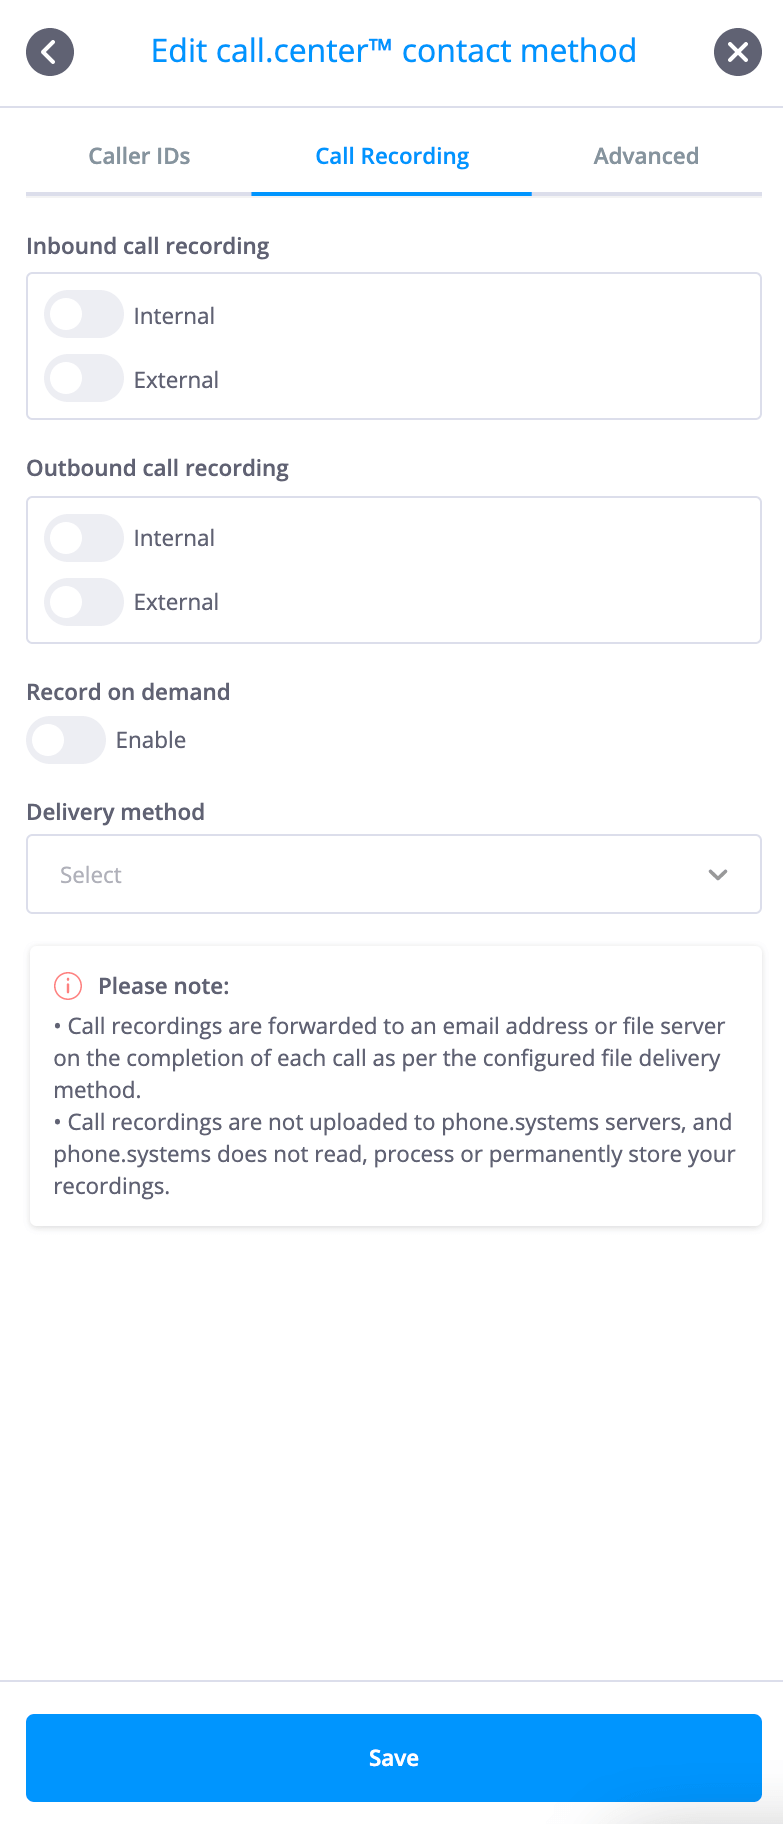
If call recording is enabled, then the delivery method for the file containing the contents of the
recorded call must be selected, with the options being Email, Dropbox, FTP, SFTP, Google Drive or
OneDrive. If the required delivery method has not previously been configured by using the Delivery
Methods option listed under the "Settings" menu, a delivery method may be added by
selecting the
 option in the dropdown menu. See the section Delivery Methods for further details.
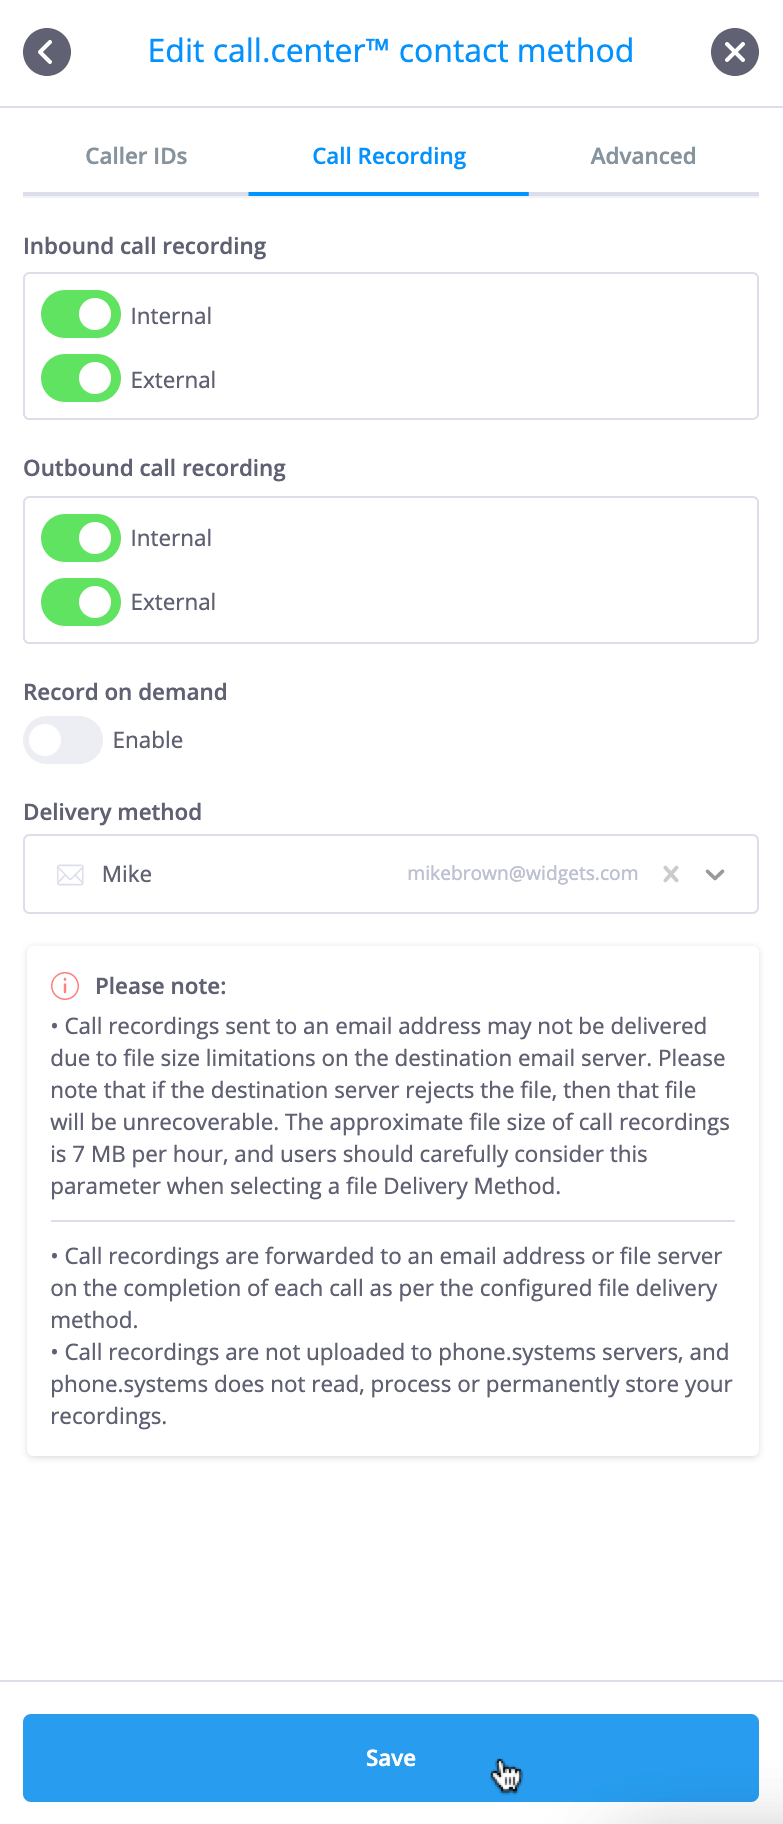
If the "record on demand" feature is enabled, then a dialing feature code must be defined in order to activate call recording.
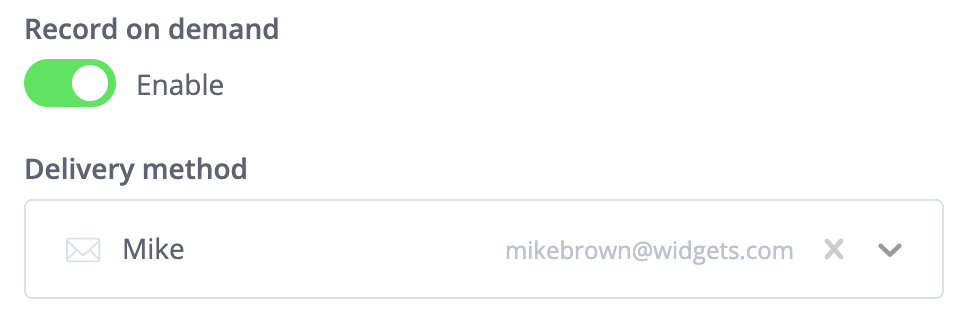
Feature codes are configured by selecting the
 option under the Settings menu (See the section
Feature Codes
for further details).
Advanced Tab
The call.center™ contact method provides users with the option of enabling an outbound call announcement, with the announcement being played to the operator once the caller has been connected with the end point. Users may configure an outbound call announcement for both (internal and/or external calls). When using this feature, the caller will hear on hold music and the end point will hear the selected announcement. To enable this feature, click on the “Internal/External outbound call announcement” section in the dropdown menu, and select the relevant audio file for the announcement.
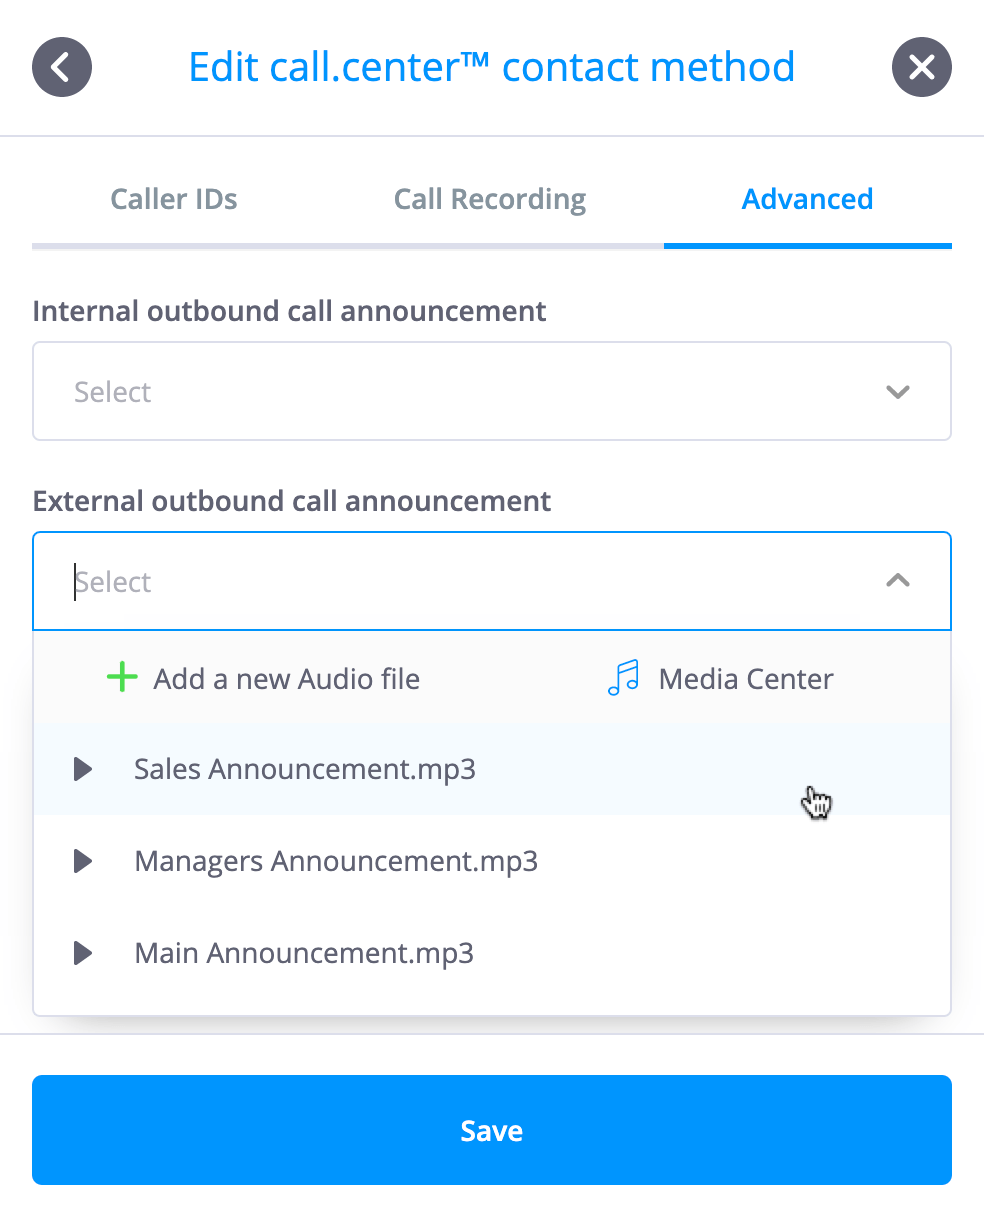
Note: By default, the outbound call announcement feature is disabled.
Back to the topAdding a call.center™ device
Selecting the  option in
the “Contact Details” window opens up form to add a new device for the selected contact.
The information to be entered is:
-
A friendly device name (or identifier), for example, "Android Phone".
-
Up to four SIP accounts to support this call.center™ device. These SIP accounts may be added on device creation, or configured at a later time.
IMPORTANT - The SIP accounts listed for use by the call.center™ device are SIP Account contact methods that were previously configured in phone.systems™.
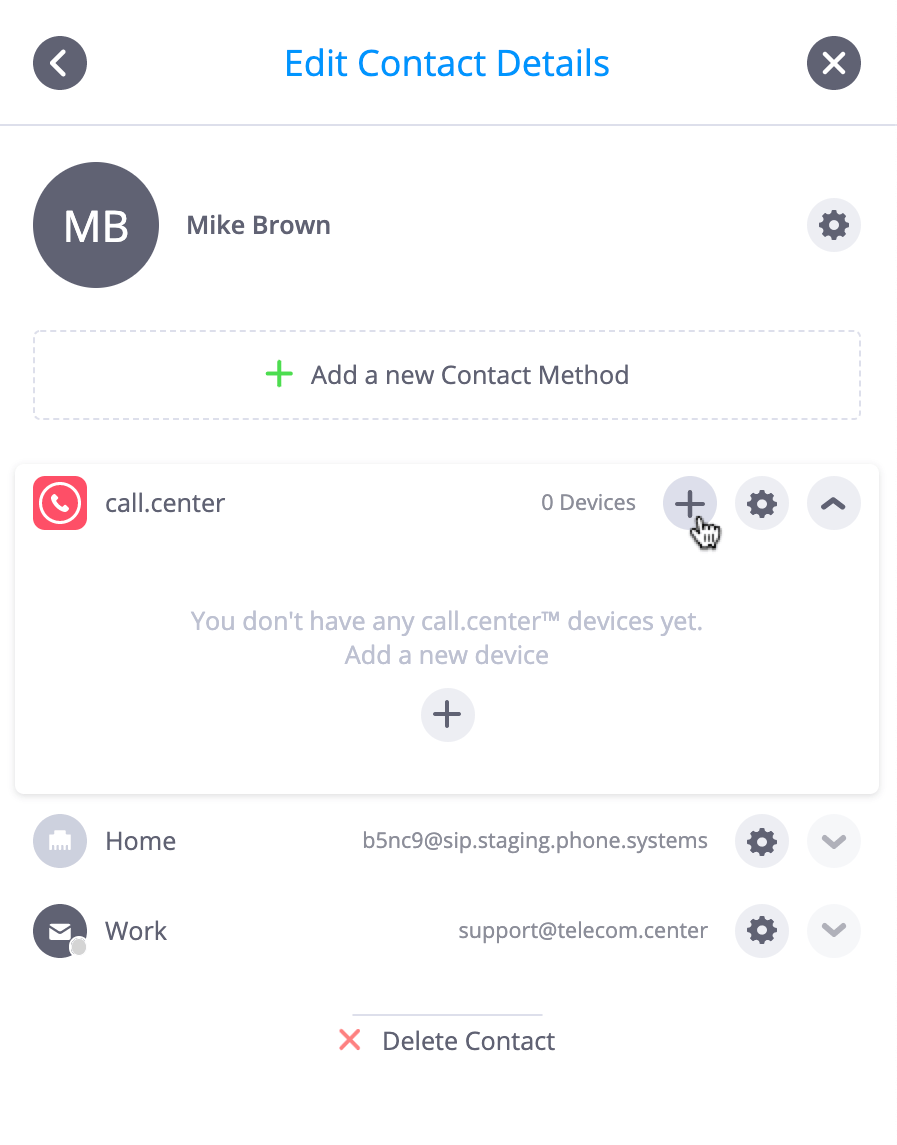

After selecting the call.center™ device option from the drop-down menu, the same window as previously detailed will be opened. However, in this case, the SIP Account(s) must be manually assigned.
To assign the SIP Account(s), select the
![]() option in the “Contact Details” window to open an existing call.center™ device for the selected
contact.
option in the “Contact Details” window to open an existing call.center™ device for the selected
contact.

Choose any of the four visible “Add account” fields, and select which SIP Account to add from the drop-down menu. Up to four different SIP Accounts may be assigned to a single call.center™ device.
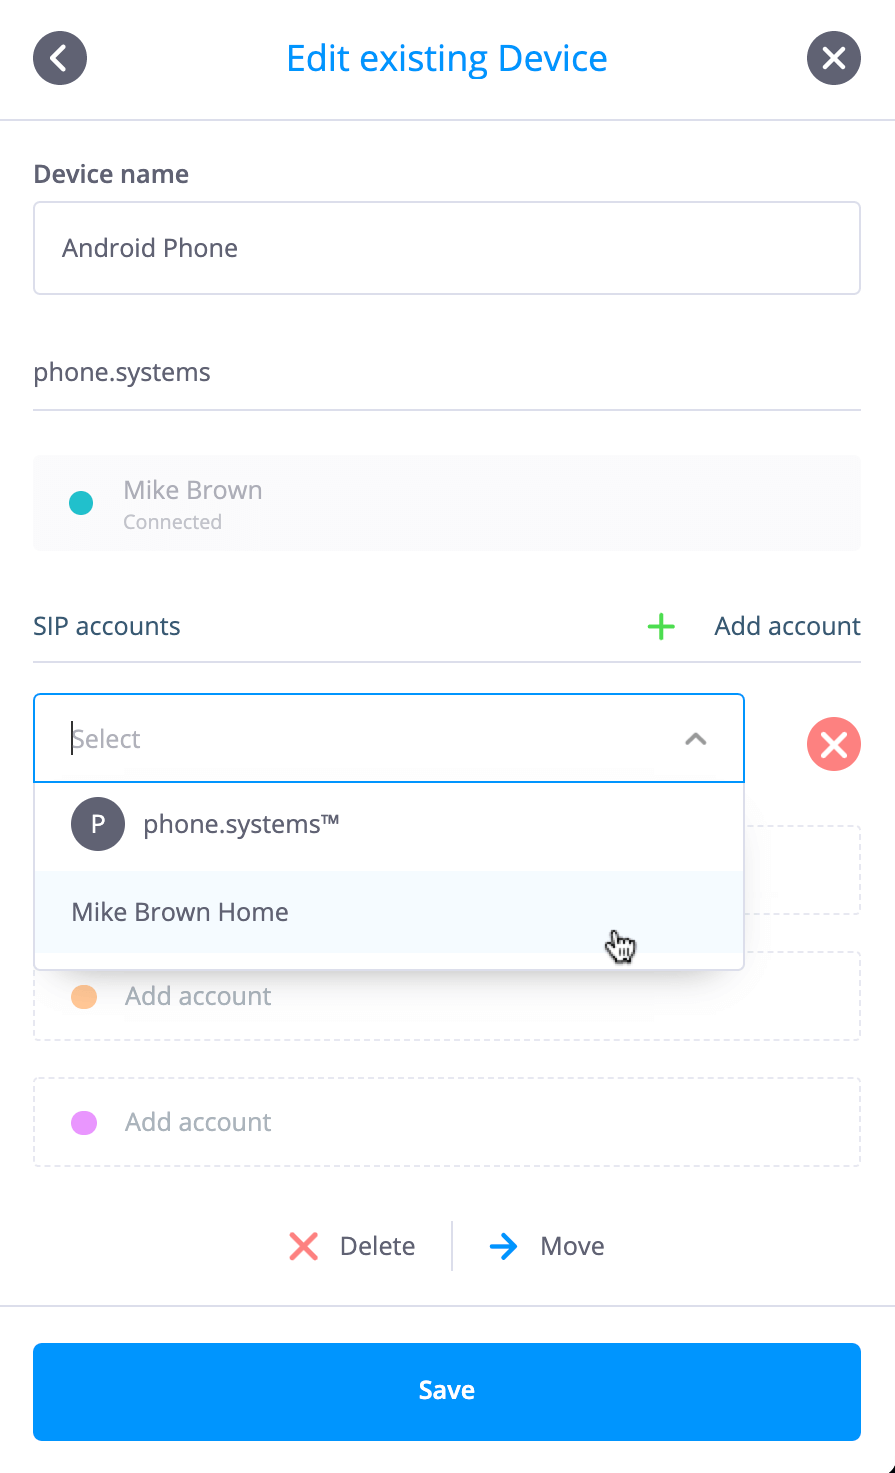
A phone.systems™ line is automatically linked to all call.center™ devices. The phone.systems line allows users to assign an available Internal Number and DID numbers, that may be used as caller IDs for outbound calling. From the UI point of view, the phone.systems™ line will act as the main group for call.center™ devices within that Contact. All call.center™ devices that belong to this contact will appear “under” the phone.systems™ line.
Back to the topcall.center™ Device Statuses
There are three device statuses displayed on the following page:
-
Pending devices - The device has previously been activated and configured. However, configuration changes were since made, and the device has not yet been updated with the new configuration parameters.
Note if activation instructions were sent by email, this device will appear in the Pending Devices section.
-
Not activated devices - The name and type of the device that have not been activated.
-
Activated devices - The name and type of the device that have been activated.
 Back to the top
Managing Contacts and Contact Methods
The Contact Center includes a number of features that assist in simplifying the management of complex PBX systems, including:
Back to the topDisplaying linked objects and services
When displaying the Contact Methods, a
![]() icon is shown on the right-hand side of the listed Contact Methods. By clicking on this icon, all
of the services using this Contact Method are displayed.
icon is shown on the right-hand side of the listed Contact Methods. By clicking on this icon, all
of the services using this Contact Method are displayed.
In the image below, Mike Brown has a work phone number 416-5571894 as a Contact Method.
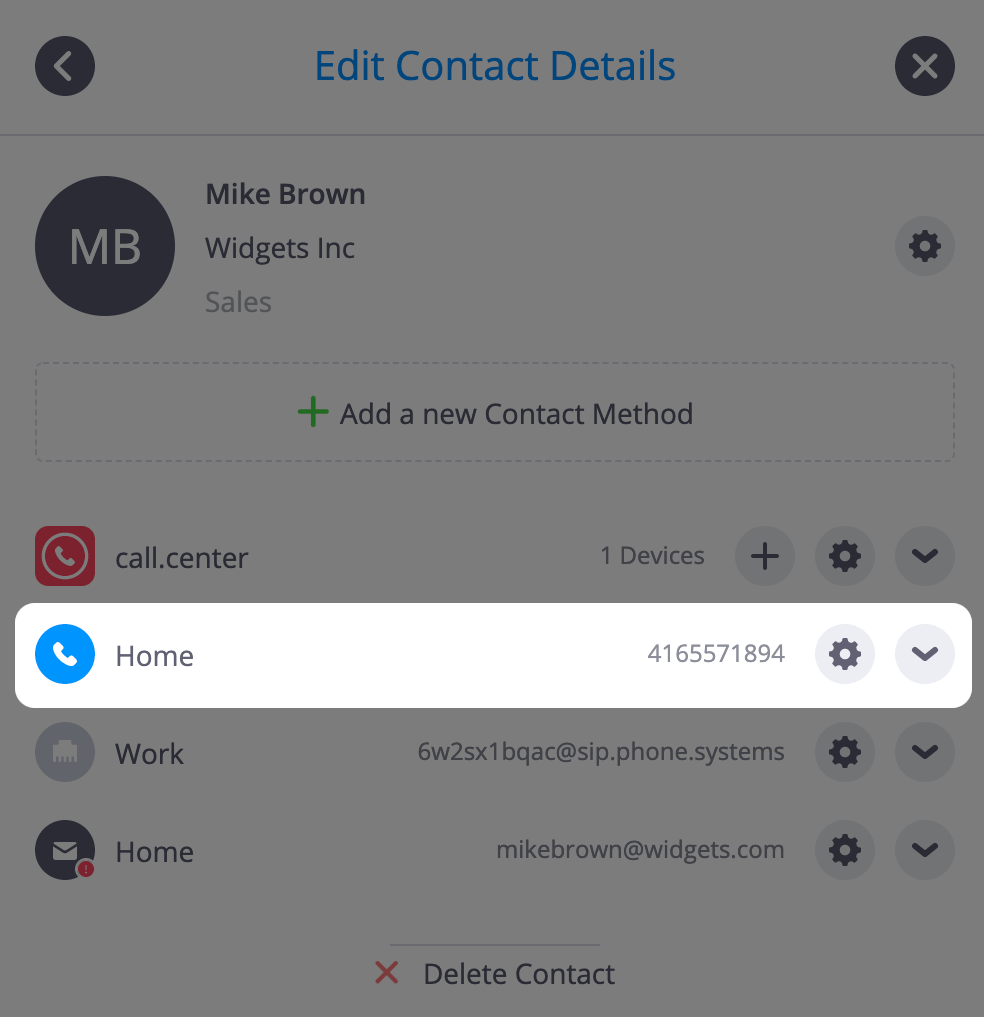
By clicking on the
![]() icon, this listed item may be expanded to show that the Contact Method is in use by a Queue object
(Queue-Support), and two Ring Group objects (Private Line and
Priority Ring Group).
icon, this listed item may be expanded to show that the Contact Method is in use by a Queue object
(Queue-Support), and two Ring Group objects (Private Line and
Priority Ring Group).
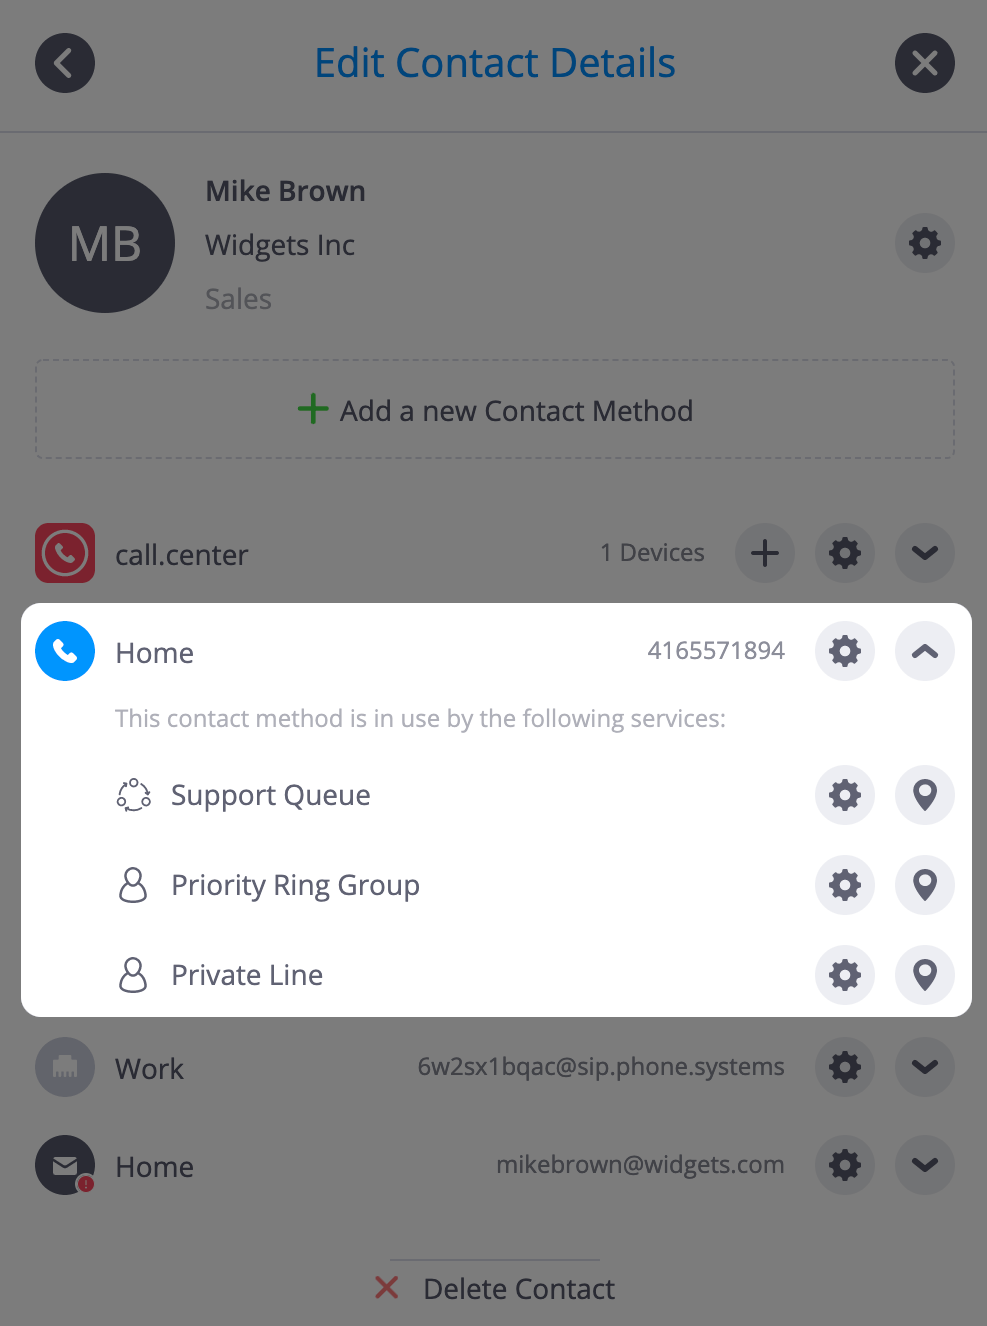
Clicking on the
![]() icon collapses the expanded list of allocated services.
icon collapses the expanded list of allocated services.
Locating the linked objects
When displaying an expanded list of the services or objects using a selected Contact Method as
detailed above, a
![]() icon is shown on the right-hand side of each listed service. Clicking on this icon closes the
contact window, and the selected object oscillates for a short duration on the workspace, making
it easily identifiable.
icon is shown on the right-hand side of each listed service. Clicking on this icon closes the
contact window, and the selected object oscillates for a short duration on the workspace, making
it easily identifiable.
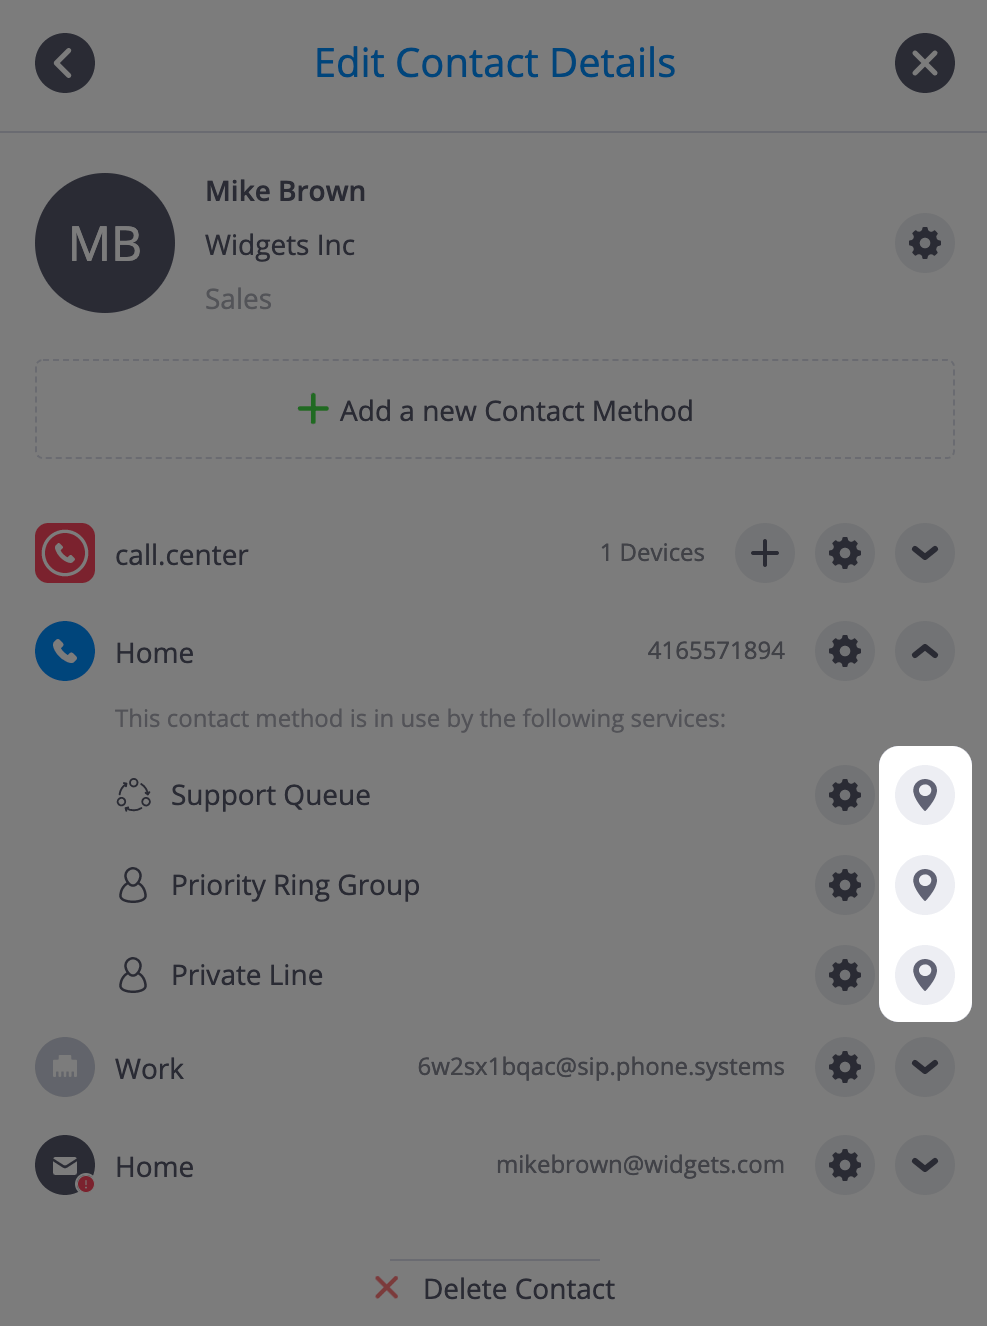 Back to the top
Editing a Contact
Contacts may be edited. To edit a Contact, click on the
![]() icon next to the selected contact to open a Contact configuration window.
icon next to the selected contact to open a Contact configuration window.
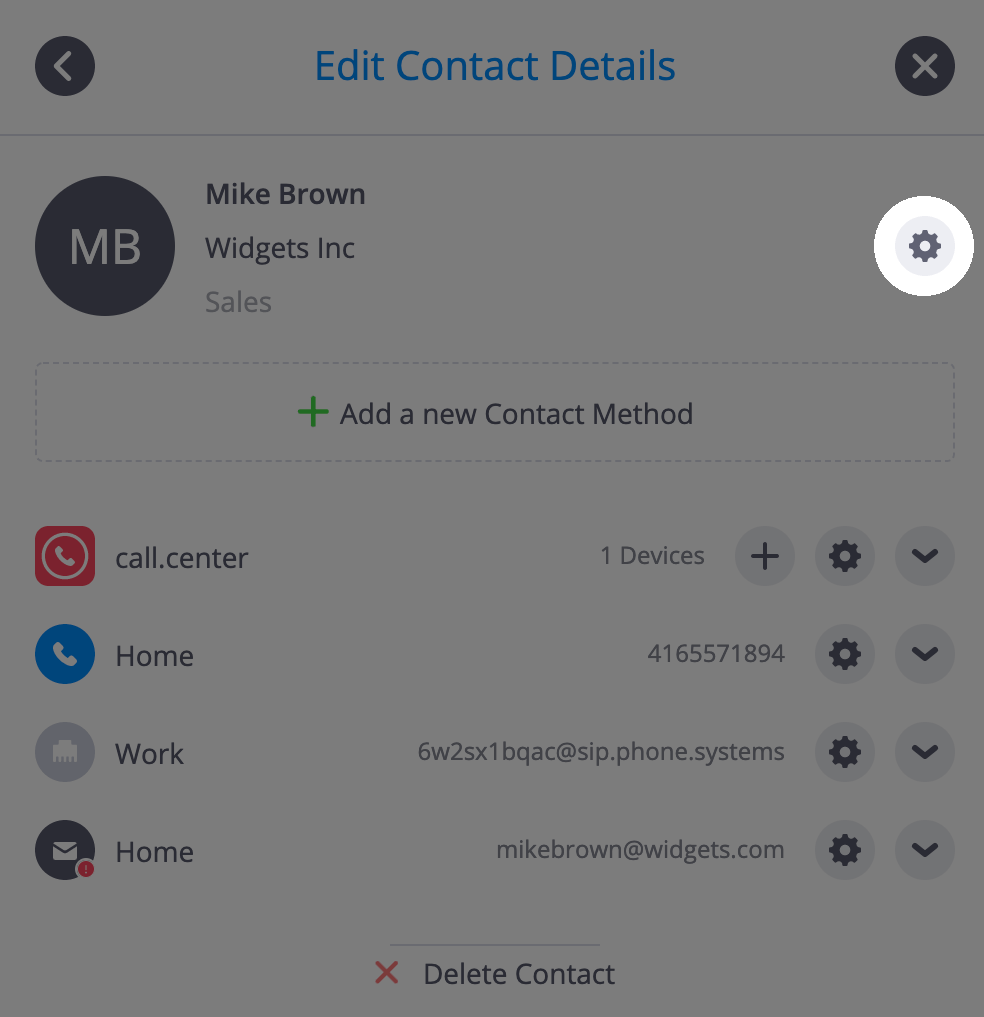
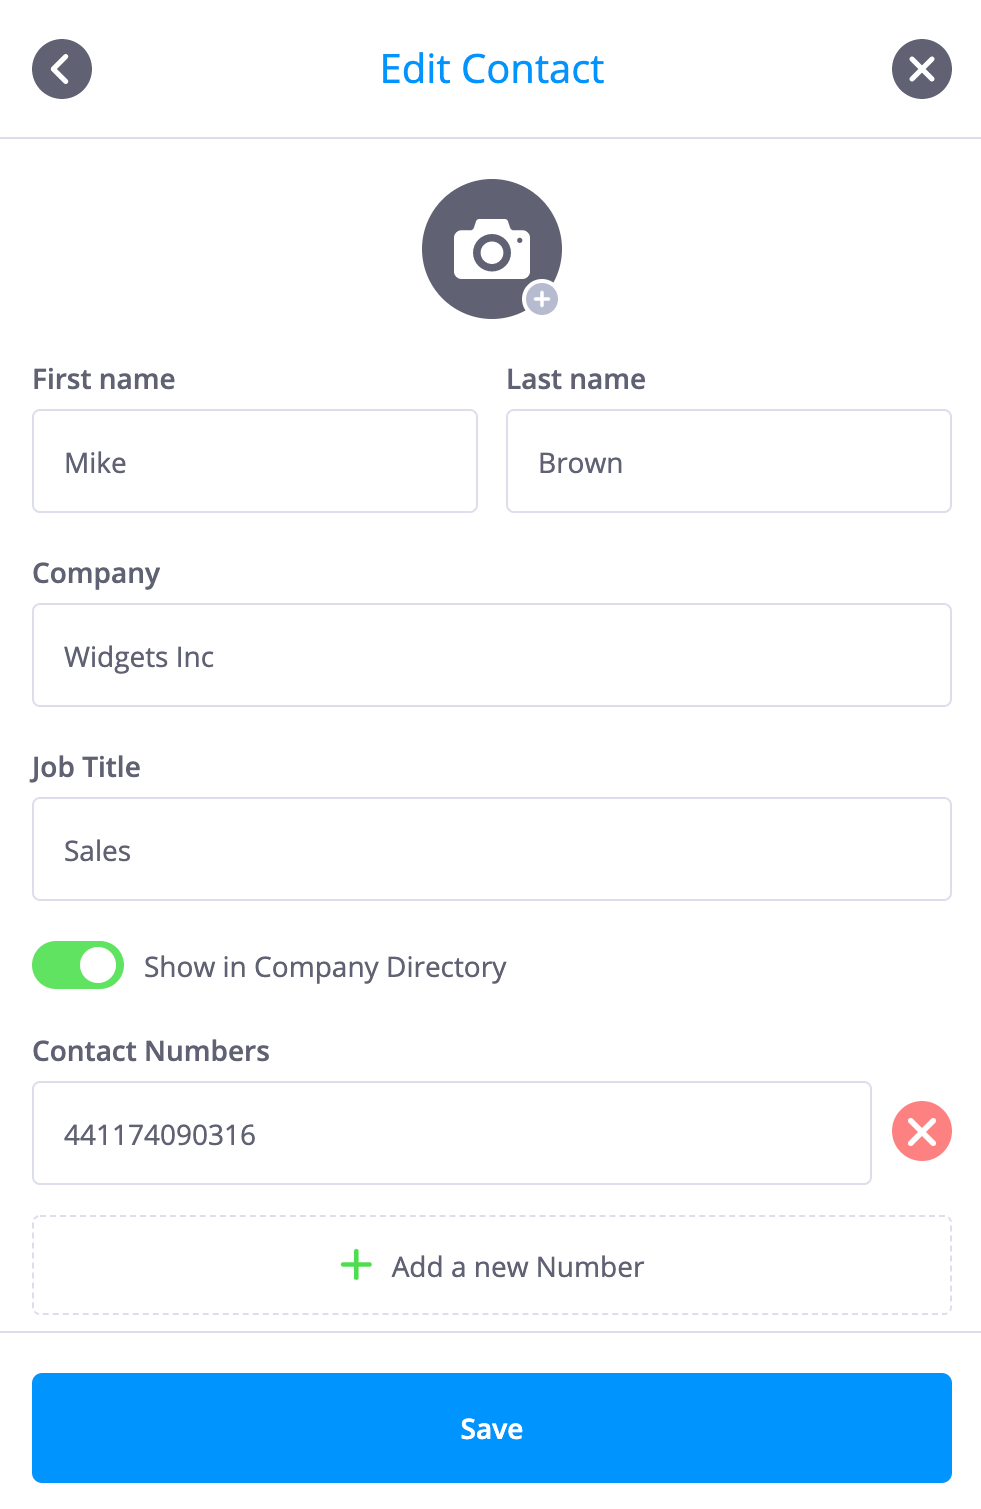
Make the required configuration changes and click the
 button to apply these changes.
Editing Contact Methods
Contact Methods may be edited. To edit a Contact Method, click on the
![]() icon next to the selected contact method to open a Contact Method configuration window.
icon next to the selected contact method to open a Contact Method configuration window.
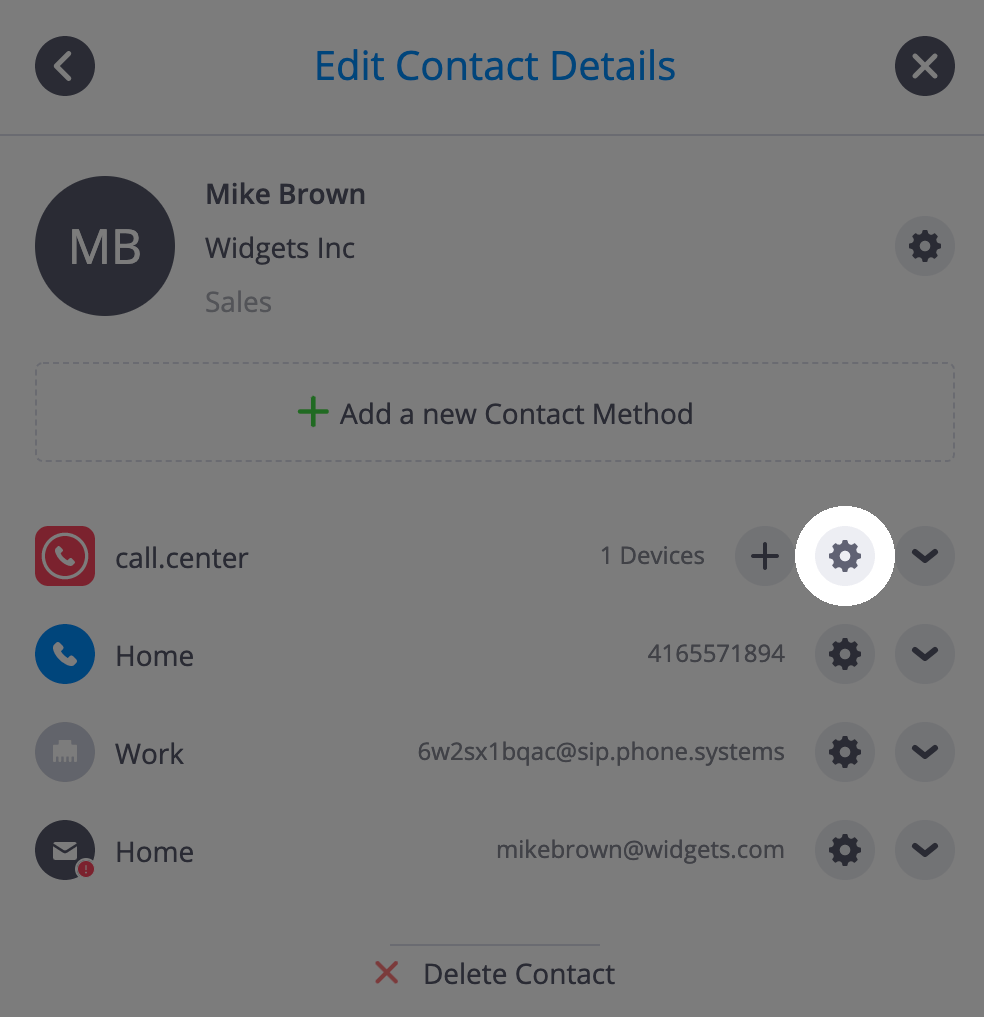
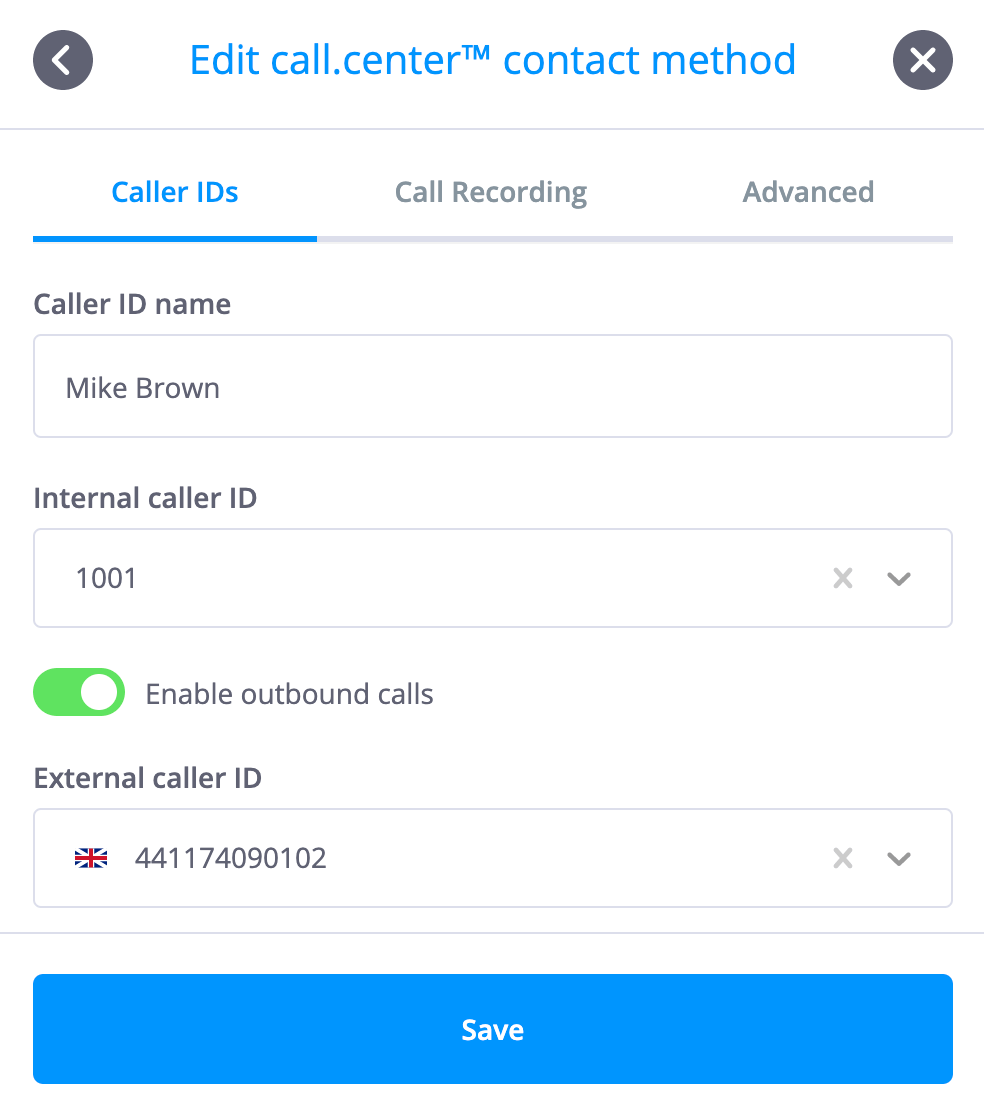
Make the required configuration changes and click the
 button to apply these changes.
Moving Contact Methods between Contacts
Contact Methods may be moved from one contact to another, facilitating the efficient reallocation
of resources. To move a Contact Method, click on the
![]() icon next to the selected contact method to open a Contact Method configuration window.
icon next to the selected contact method to open a Contact Method configuration window.
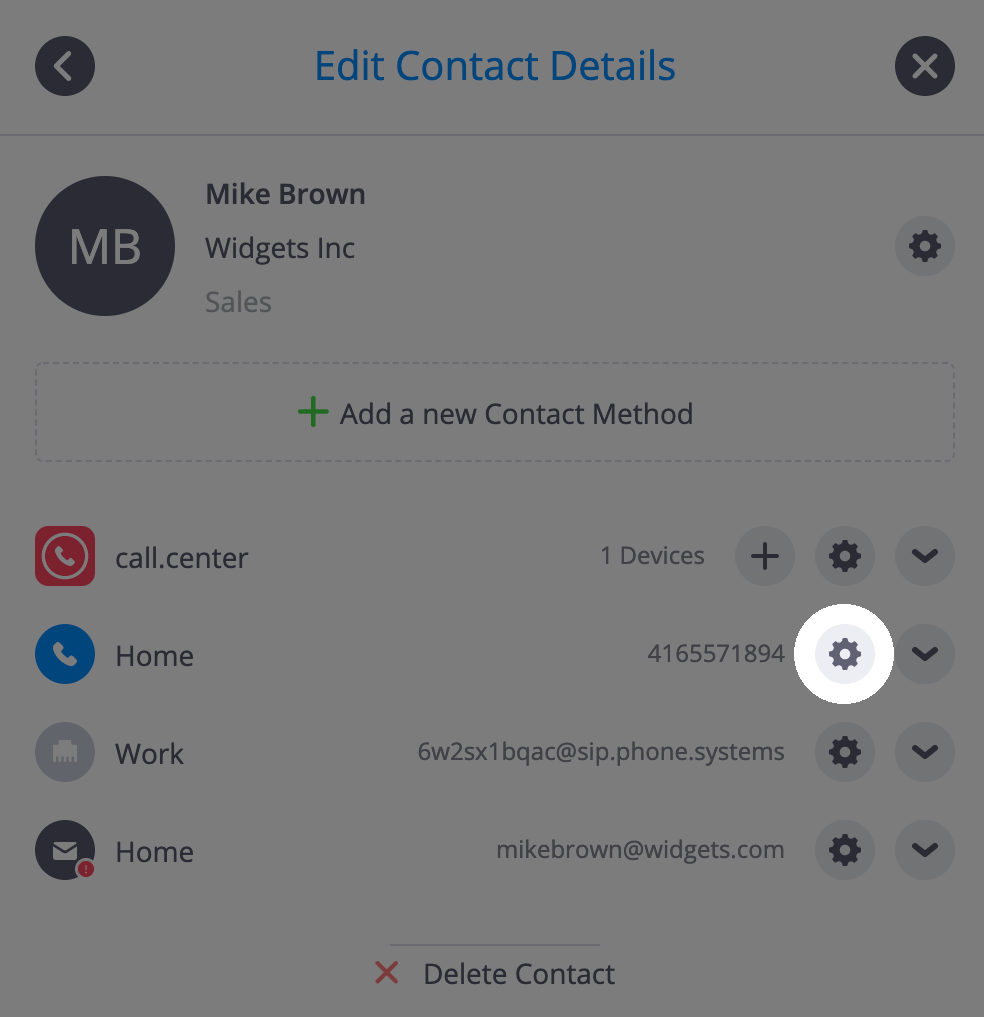
Clicking on the
 option opens a window in which the user is able to define the details for this configuration
change.
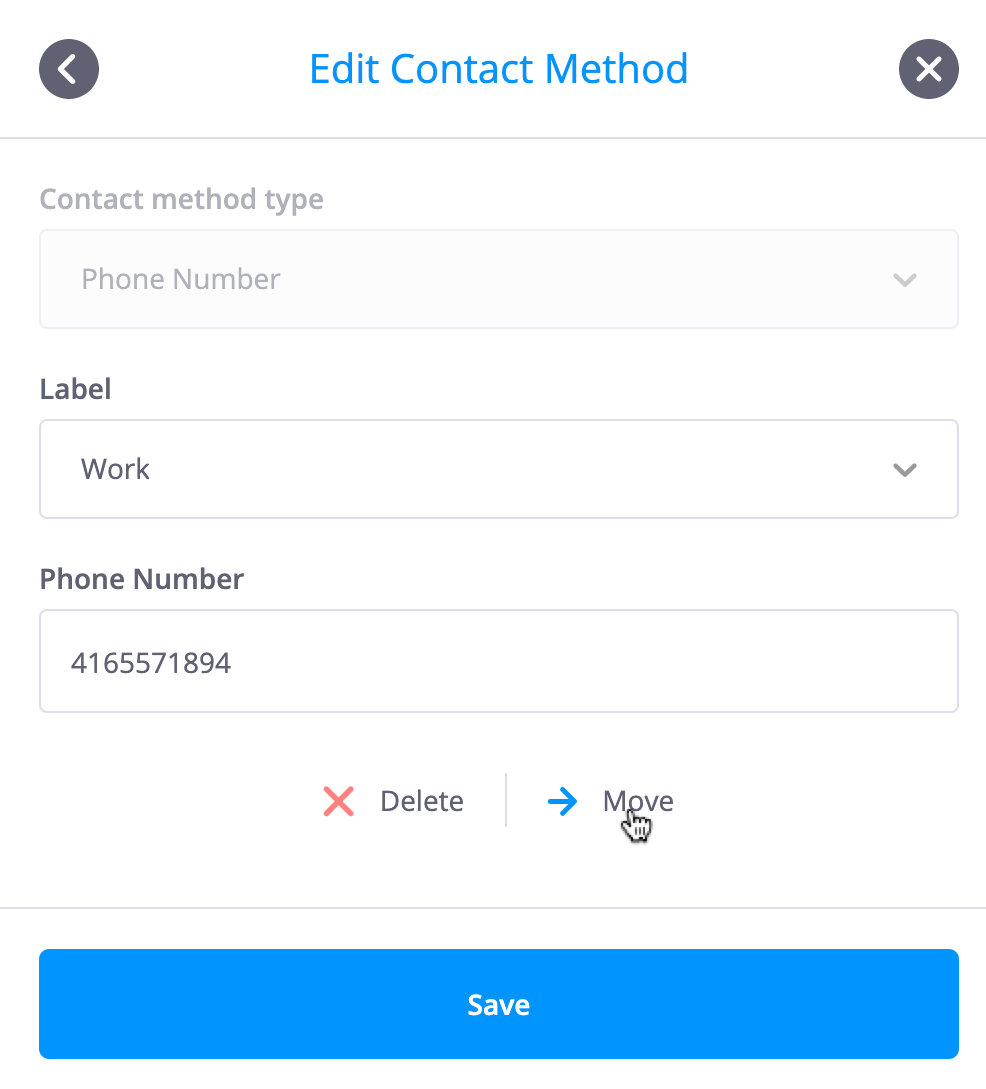
A list of configured Contacts is displayed, and the Contact Method may be moved to a selected Contact. Note that a new Contact may be created for the reallocation of the Contact method.
Press the
 button to complete the configuration change.
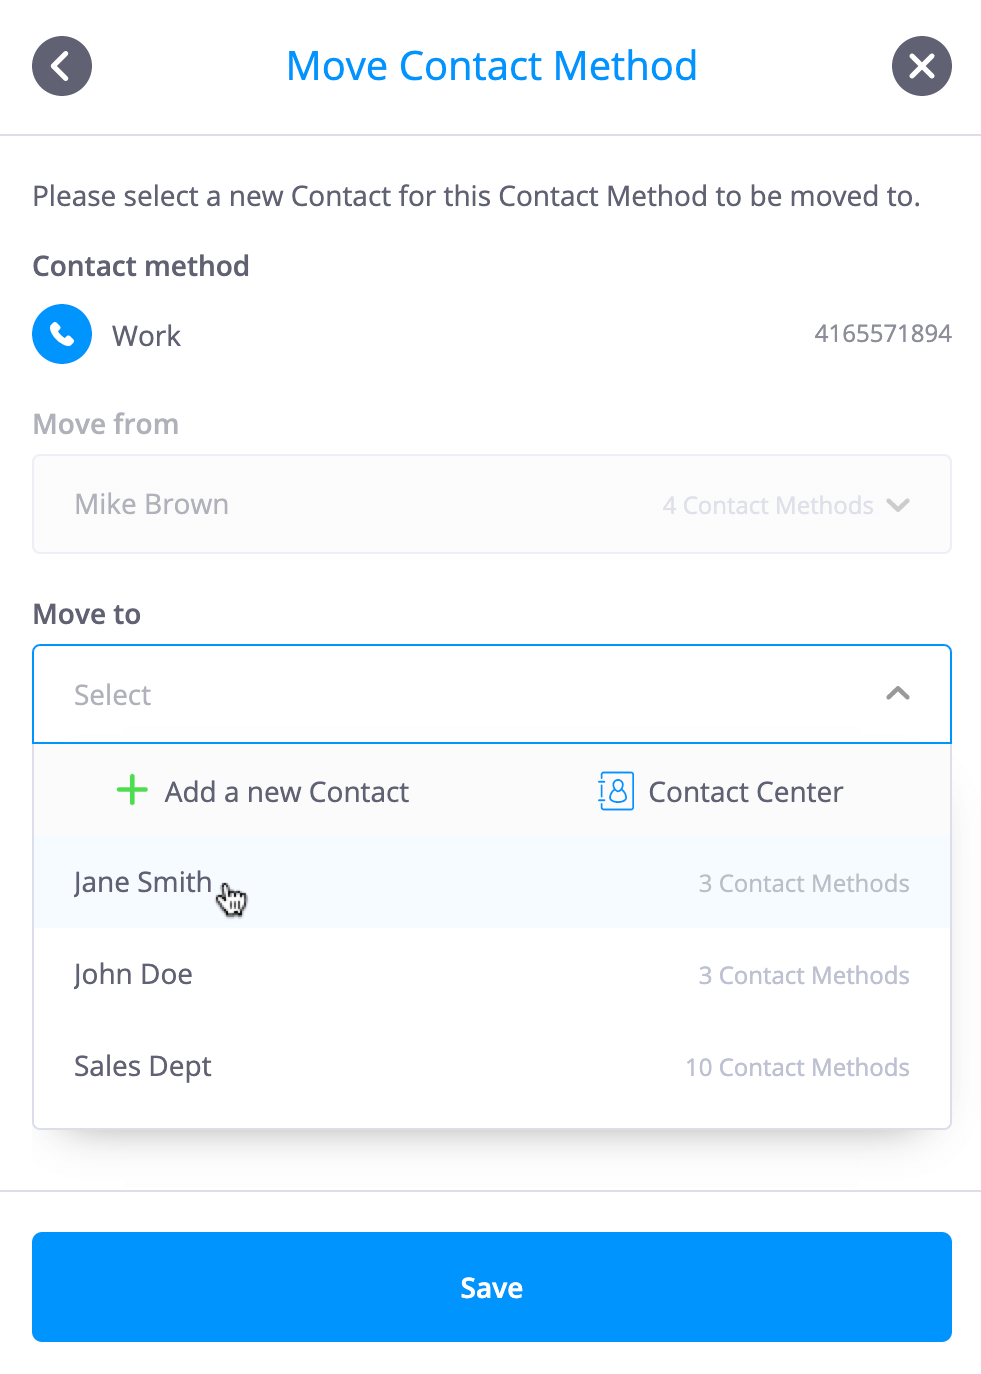 Back to the top
Deleting Contacts and Contact Methods
Contacts and Contact Methods cannot be deleted if objects on the workspace or other configuration attributes are dependent on the parameter that you wish to delete. The phone.systems™ logic will determine if dependencies exist and, if necessary, prevent Contacts and Contact Methods from being deleted. If such an event occurs, full details are displayed detailing the dependency or dependencies that need to be remedied before this Contact or Contact method may be deleted.
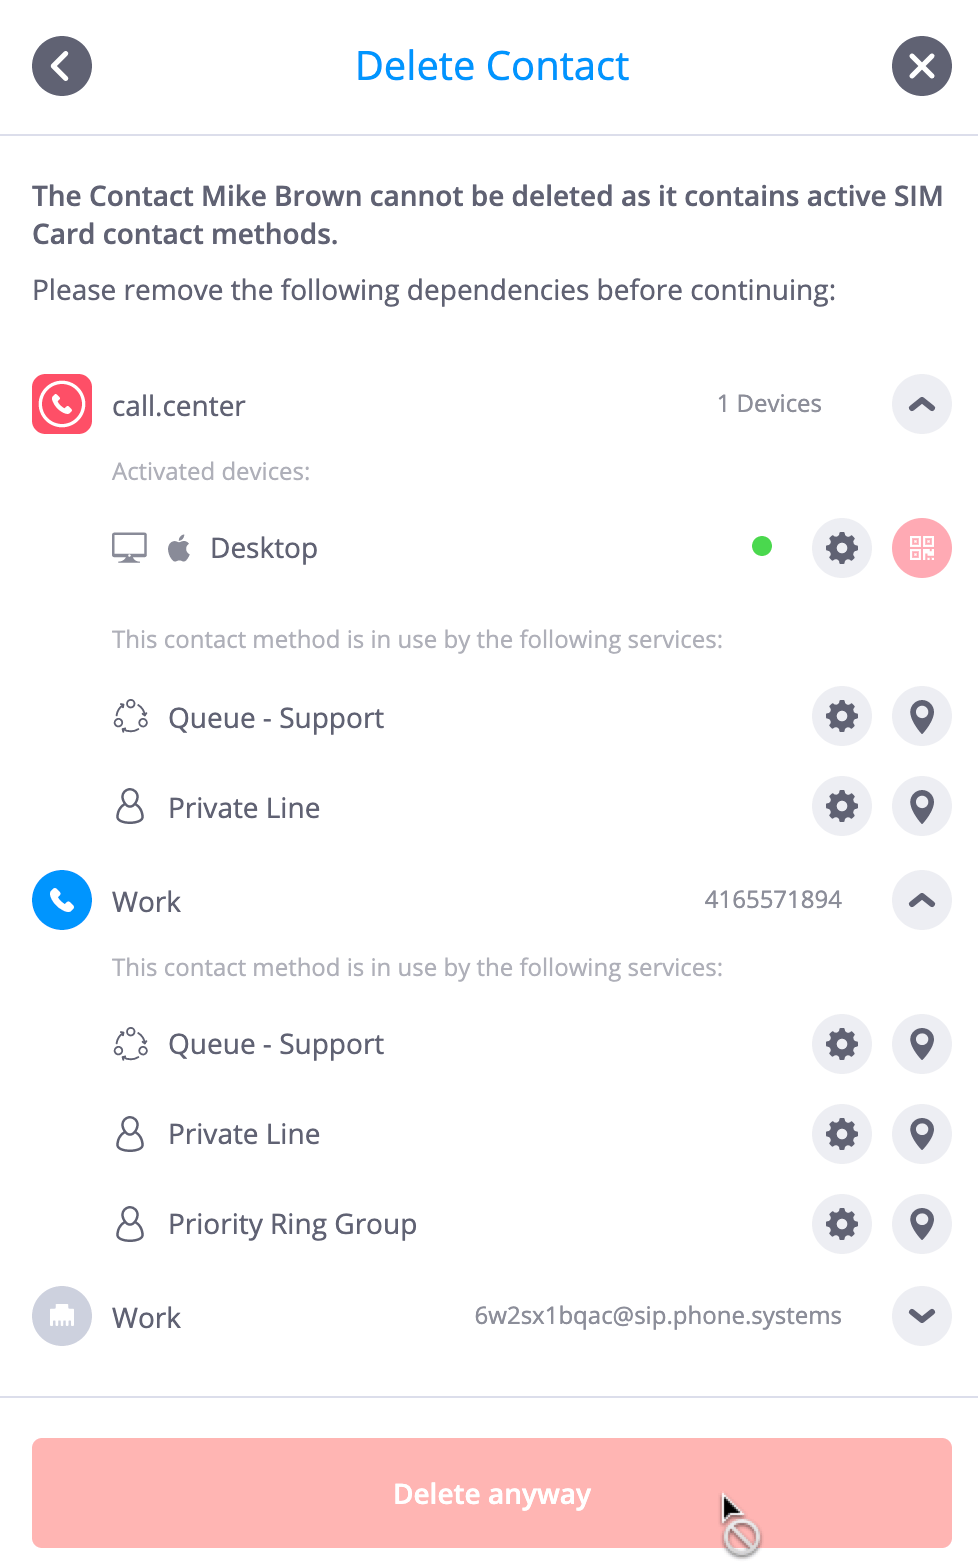
Note that the dependency informational window includes a
 option. In the case described above where the contact methods listed are currently in use on the
workspace (that is, allocated to objects), then this option is not available for selection and the
contact may not be deleted. However, as shown below, if the Contact Method/s listed are not in
use, then the
 option is highlighted and may be selected in order to delete the Contact.
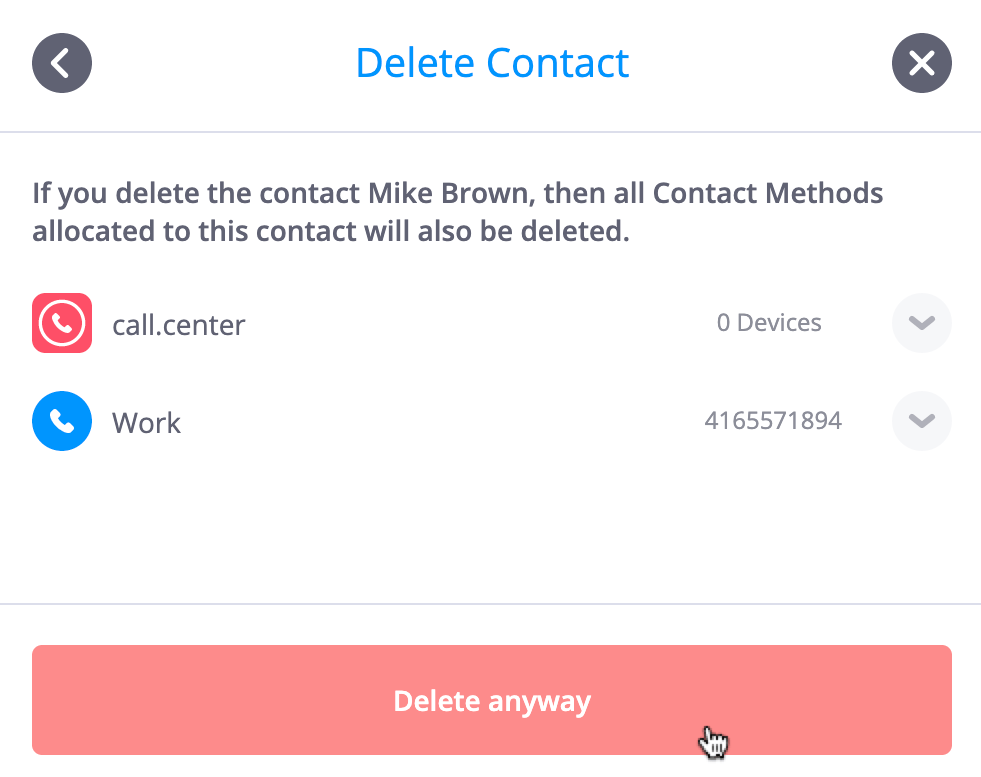
Similarly, in the figures shown below, the user wishes to delete a selected Contact Method (labeled "Work"). However, that Contact Method is in use by multiple objects on the workspace, and a window showing the relevant dependencies is displayed. In this case, the phone number must first be removed from the Queue object (Queue-Support), and two Ring Group objects (Private Line and Priority Ring Group), before the Contact Method may be deleted.
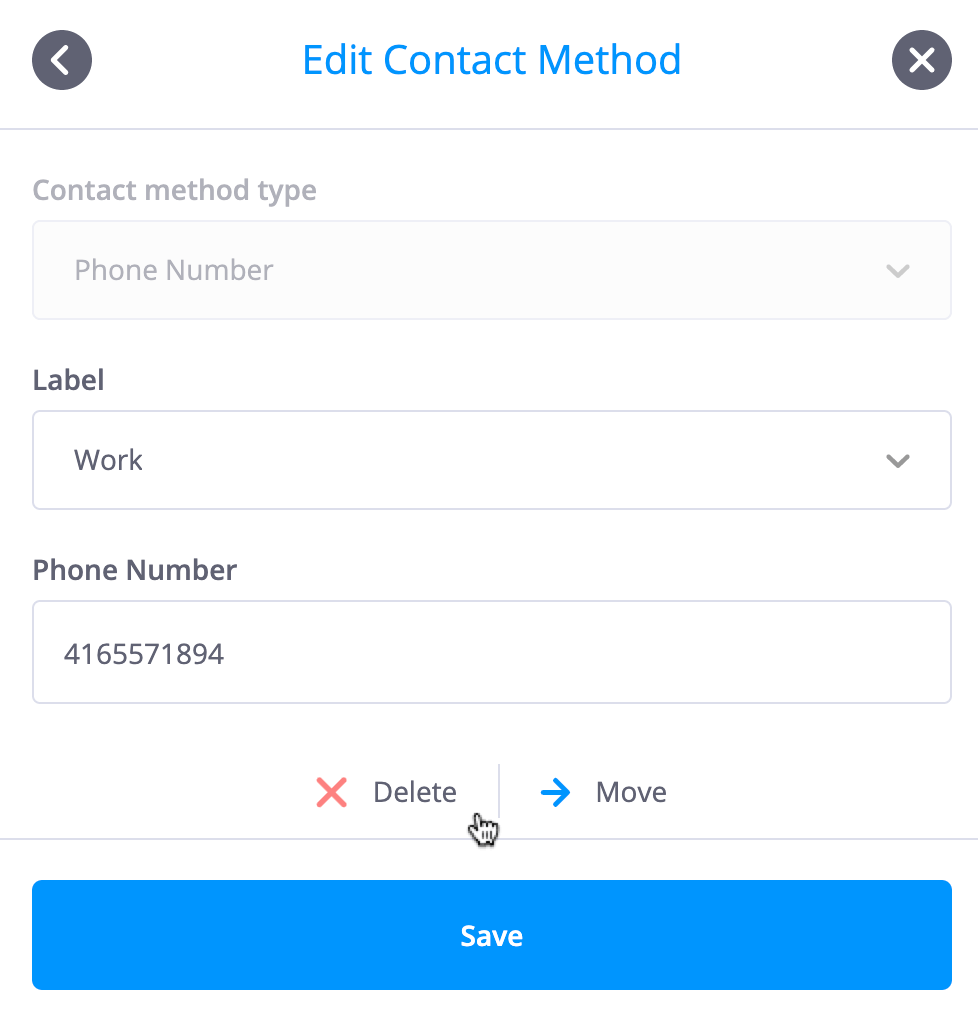
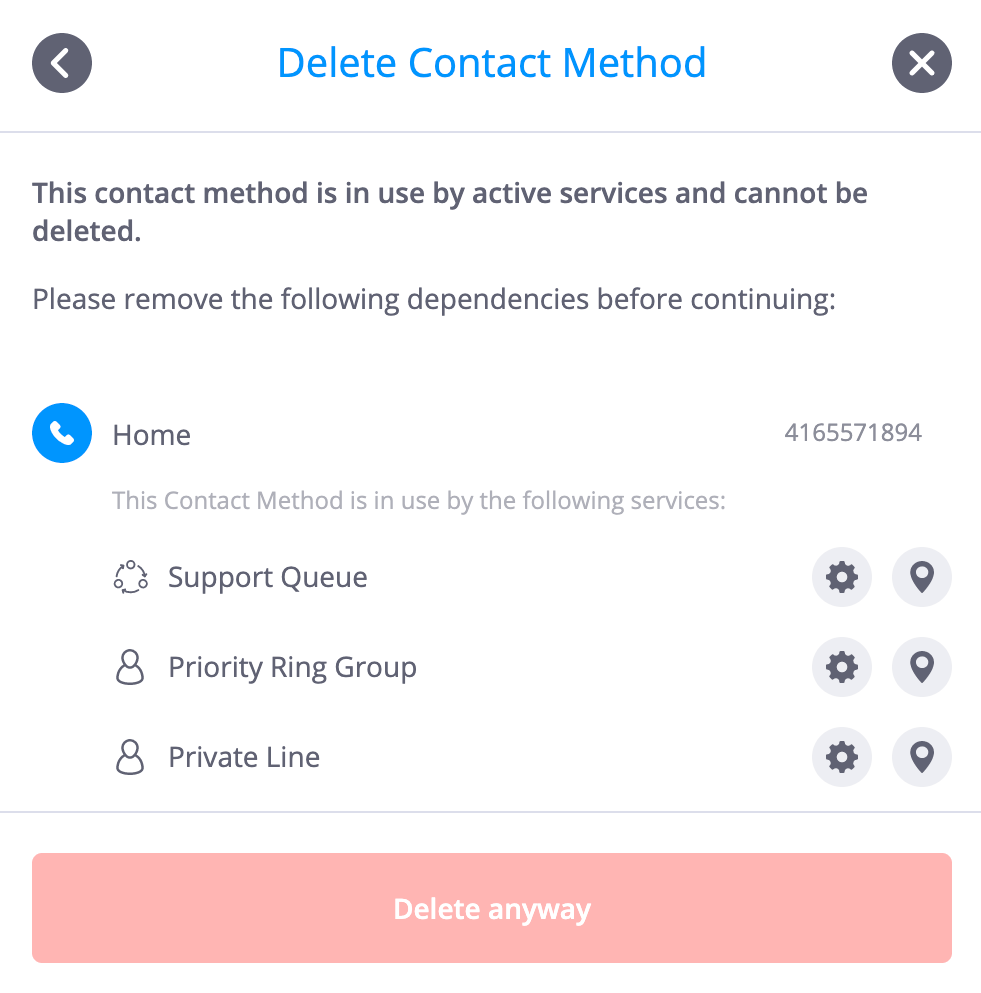
Media Center
The Media Center allows users to manage audio files and compile playlists. These audio files are used by objects such as Voice Menu, Audio Playback and Ring Group to play messages and/or music to waiting callers. Audio files of maximum size 14 megabytes may be uploaded to phone.systems™ from a local drive (in .mp3/.wav/.flac/.ogg format), or may be recorded directly.
These audio files and playlists are used for general purposes such as music-on-hold, or may serve a specific function such as in the case of a Voice Menu object, where a message directs callers to press numbers on their phone in order to be connected with people or departments.
The Media Center is accessed by clicking on the
![]() button in the upper right-hand corner of the workspace. This opens the
Settings menu, which includes the
button in the upper right-hand corner of the workspace. This opens the
Settings menu, which includes the
 option.
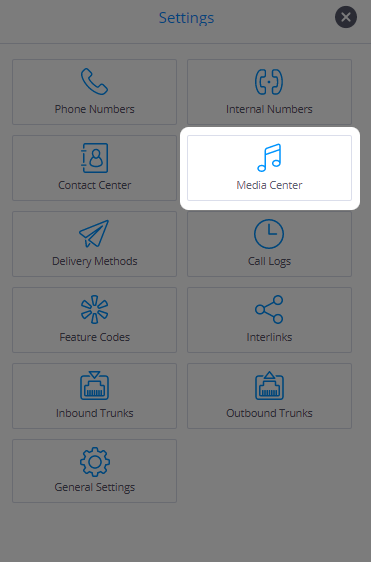
It should be noted that audio files and playlists may be pre-configured in the Media Center before adding objects such as Voice Menus to the workspace, which require these audio files. However, the Media Center is made available to users during object configuration, and audio files and playlists may be managed at that time.
Back to the topUploading files
Selecting the option
 within the Media Center window opens a menu allowing
users to select and upload an audio file from a local/networked drive or
removable media.
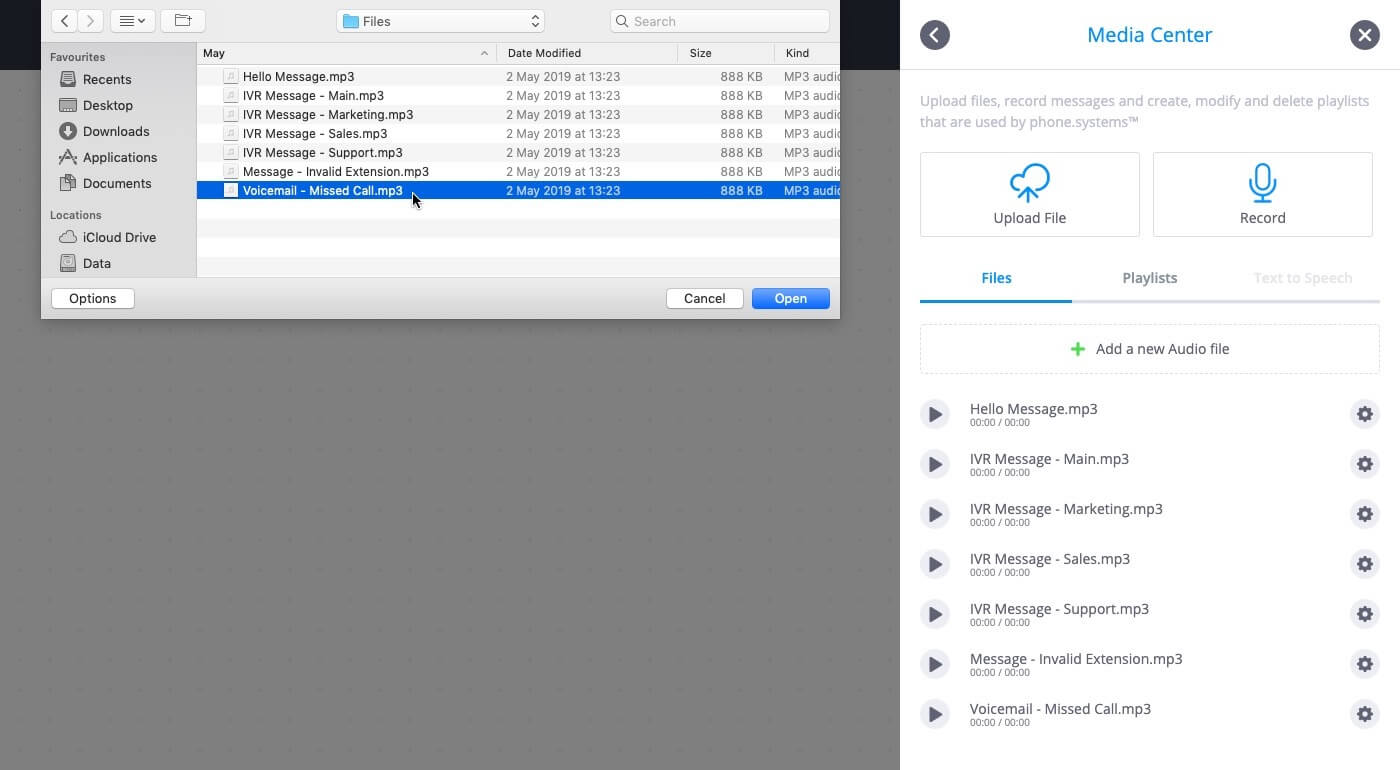
Selecting the
 menu option displays a list of the media files that have been
uploaded or directly recorded. The audio file length (in the format minutes:seconds) is shown,
and the message may be played back by clicking on the
![]() icon.
icon.
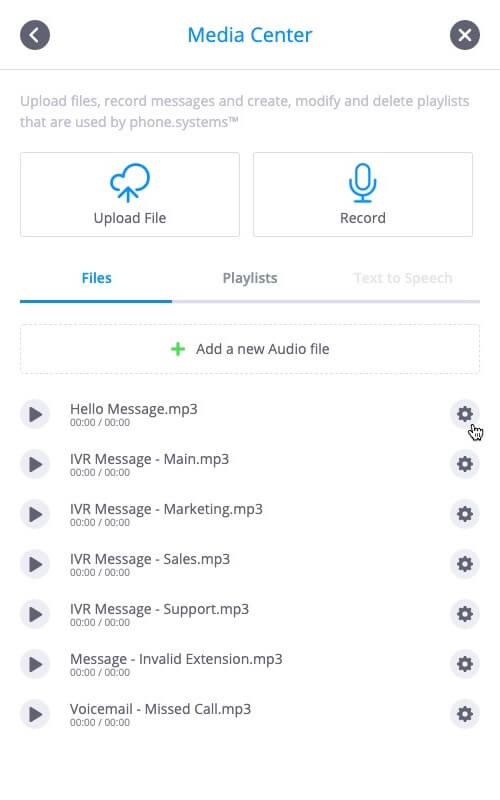
Selecting the
![]() icon to the right of each listed file allows users to change the name of the
file, or delete that file from the Media Center. New audio files are added by
clicking on
icon to the right of each listed file allows users to change the name of the
file, or delete that file from the Media Center. New audio files are added by
clicking on
 .
.
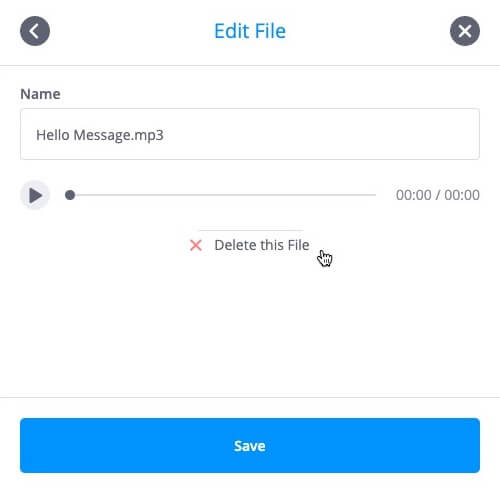 Back to the top
Recording messages
Selecting the option
 within the Media Center window opens a menu allowing users to directly record
audio messages on the host device that includes an audio input.
A name must be provided for the audio file, and recording is activated and
completed by clicking on the
![]() and
and
![]() icons respectively. The audio file is saved for later use by selecting
icons respectively. The audio file is saved for later use by selecting
 .
.
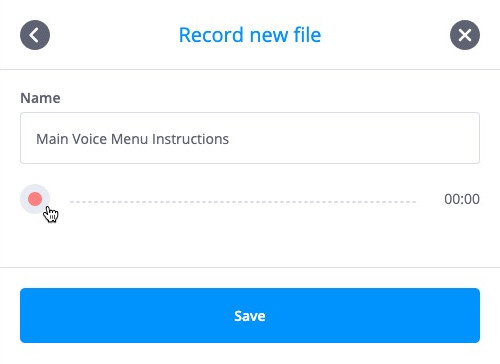
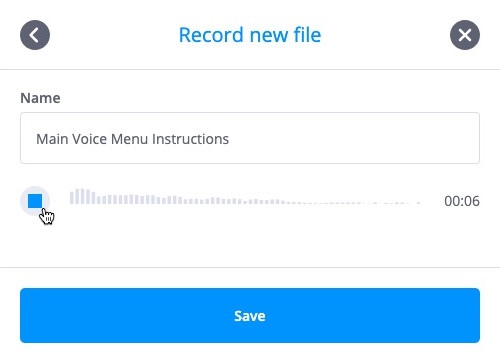
Creating playlists
Selecting the
 menu option displays the configured playlists, and new playlist may be created by clicking on
 .
A name must be provided for new playlist, after which files may be added to that playlist.
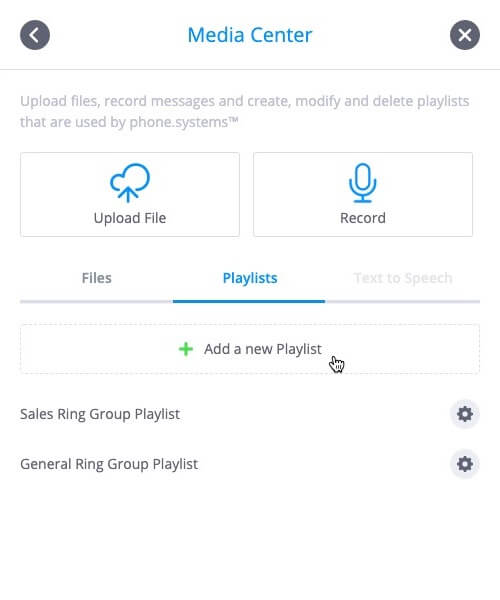
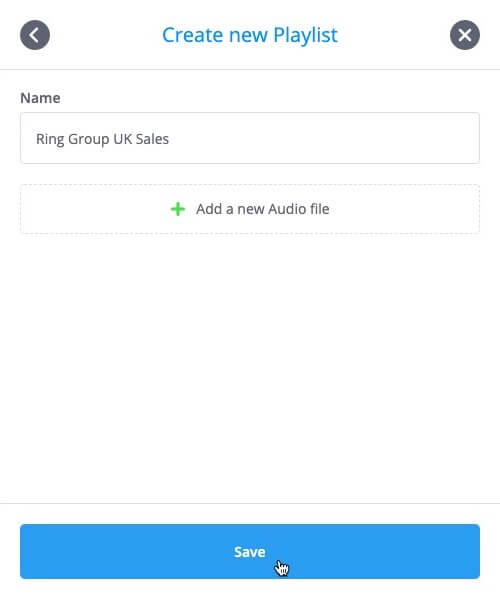
Once a playlist has been created, clicking on the
![]() icon to the right of the
playlist allows users to edit the name of that playlist, add or delete files
from the playlist, or delete the entire playlist.
icon to the right of the
playlist allows users to edit the name of that playlist, add or delete files
from the playlist, or delete the entire playlist.
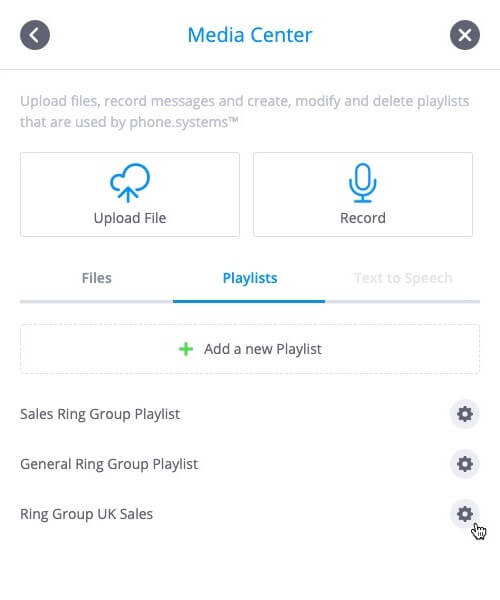
Files are added to the playlist by selecting
 .
All previously uploaded or recorded audio files are listed, and they may be
selected and added to the playlist one at a time.
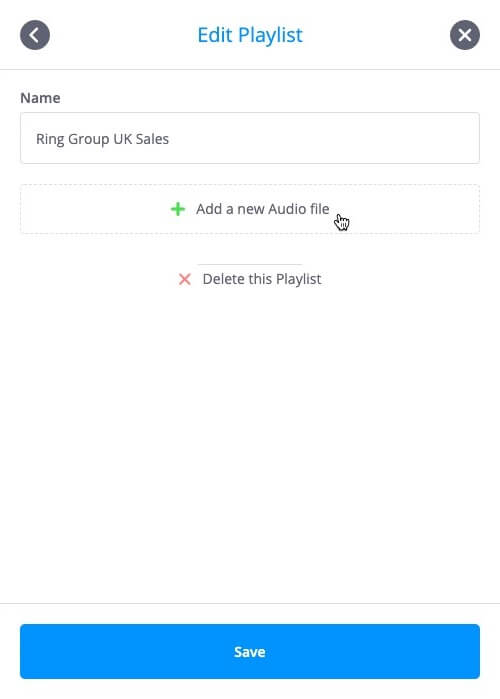
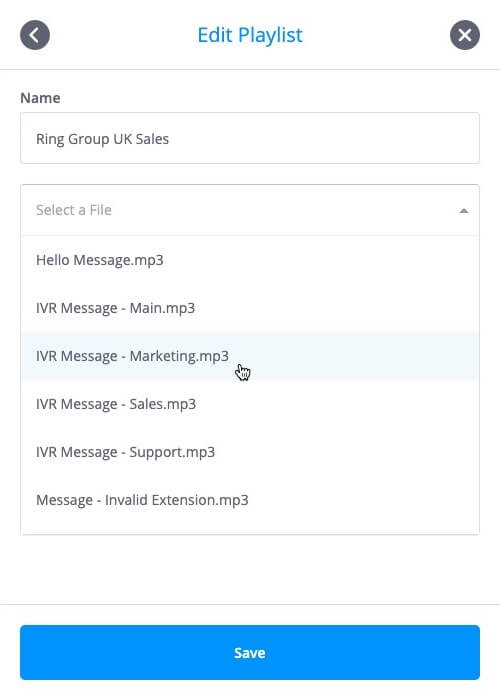
Editing and deleting media files and playlists
The phone.systems™ Media Center provides full flexibility in editing and deleting media files and playlists. However, it is important that dependencies must be considered when attempting to delete files and playlists. Parameters cannot be deleted if objects on the workspace or other configuration attributes are dependant on the parameter that you wish to delete. The phone.systems™ logic will determine if dependencies exist, and, if necessary, prevent parameters from being deleted.
For example, in the figures below, a Ring Group "Main Sales Ring Group" includes a music-on-hold playlist called "Sales Ring Group Playlist". It is logical this playlist may not be deleted while it is in use by the Ring Group object. Therefore, any attempt to delete this playlist will fail, until this playlist is no longer in use by any objects on the workspace.
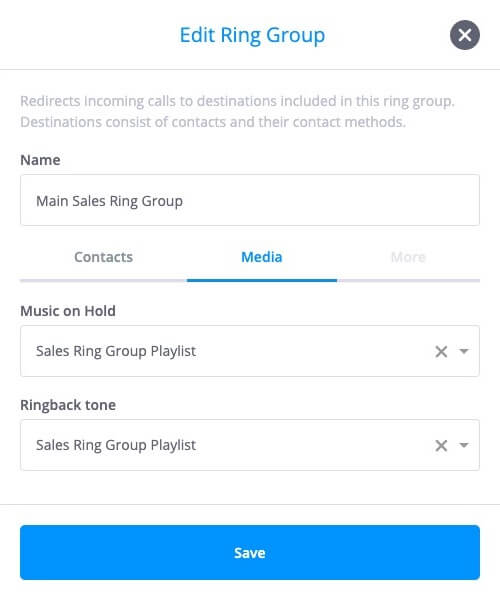
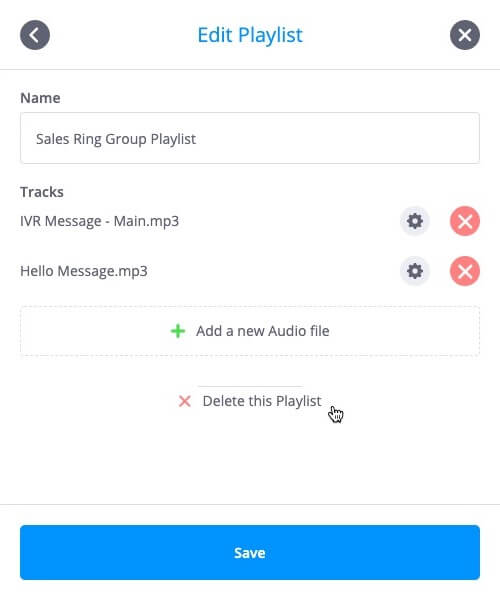
Delivery Methods
The configuration and management of Delivery Methods is accessed by selecting the
 option listed in the "Settings" menu
![]() .
.
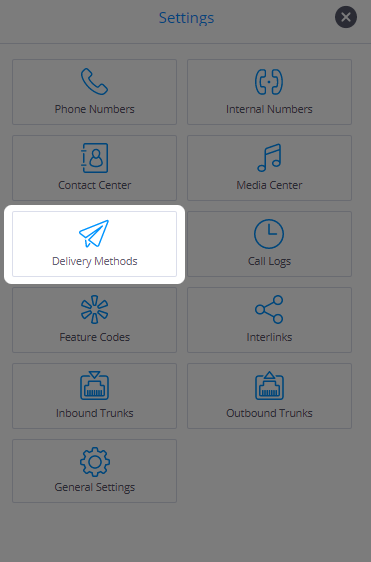
Delivery Methods define how audio and text files generated by phone.systems™ are delivered to users. These files include voicemail, notification messages and faxes, as well as the contents of recorded calls. The delivery methods supported are Email, Dropbox, FTP, SFTP, Google Drive and OneDrive.
The Delivery Methods options for the various phone.systems™ objects and call recordings are as follows:
Voicemail object - Email, Dropbox, FTP, SFTP, Google Drive, OneDrive
Call Recorder object - Email, Dropbox, FTP, SFTP, Google Drive, OneDrive
Fax object - Email, Dropbox, FTP, SFTP, Google Drive, OneDrive
Notification object - Email
SIP Account call recording - Email, Dropbox, FTP, SFTP, Google Drive, OneDrive
Please note:
-
Call recordings are immediately forwarded to an email address or file server on the completion of each call as per the configured file delivery method.
-
It is possible that call recordings sent to an email address may not be delivered due to file size limitations applicable to the destination email server. Note that if the destination server rejects the file, then that file will be unrecoverable. The approximate file size of call recordings is 7 MB per hour, and users should carefully consider this parameter when selecting a file Delivery Method.
-
Call recordings are not uploaded to phone.systems™ servers, and phone.systems™ does not read, process or permanently store the recordings.
There are a number of optional, dynamic fields that may be used to provide important information regarding the email message or file to be delivered, and these fields are automatically updated by phone.systems™ with the relevant information on the creation of each message or file.
For the Email delivery method, these dynamic fields may be included in the subject and the text body of the email. For Dropbox, FTP, SFTP, Google Drive and OneDrive delivery methods, the dynamic fields are used to define the file name, and include relevant information (such as a date/time stamp) in that file name. Note that time stamps are set according to the “System” time zone selected under the General Settings configuration option.
The dynamic fields are:
-
%{src_number} - the source (caller) phone number
-
%{src_name} - the source (caller) name
-
%{dst_number} - the destination (called) phone number
-
%{service_name} - the name of the service (or object type such as Voicemail, Notification, Call Recorder, Fax or SIP Account) that generated this file
-
%{call_time} - the full date and time of the call in the format year-month-day hour-minute-second (for example, 2019-11-25 14-31-26)
-
%{call_year} - the year of the call
-
%{call_month} - the month of the call
-
%{call_day} - the day of the call
-
%{call_hour} - the hour of the call
Adding a Delivery Method
Create a new Delivery Method with the
 button, and then select one of the available Delivery Method types from the dropdown menu.
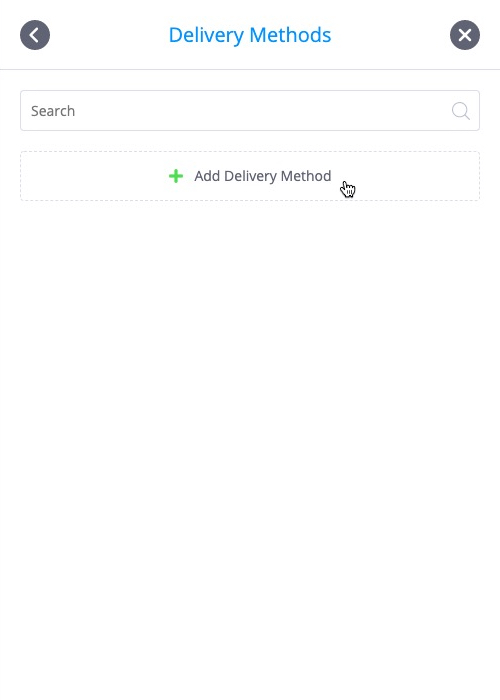
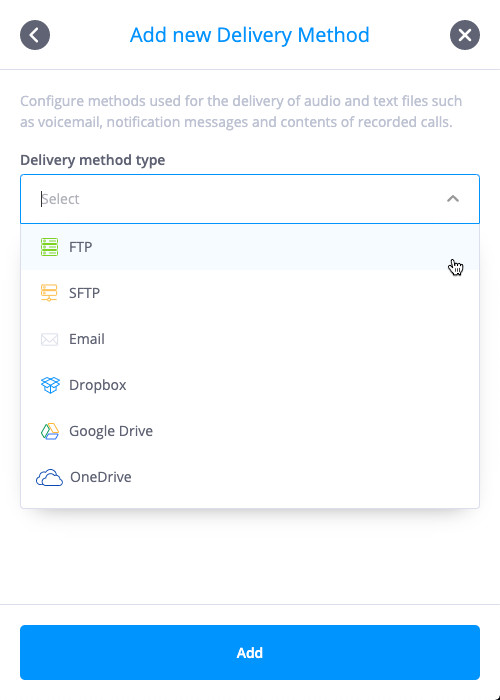
In addition to accessing the Delivery Method configuration from the "Settings" menu, new Delivery
Methods may be directly added as required during object configuration by selecting the
 option for that object.
The configuration options for each Delivery Method are as follows:
Back to the topDelivery Method: Email
The Email Delivery Method now supports multiple email destinations. This allows you to receive the same notification or call-recording at several destinations by using a single Email delivery method.
The information to be entered is:
-
A friendly name for identifying this Delivery Method.
-
The email address to which the message should be sent. This email address may have been previously configured as Contact Method for a specific contact, or may be added as required.
The subject to be included in the email.
The email message text, including the optional dynamic fields as detailed above.
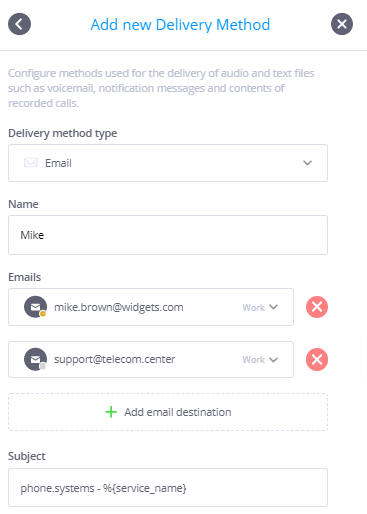
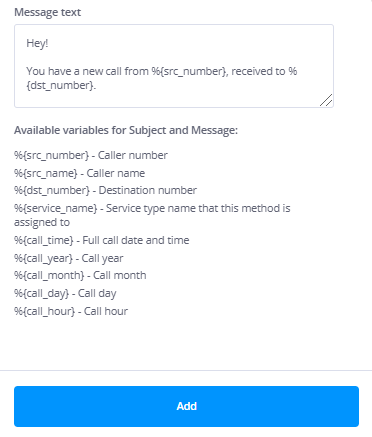
Delivery Method: Dropbox
The information to be entered is:
A friendly name for identifying this Delivery Method.
-
The format of the file name to be stored in the Dropbox, including the optional dynamic fields as detailed above.
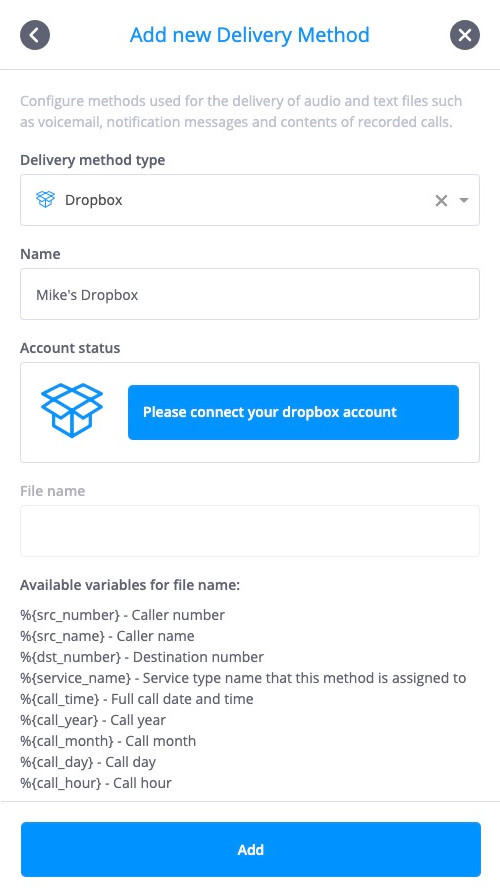
Note that the user must have an existing Dropbox account in order to use this Delivery Method, and
must be signed into that Dropbox account by selecting
 .
.
Delivery Method: Google Drive
The information to be entered is:
-
A friendly name for identifying this Delivery Method.
-
The name of the directory in which the files should be stored.
-
The format of the file name to be stored in Google Drive, including the optional dynamic fields as detailed above.
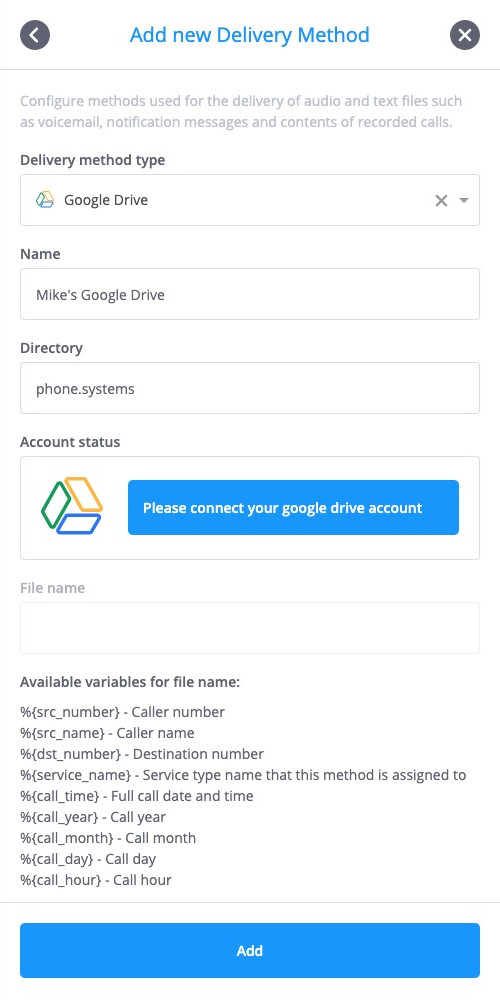
Note that the user must have an existing Google Drive account in order to use this Delivery
Method, and must be signed into that Google Drive account by selecting
 .
.
Delivery Method: OneDrive
The information to be entered is:
-
A friendly name for identifying this Delivery Method.
-
The name of the directory in which the files should be stored.
-
The format of the file name to be stored in OneDrive, including the optional dynamic fields as detailed above.
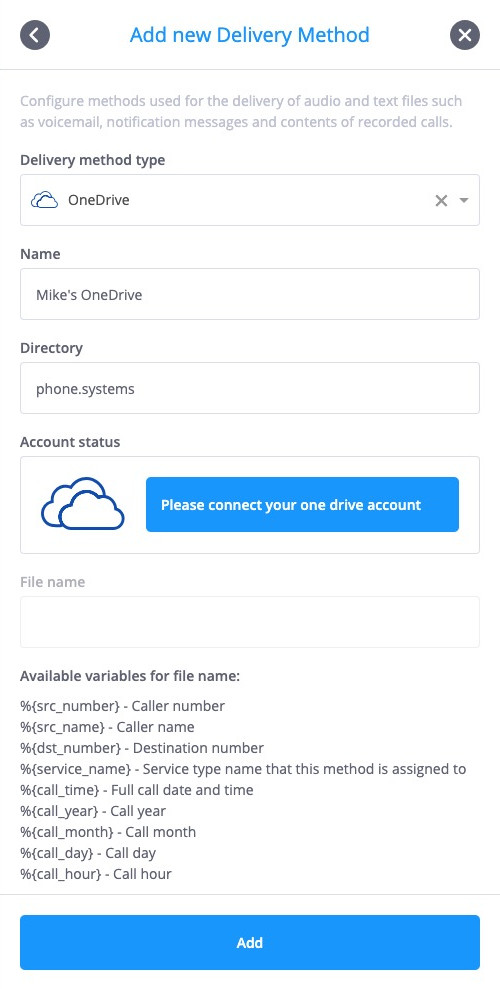
Note that the user must have an existing Microsoft OneDrive account in order to use this Delivery
Method, and must be signed into that OneDrive account by selecting

Delivery Method: FTP
The information to be entered is:
-
A friendly name for identifying this Delivery Method.
-
The FTP address to which the message should be sent.
-
The port number used for connecting to the FTP server.
-
The name of the directory in which the files should be stored on the FTP server.
-
An option to operate the FTP in an active or passive mode. By default, the active mode is enabled.
-
Enable or disable anonymous FTP. By default, anonymous FTP is disabled.
-
The Username and Password for access to the FTP server.
-
The format of the file name to be stored on the FTP server, including the optional dynamic fields as detailed above.
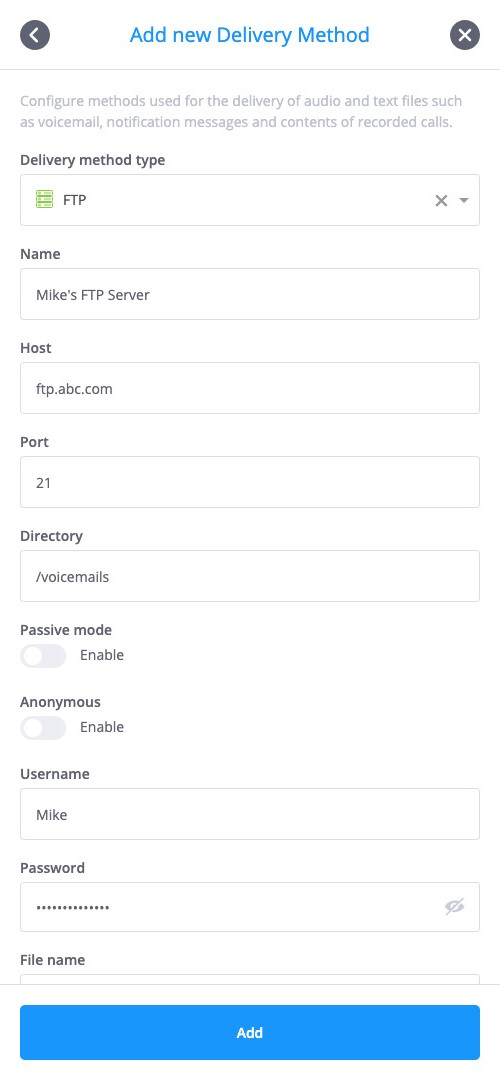 Back to the top
Delivery Method: SFTP
The information to be entered is:
-
A friendly name for identifying this Delivery Method.
-
The FTP address to which the message should be sent.
-
The port number used for connecting to the FTP server.
-
The name of the directory in which the files should be stored on the FTP server.
-
An option to operate the FTP in an active or passive mode. By default, the active mode is enabled.
-
Enable or disable anonymous FTP. By default, anonymous FTP is disabled.
-
The Username and Password for access to the FTP server.
-
The format of the file name to be stored on the FTP server, including the optional dynamic fields as detailed above.
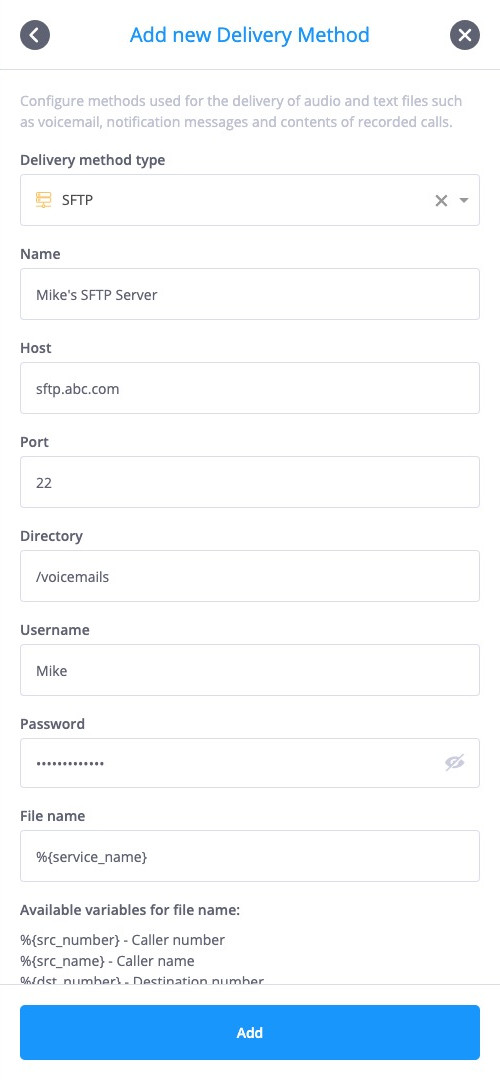 Back to the top
Re-authorizing 3rd party Delivery Method
In some cases, cloud delivery methods such as Dropbox, Google Drive and OneDrive will require re-authorization due to reasons such as the phone.systems™ application being disconnected from the 3rd party cloud server or access being restricted, or the service being removed from the list of permitted applications.
Each such connection may be re-authorized by selecting the
 option listed in the "Settings" menu
![]() , and
using the
, and
using the
![]() button to access the Delivery Method that requires reauthorization. Click on the “refresh” button
button to access the Delivery Method that requires reauthorization. Click on the “refresh” button
 next to the account status indicator
 , and a window will be opened, allowing the entry of the required service credentials. If the
connection access has already been revoked, then the account status should display the
 state. The connection may be re-established by using the Refresh
 button.
Additionally, objects that use the Delivery Method for which access has been revoked will include
a highlighted “settings” icon
![]() to warn the user that re-authorization is required.
to warn the user that re-authorization is required.
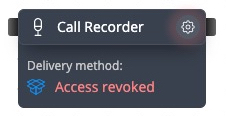 Back to the top
Object Relations and Locations
The Delivery Methods list displays each individually configured Delivery Method, as well as the relationship between those Delivery Methods and the various objects on the workspace.
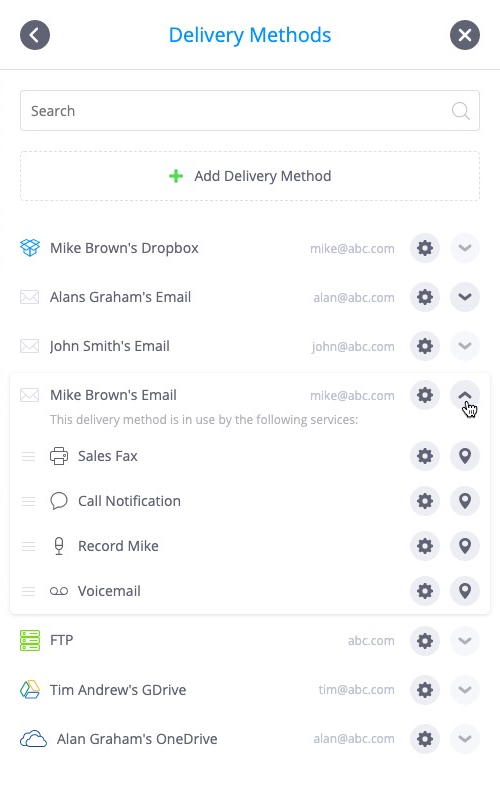
Clicking on the
![]() icon displays a list of objects to which the selected Delivery Method has been assigned, and
selecting the
icon displays a list of objects to which the selected Delivery Method has been assigned, and
selecting the
![]() icon next to each of those objects allows direct access to the object’s properties for viewing or
optional reconfiguration. Clicking on the
icon next to each of those objects allows direct access to the object’s properties for viewing or
optional reconfiguration. Clicking on the
![]() icon will locate that particular object on the phone.systems™ workspace.
icon will locate that particular object on the phone.systems™ workspace.
Replacing a Delivery Method
This feature allows users to replace all of the instances of an existing Delivery Method with an alternative Delivery Method. For example, a Dropbox Delivery Method that is currently in use by multiple objects on the phone.systems™ workspace must be replaced by a OneDrive Delivery Method. This “replacement” utility may be used to conveniently implement the required change on a system-wide basis.
To replace a Delivery Method, access the Delivery Method to be replaced via the
![]() button adjacent to that Delivery Method. In the bottom section of the window, click on the
button adjacent to that Delivery Method. In the bottom section of the window, click on the
 button. The subsequent window will provide a drop-down menu listing all of the configured Delivery
Methods that may be used to replace the current Delivery Method. Note that a new Delivery Method
may be added if required. Click on
 to complete this action.
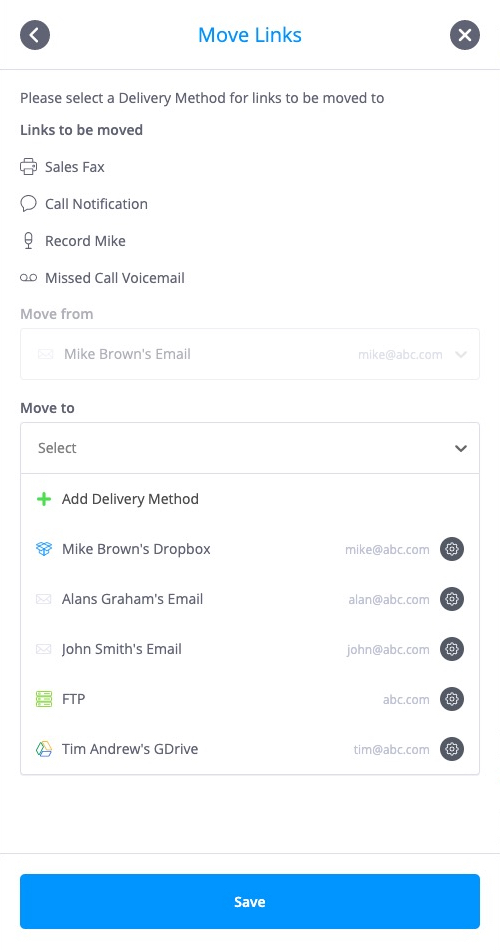
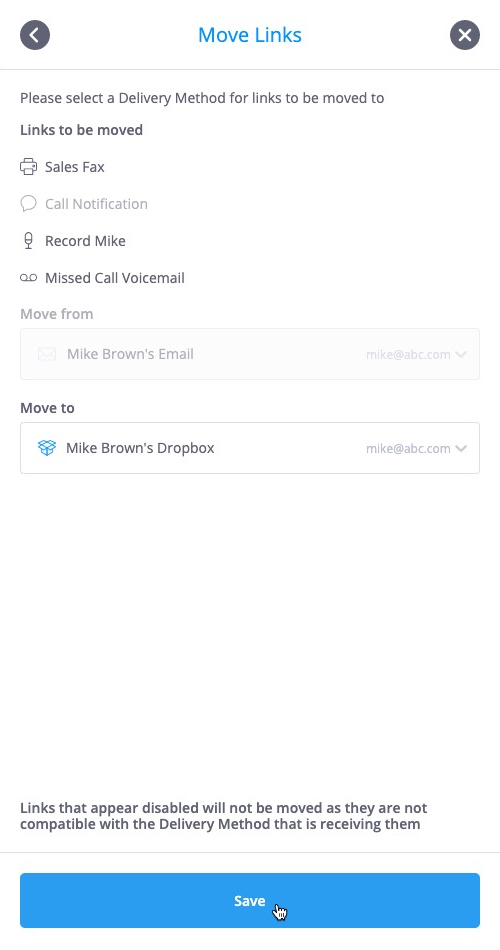
If the Delivery Method is not supported by the target Object or Service (for example the “Notification” object only supports Email as a Delivery Method), then the original Delivery Method will not be replaced for that specific Object or Service.
Back to the topDeleting a Delivery Method
To remove a Delivery Method that is no longer required, access the Delivery Methods settings using
the
![]() button, and click on
button, and click on
 . A “Delete Delivery Method” window will appear, displaying the details of the Delivery Method
to be terminated. To complete the action, click the “Delete anyway” button, or select the
![]() icon to leave the Delivery Method unchanged.
icon to leave the Delivery Method unchanged.
Please note that if the Delivery Method is used by an object in the phone.systems™ environment, the dialog window will display those dependencies which must be removed before the Delivery Method can be deleted.
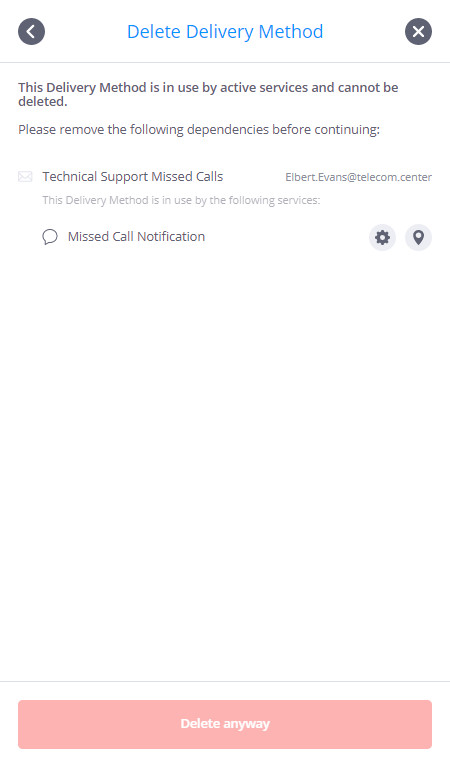 Back to the top
General Settings
Select the generic settings for the phone.systems™ interface
Back to the topLanguage
Select a language for the phone.systems™ user interface, with the current options being English, Russian, Lithuanian and Latvian.
Back to the topSystem Time Zone
Set the system time zone used when displaying call logs, and for routing calls via the Time Router object when the “System” time zone option is selected.
Back to the topSystem emails
Set the email address, which will be used to send notifications about certain events that have occurred in the phone.systems™ account.
Events that will trigger the system email notification:
-
When a Delivery method is given an “Access revoked” status
Whenever one of the delivery methods in the cloud storage (Google Drive, Dropbox, OneDrive) receives the status “Access revoked”, an email will be sent to report this.
-
When there are failed deliveries on the account
Whenever the system detects a failed delivery to one of the delivery methods, an email will be sent to report this. If deliveries consistently fail, follow up emails are sent every 24 hours.
Insufficient channel decline code
Select the decline code that will be sent to the caller if that call failed due to insufficient channel capacity. By default, the code “480 - Temporarily Unavailable” will be used, but this may be replaced by any of the following decline codes:
403 - Forbidden
480 - Temporarily Unavailable
486 - Busy Here
600 - Busy Everywhere
603 - Decline
Dark Mode
Enable or disable the dark mode for the phone.systems™ user interface.
Back to the topCall Logs, Charts and Statistics
phone.systems™ includes extensive call logs, charts and statistics that aid in
the monitoring, control and optimization of cloud PBX services. This data is
accessed by selecting the
 option from the "Settings" menu
![]() .
.
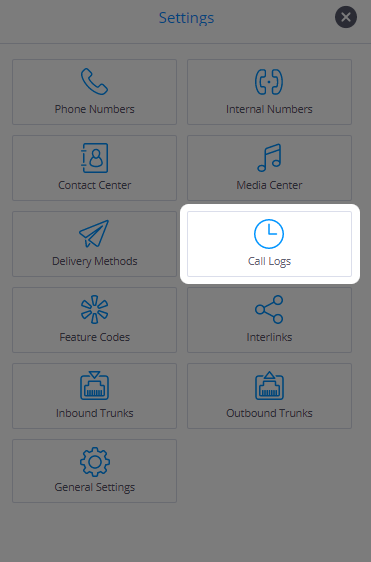
Six different informational sections are presented within the Call Logs, and each of these options may be selected by the available tabs - Call charts, Lost calls, Active calls, Contact statistics, CDRs (which includes Outbound CDRs, Inbound CDRs, Contact outbound CDRs.
Contact inbound CDRs and Queue & Ring Group CDRs) and Delivery logs. Note that all data is correlated with the time zone selected under the "General Settings" menu.
Data may be exported and sent to a defined email address. For more details, see Exporting Call Logs later in this section.
Back to the topCall Charts
Three call charts are presented as follows:
-
Unique Call Amount – This chart is a combination of both the inbound and outbound call charts, and displays the number of unique inbound calls received by Contacts, added to the number of unique outbound calls placed by Contacts within the phone.systems™ PBX. The chart does not include repeated call forwarding attempts of a single inbound call to a specific Contact. Both answered and unanswered calls are included.
-
Unique Inbound Calls – Displays the number of unique received (inbound) calls that are forwarded to Contacts within the phone.systems™ PBX. The chart does not include repeated call forwarding attempts of a single inbound call to a specific Contact. Inbound calls received by both Phone Number and Internal Number objects are included.
-
Unique Outbound Calls – Displays the number of unique outbound calls placed by Contacts within the phone.systems™ PBX. The chart does not include call forwarding attempts to the PSTN that originated from Ring Group or Queue objects.
Note that moving the mouse cursor over the line or bar charts displays a pop-up window that includes detailed statistics.
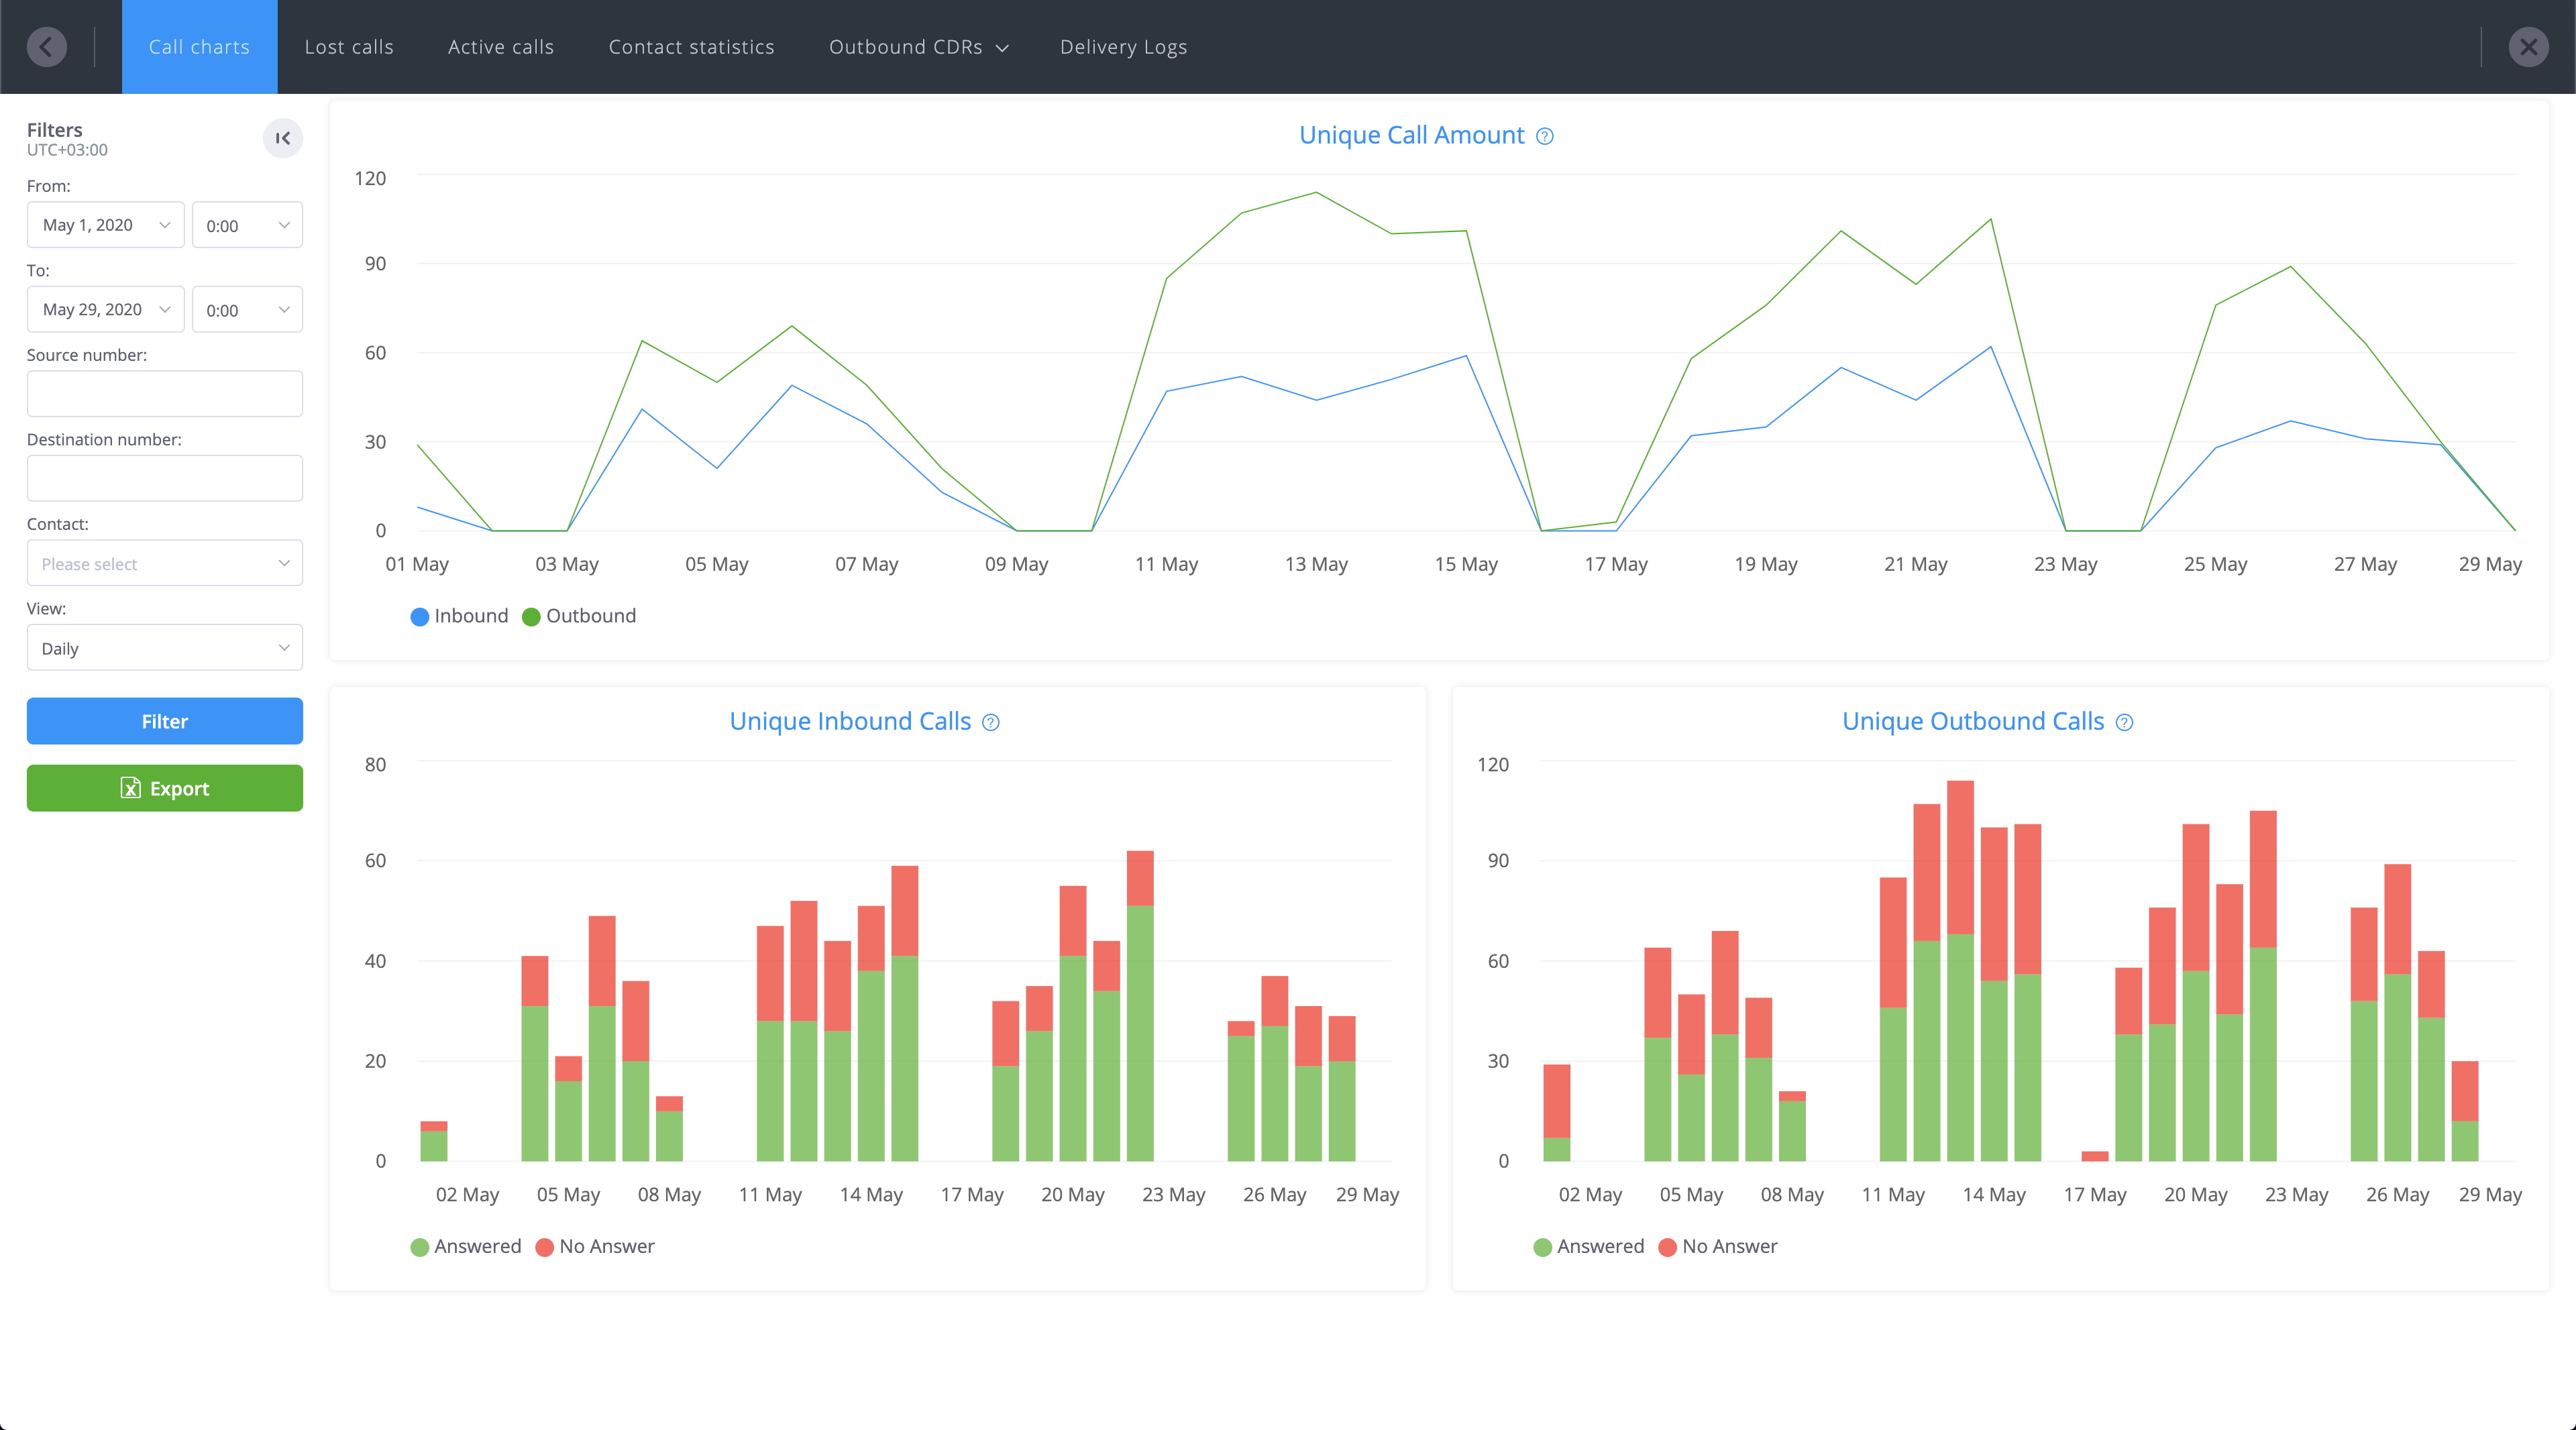
Filters may be applied to the charts as follows:
-
From/To – Allows the selection of the time period applicable to the displayed statistics.
-
Source or Destination number – Results are filtered according to a provided source or destination phone number. Note that a partial phone number may be entered, such as an area code prefix.
-
Contact - Results are filtered according to a single selected Contact.
-
View - Defines how the results are to be displayed. The "Daily" option groups results by day, "Hourly" groups results by the hour, and "Grouped" selects results by the exact hour of the day, performing a peak-time analysis and allowing users to determine at which time of the day most calls were received or made.
Clicking on a selected point in the Call Amount chart causes the automatic application of date/time filters, resulting in the display of specific call distribution data, and facilitating the convenient analysis of call statistics.
Back to the topLost Calls
Displays the number of lost inbound and outbound calls, both as absolute numbers and as a percentage of the total calls made or received.
Important - For the purpose of these statistics, a lost call is defined as a call that was not answered or connected, and, if applicable, there was no successful callback to that same number. The callback time limit is dependent on the View filter, with a "Daily" filter applying a 24 hour limit, and "Hourly"/"Grouped" filters applying a one hour time limit.
Four call charts are presented as follows:
Rate % of Lost Inbound Calls - Displays the number of lost inbound calls as a percentage of the total calls received.
Number of Lost Inbound Calls - Displays the number of lost inbound calls as an absolute number.
Rate % of Lost Outbound Calls - Displays the number of lost outbound calls as a percentage of the total calls made.
Number of Lost Outbound Calls - Displays the number of lost outbound calls as an absolute number.
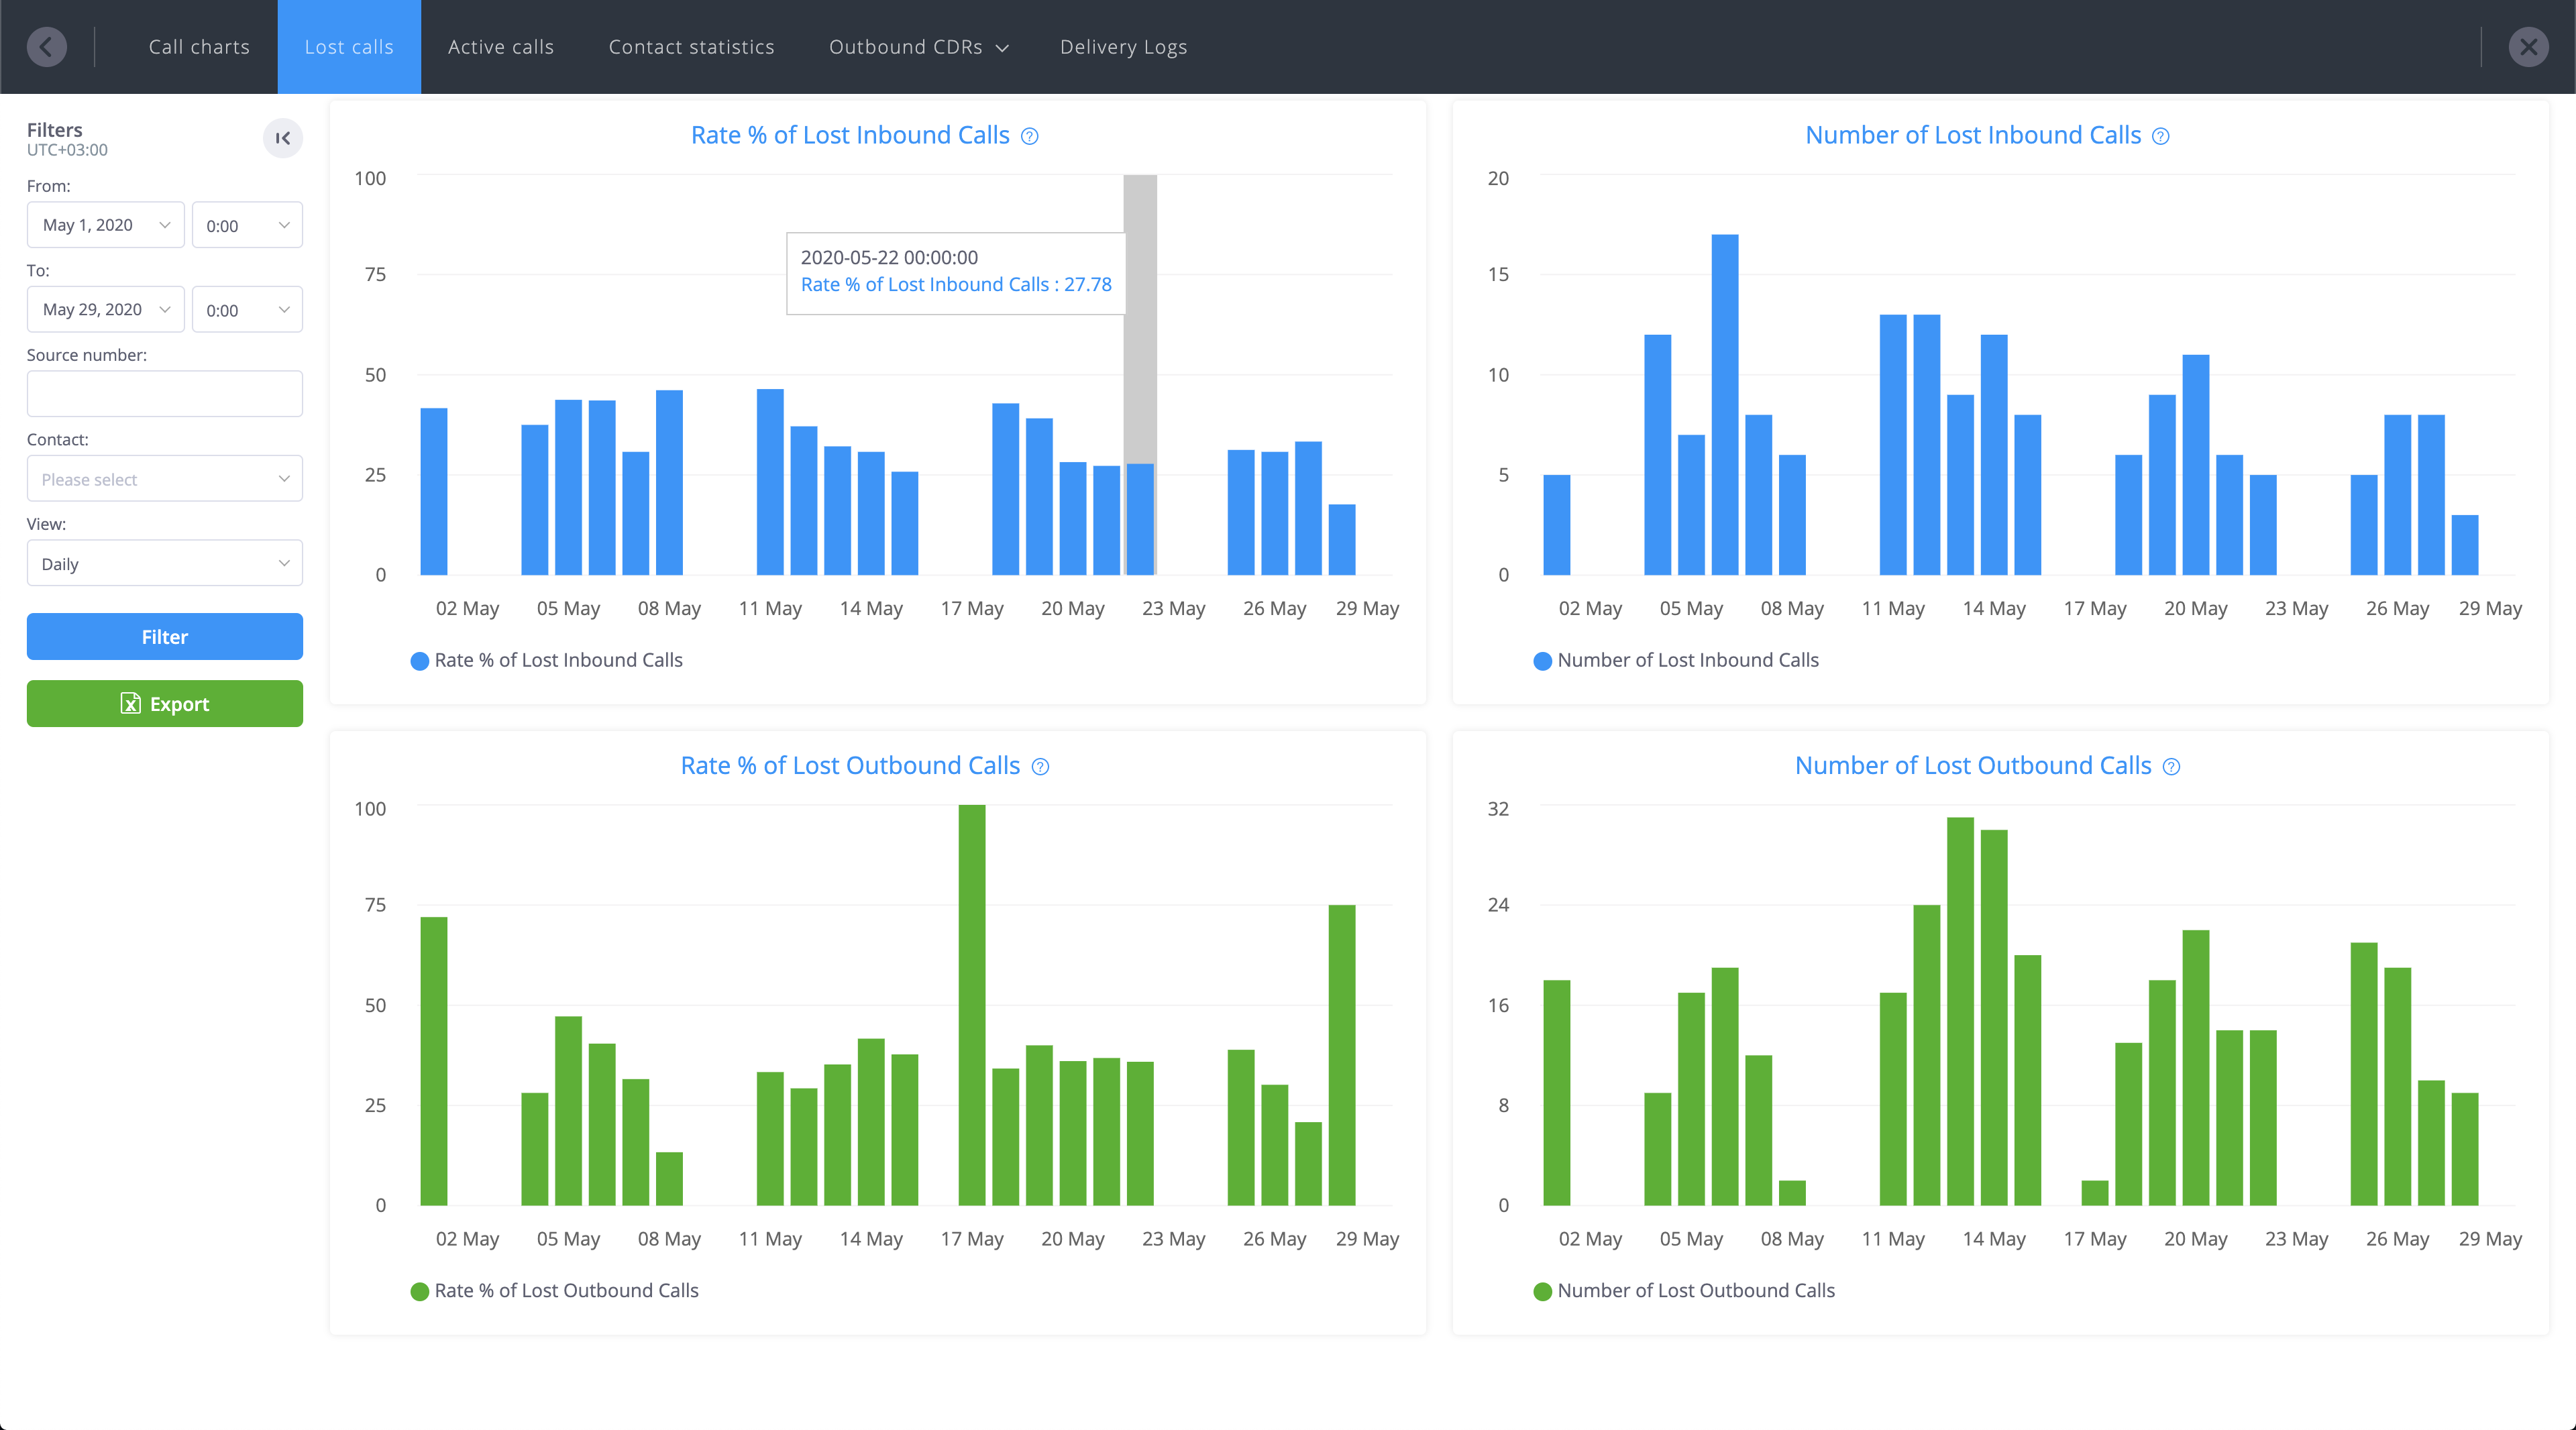
Filters may be applied to the charts as follows:
-
From/To – Allows the selection of the time period applicable to the displayed statistics.
-
Source number – Results are limited to a provided source phone number. Note that a complete phone number must be entered.
-
Contact - Results are filtered according to a single selected Contact.
-
View – Defines how the results are to be displayed. The "Daily" option groups results by day, "Hourly" groups results by the hour, and "Grouped" selects results by an exact hour of the day, performing a peak-time analysis and allowing users to determine at which time of the day most calls were received or made.
Active Calls
Displays the number of active calls (including both inbound and outbound calls) that were connected at the same time. Due to the concurrent nature of these calls, this chart is also useful for managing and optimizing channel capacity.

Filters may be applied to the charts as follows:
-
From/To – Allows the selection of the time period applicable to the displayed statistics.
-
Source or Destination number – Results are filtered according to a provided source or destination phone number. Note that a partial phone number may be entered, such as an area code prefix.
-
Contact - Results are filtered according to a single selected Contact.
-
View – Defines how the results are to be displayed. The "Daily" option groups results by day, "Hourly" groups results by the hour, and "Grouped" selects results by an exact hour of the day, performing a peak-time analysis and allowing users to determine at which time of the day most calls were received or made.
Contact Statistics
Displays inbound and outbound call statistics on a per-contact basis, providing in-depth information regarding the individual usage of the phone.systems™ call facilities.
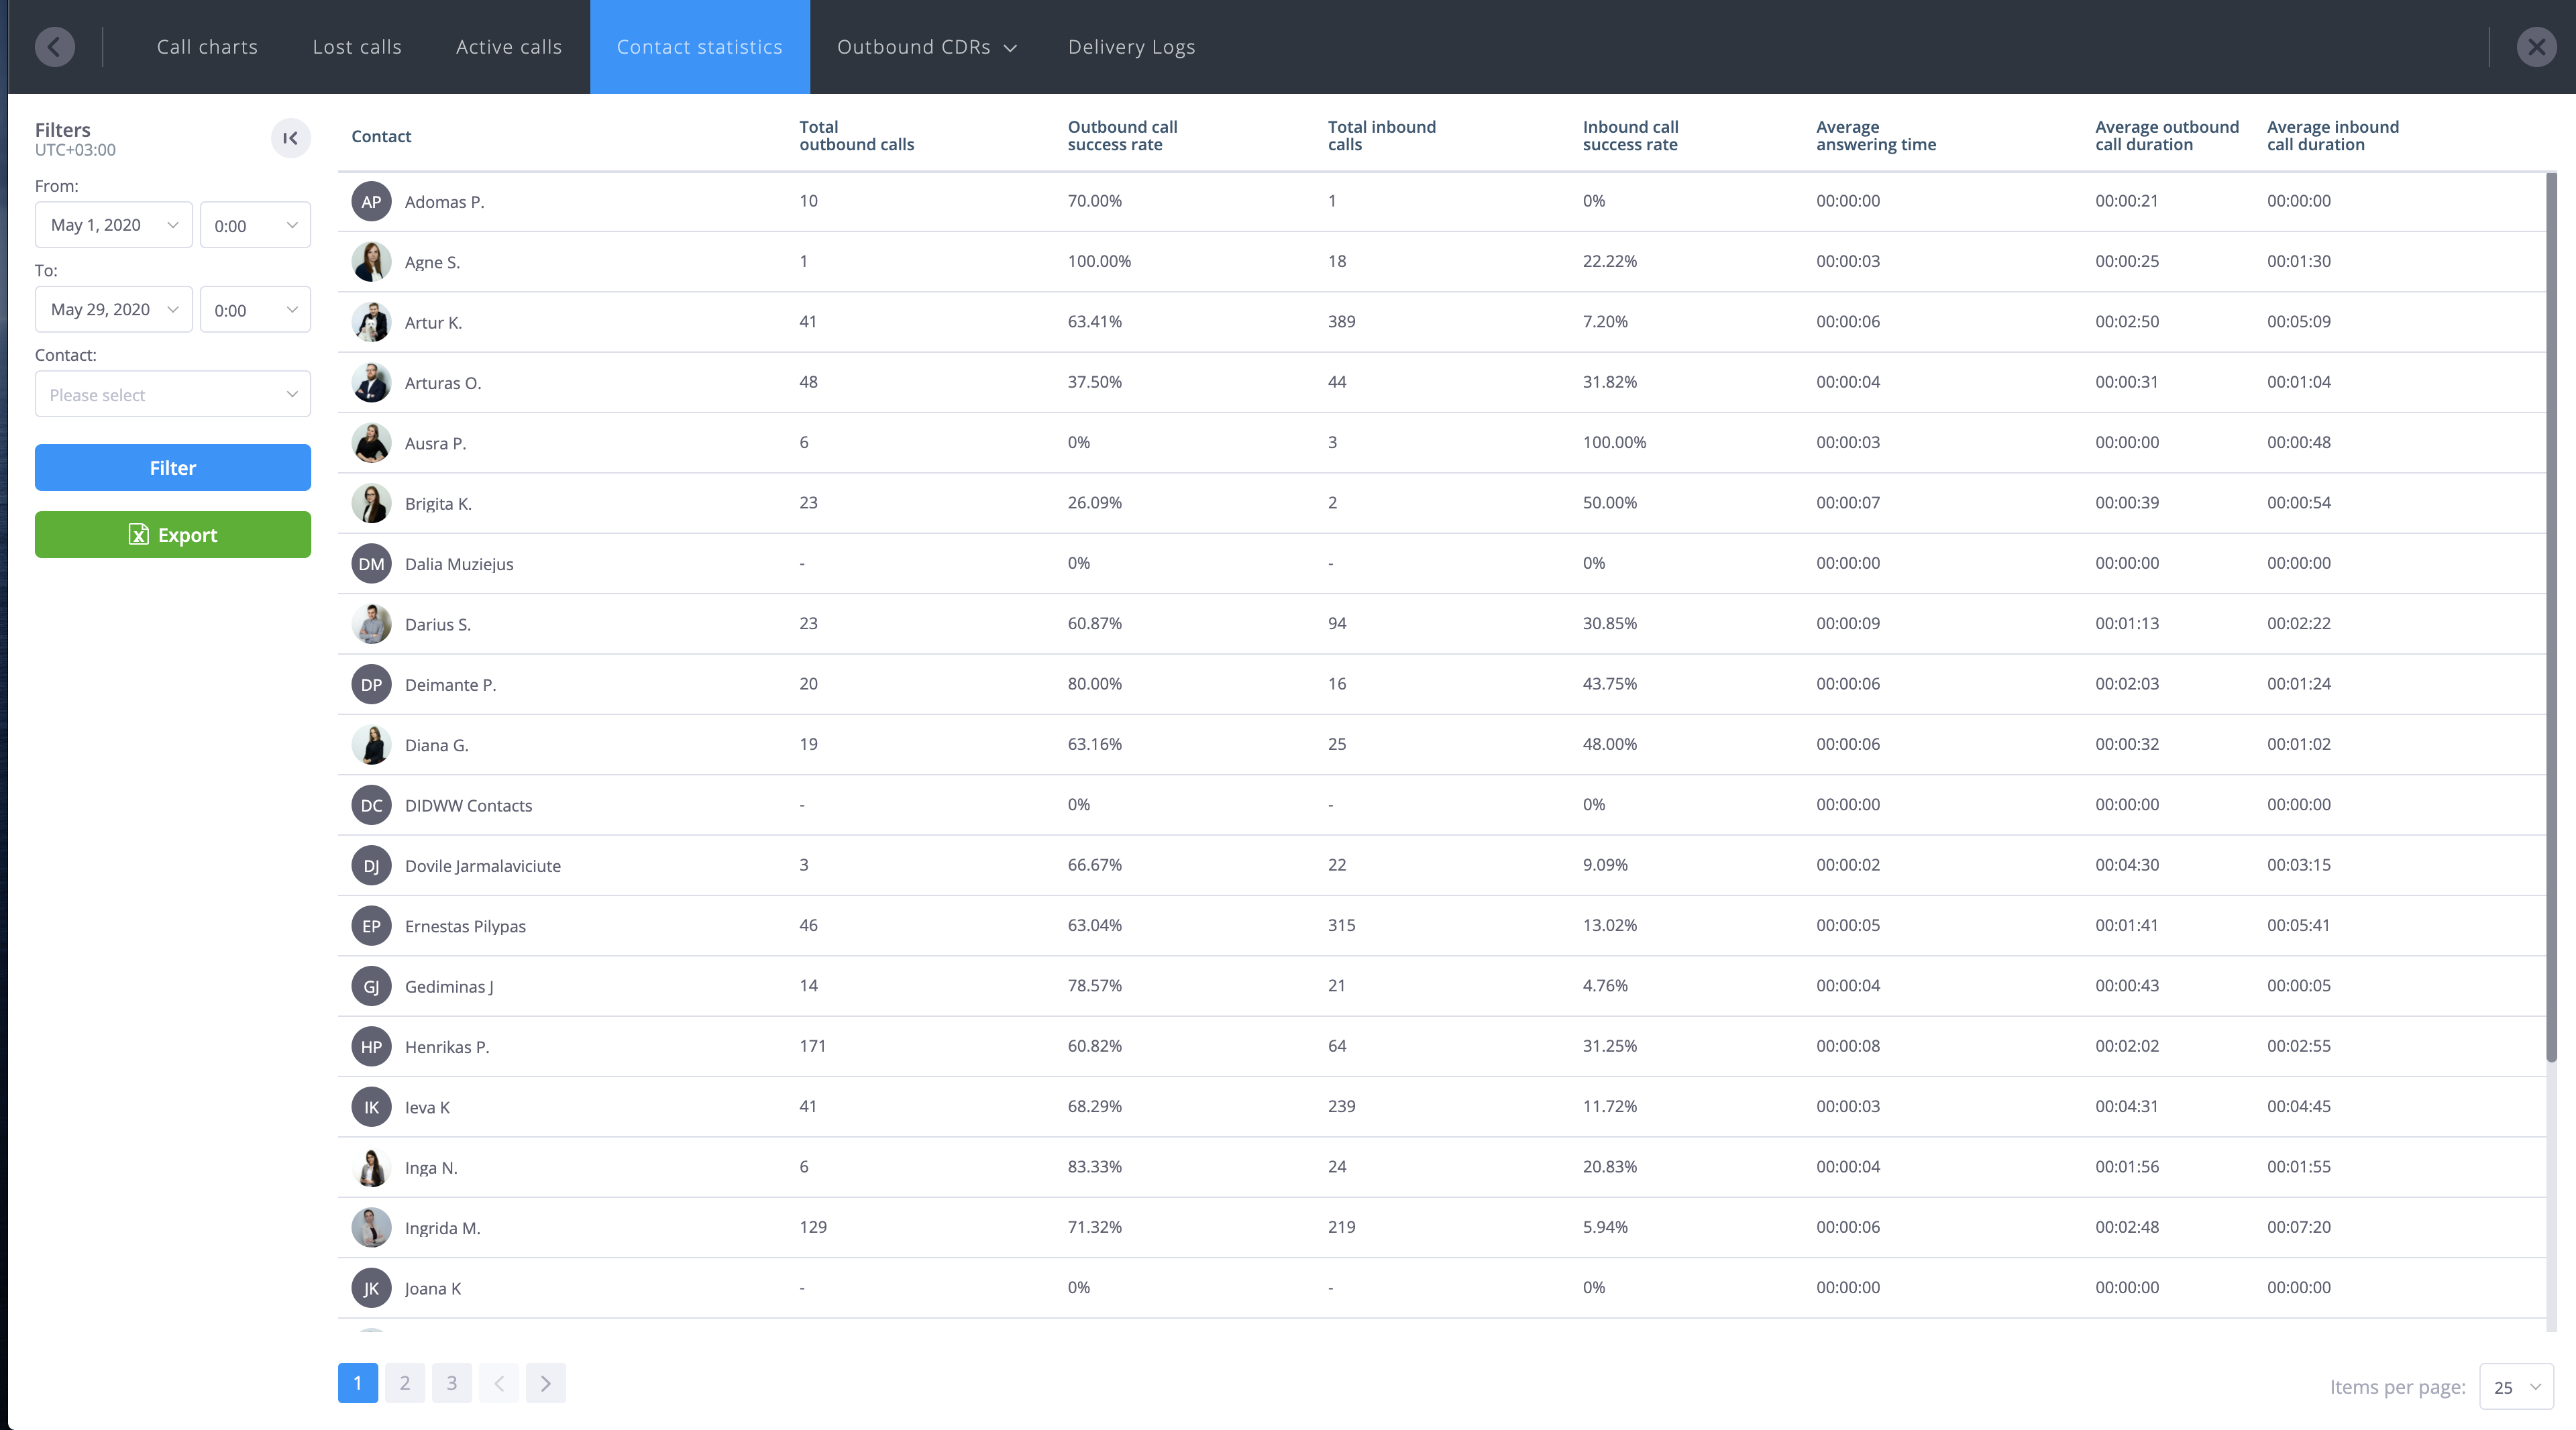
The information presented in this chart is as follows:
-
Contact – The name of a single Contact entity that is capable of making or receiving calls. Note that a single Contact may include multiple Contact Methods for making or receiving calls.
-
Total outbound calls – The total number of outbound calls originating from a specific Contact. Note that this number includes internal calls.
-
Outbound call success rate – The percentage of successful (answered) outbound calls for the Contact.
-
Total inbound calls – The total amount of incoming calls delivered to a specific Contact. Note that this number includes internal calls.
-
Inbound call success rate – The percentage of successful (answered) incoming calls for the Contact.
-
Average answering time – The average time taken for incoming calls to be answered. This statistic only applies to incoming calls that have been answered, and excludes any unanswered calls.
-
Average outbound call duration – The average duration of successful outbound calls made by this Contact (the total outbound call duration divided by the number of successful outbound calls).
-
Average inbound call duration – The average duration of successful inbound calls received by this Contact (the total inbound call duration divided by the number of successful inbound calls).
Optional filters may be applied to the charts as follows:
From/To – Allows the selection of the time period applicable to the displayed statistics.
Contact - Results are filtered according to a single selected Contact.
Note that clicking on a selected Contact displays the individual call statistics for that Contact.
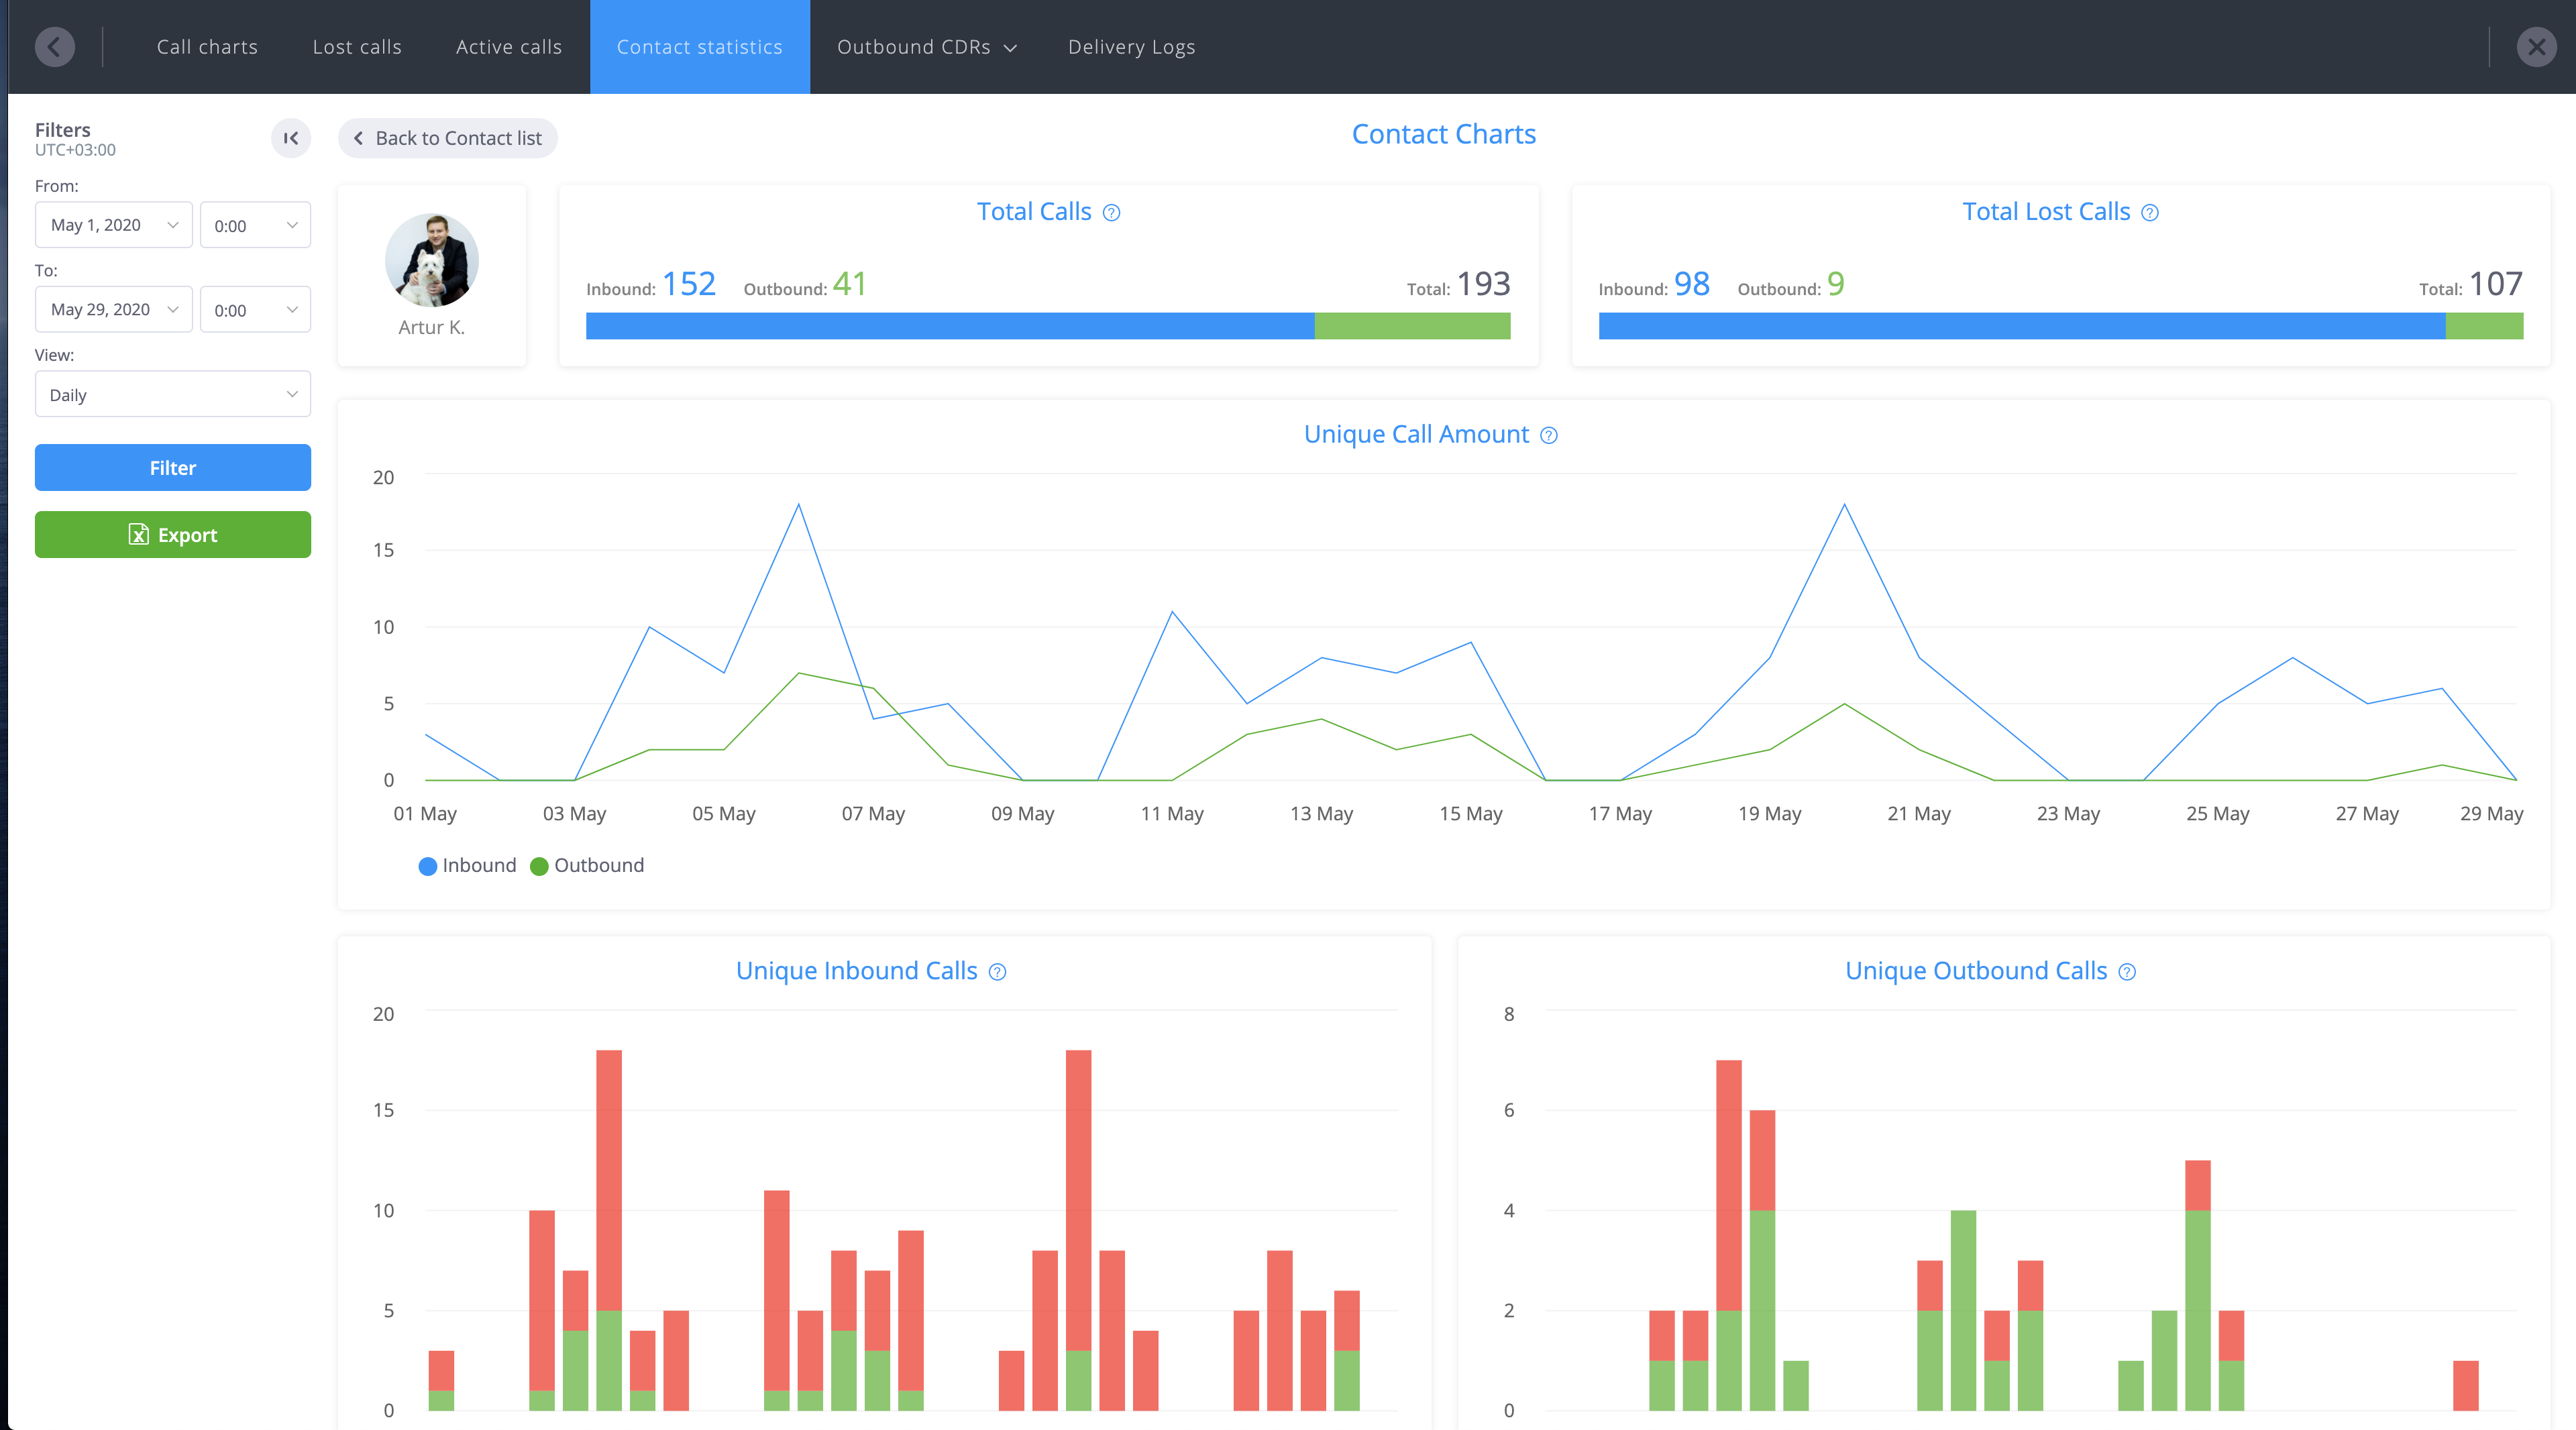
The information presented in this chart is as follows:
-
Total Calls – Displays the total number of calls received and placed by a specific Contact. The chart includes all call forwarding attempts to the Contact that originated from Ring Groups and Queues, as well as outbound calls placed by the Contact.
-
Total Lost Calls - Displays the total number of lost inbound and outbound calls applicable to the selected Contact.
-
Unique Call Amount - This chart is a combination of both the inbound and outbound call charts, and displays the number of unique inbound calls received by the selected Contact, added to the number of unique outbound calls placed by the Contact within the phone.systems™ PBX. The chart does not include repeated call forwarding attempts of a single inbound call to a specific Contact. Both answered and unanswered calls are included.
-
Unique Inbound Calls - Displays the number of unique received (inbound) calls forwarded to the Contact, and includes incoming calls that were received by both Phone Number and Internal Number objects. The chart does not include repeated call forwarding attempts to a specific Contact that originated from a single inbound call.
-
Unique Outbound Calls - Displays the total number of unique outbound calls placed by the Contact.
-
Number of Lost Inbound Calls - Displays the number of lost inbound calls destined for the selected Contact. A lost call is defined as a call which was not answered or connected and, if applicable, there was no successful callback to that same number. The callback time limit is dependent on the View filter, with a "Daily" filter applying a 24 hour limit, and "Hourly"/"Grouped" filters applying a one hour time limit.
-
Number of Lost Outbound Calls - Displays the number of lost outbound calls made by the selected Contact. A lost call is defined as a call which was not answered or connected and, if applicable, there was no successful callback to that same number. The callback time limit is dependent on the View filter, with a "Daily" filter applying a 24 hour limit, and "Hourly"/"Grouped" filters applying a one hour time limit.
Filters may be applied to the data as follows:
-
From/To – Allows the selection of the time period applicable to the displayed statistics.
-
View - Defines how the results are to be displayed. The "Daily" option groups results by day, "Hourly" groups results by the hour, and "Grouped" selects results by an exact hour of the day, performing a peak-time analysis and allowing users to determine at which time of the day most calls were received or made.
Inbound CDRs
Displays all incoming call traffic to the PBX, including incoming calls that do not reach a valid end-destination. Note that internal calls (from extension to extension) are not included in these CDRs.
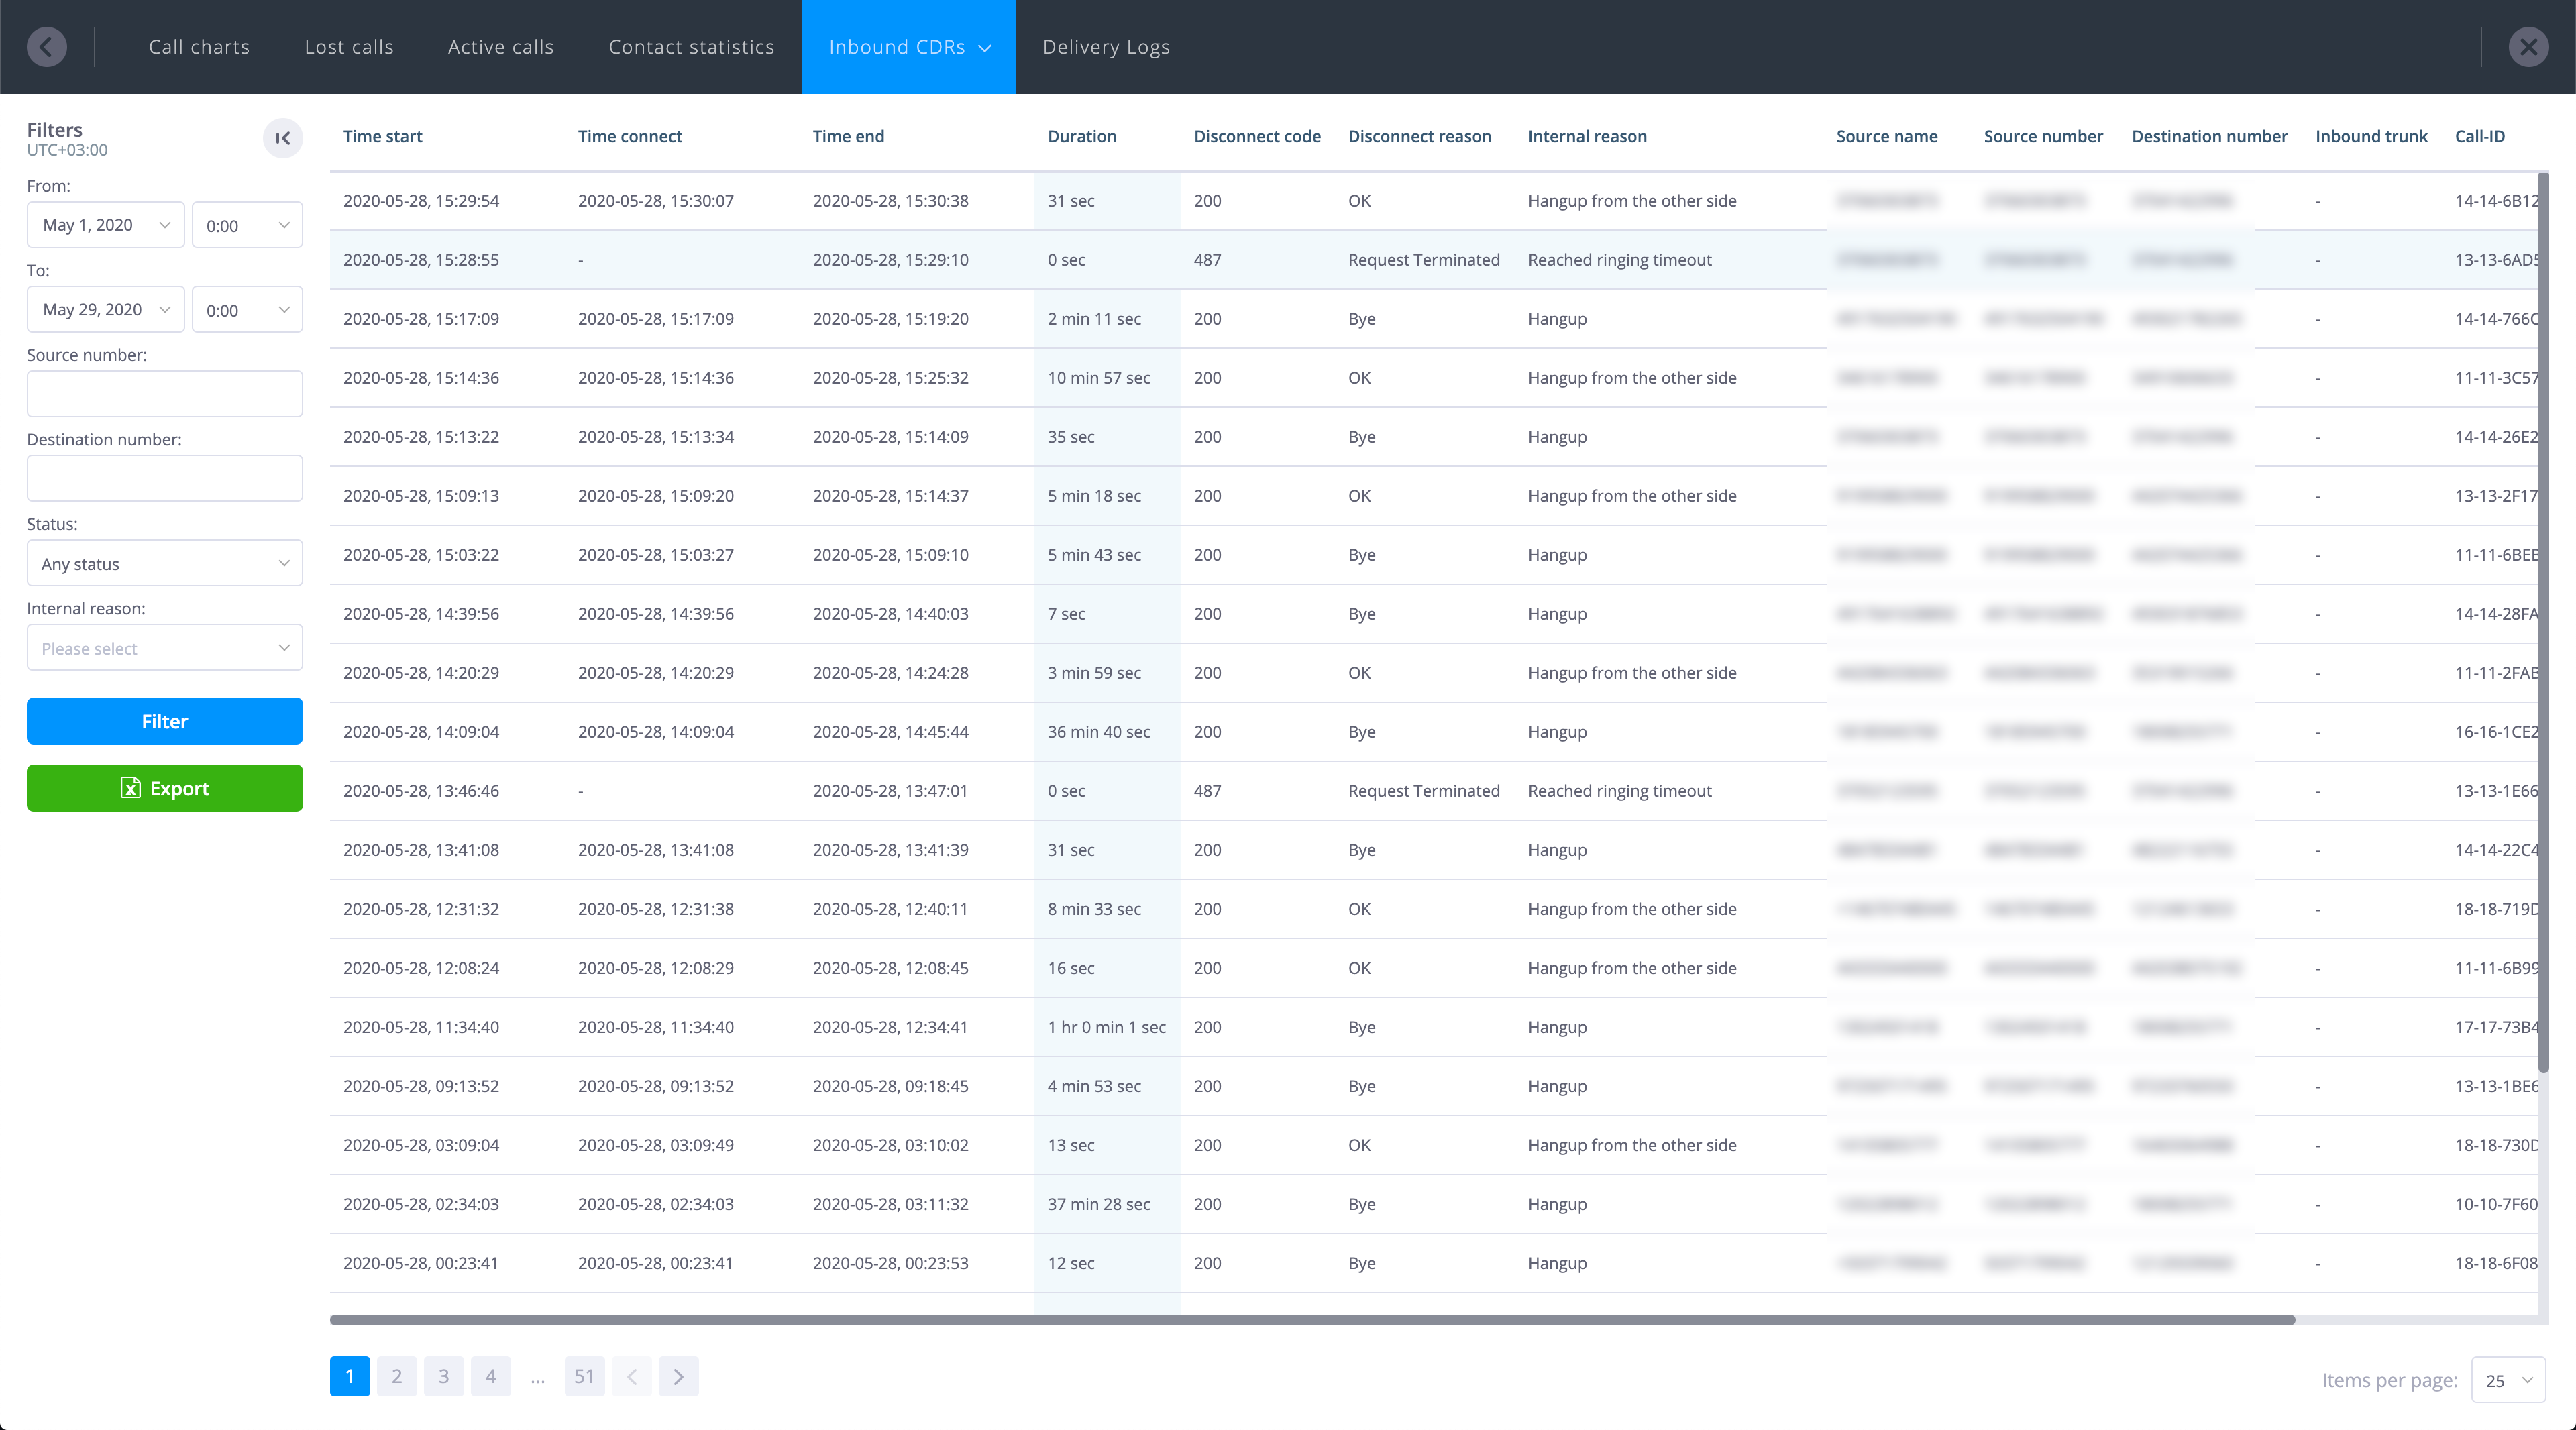
The information presented in this chart is as follows:
-
Time start – Time when the inbound call entered the phone.systems™ PBX
-
Time connect – Time when the inbound call was answered
-
Time end – Time when the inbound call ended
-
Duration – Inbound call duration (from Time connect to Time end)
-
Disconnect code – The SIP disconnect code (if applicable) from the receiver's point of view (200 OK call ended by receiver, 200 BYE call ended by call initiator)
-
Disconnect reason – SIP disconnect code from the caller's point of view
-
Internal reason – A disconnect reason set by phone.systems™
-
Source Name – External callers phone name (CNAM), if supported
-
Source Number – Callers phone number (ANI/CLI)
-
Destination number – The number in phone.systems™ which received the incoming call
-
Inbound trunk – The name of the inbound trunk through which the call entered phone.systems™ (if applicable)
-
Call-ID – The unique call ID
Filters may be applied to the CDRs as follows:
-
Source number – Results are limited to a provided source phone number. Note that a complete phone number must be entered.
-
Destination number – Results are limited to a provided destination phone number. Note that a complete phone number must be entered.
-
From / to – Allows the selection of the time period applicable to the displayed statistics.
-
Status – Filter records according to the call status, with the options being Any Status, Success or Failed.
-
Internal disconnect reason – Results are limited to a provided disconnect reason that is set by phone.systems™, with the following options:
-
Unspecified reason
-
Insufficient channels
-
Account is blocked
-
Outbound calls are blocked
-
Outbound calls are not enabled
-
Number not found
-
Reached the end of call flow configuration
-
Number is blacklisted
-
Call Pickup timeout
-
Call was cancelled by originator
-
Hangup
-
Hangup after transfer
-
Hangup from the other side
-
Redirect from destination side
-
Destination server refused to accept the call
-
Destination was busy
-
Error on destination side
-
Destination declined the call
-
Internal error
-
Outbound CDRs
Displays call traffic originating from the PBX, including all external outbound call attempts and forwarding to PSTN. Note that internal calls (from extension to extension) are not included in these CDR statistics.
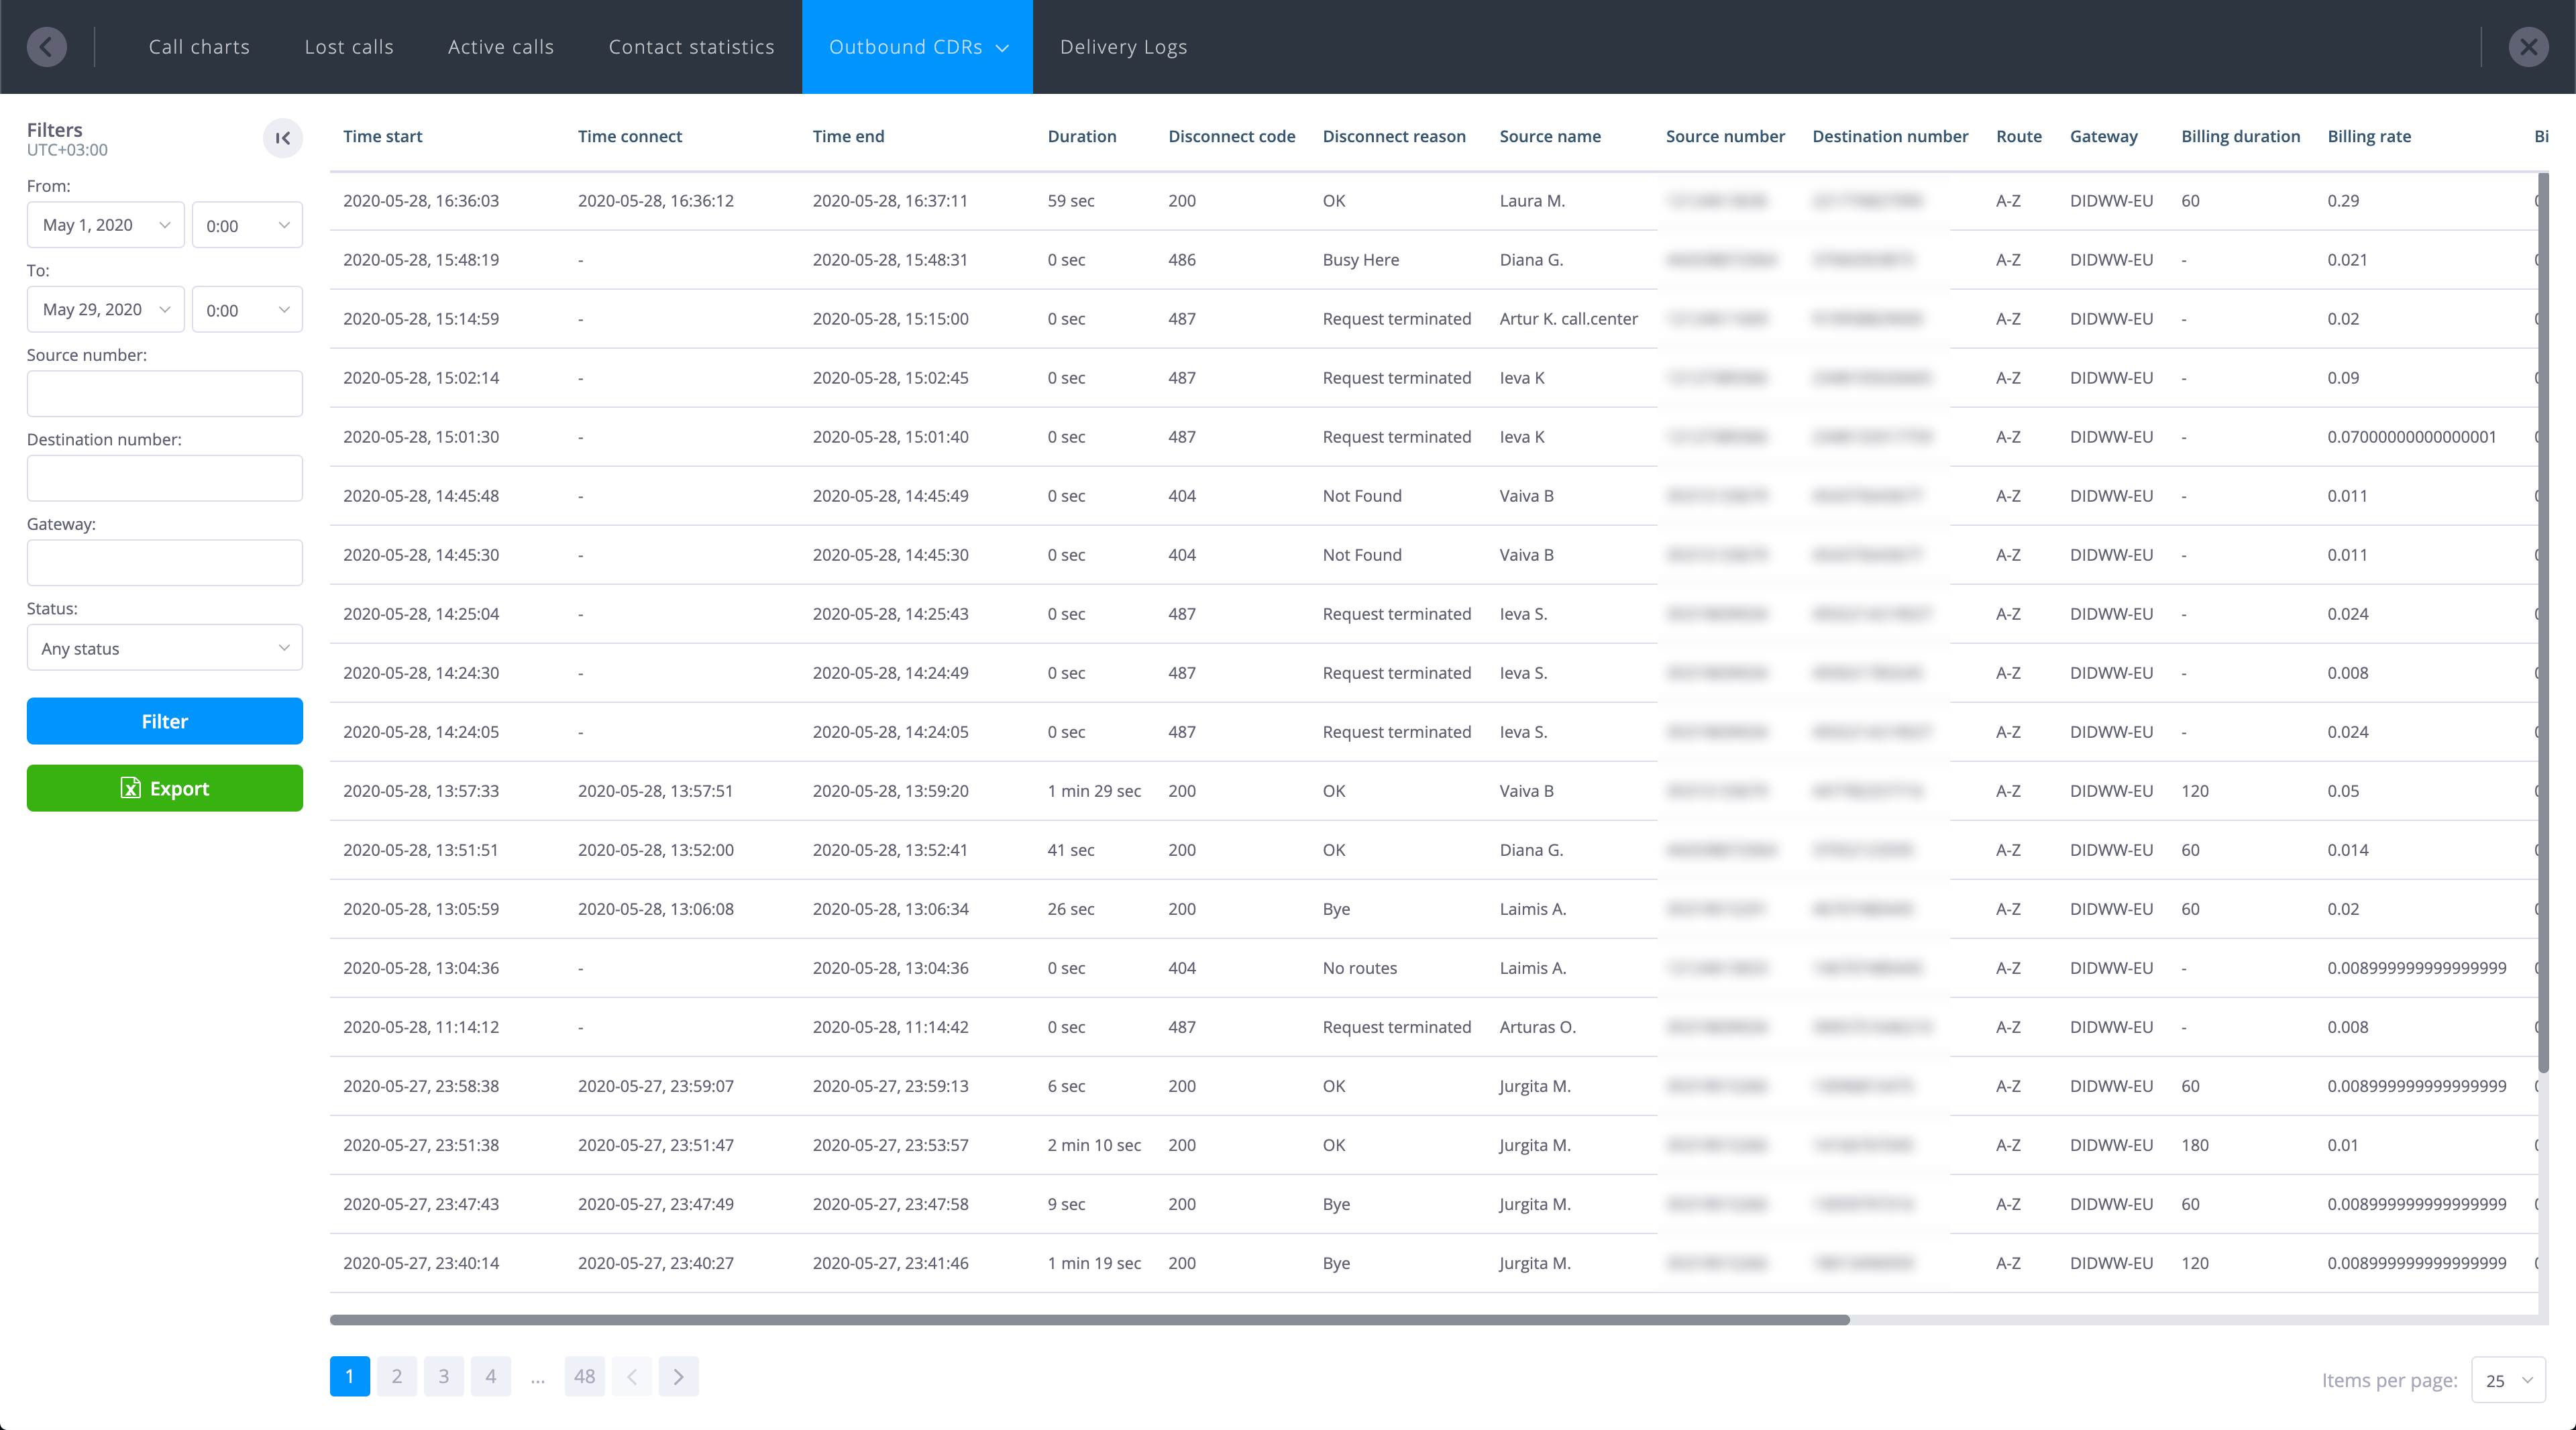
The information presented in this chart is as follows:
-
Time start – Time that the outbound call was initiated
-
Time connect - Time when the outbound call was answered
-
Time end – Time when the outbound call ended
-
Duration – Outbound call duration (from Time connect to Time end)
-
Disconnect code - The SIP disconnect code (if applicable) from the caller's point of view (200 OK call ended by destination, 200 BYE call ended by call initiator)
-
Disconnect reason - SIP disconnect code from the caller's point of view
-
Source Name – Caller ID name of SIP account that initiated the call
-
Source Number – External caller ID set on SIP account
-
Destination number – The number to which the outbound call was initiated
-
Route – The route name used for the outbound call
-
Gateway – The gateway name used for the outbound call
-
Call-ID – The unique call ID
Filters may be applied to the CDRs as follows:
-
Source number – Results are limited to a provided source phone number. Note that a complete phone number must be entered.
-
Destination number – Results are limited to a provided destination phone number. Note that a complete phone number must be entered.
-
Gateway – Results are limited to a specified gateway that was used to terminate the call.
-
From / to – Allows the selection of the time period applicable to the displayed statistics.
-
Status – Filter records according to the call status, with the options being Any Status, Success or Failed.
Contact outbound CDRs
Displays call traffic originating from the PBX on a per-contact basis, including all external outbound call attempts and forwarding to PSTN. Note that internal calls (from extension to extension) are included in these CDR statistics.
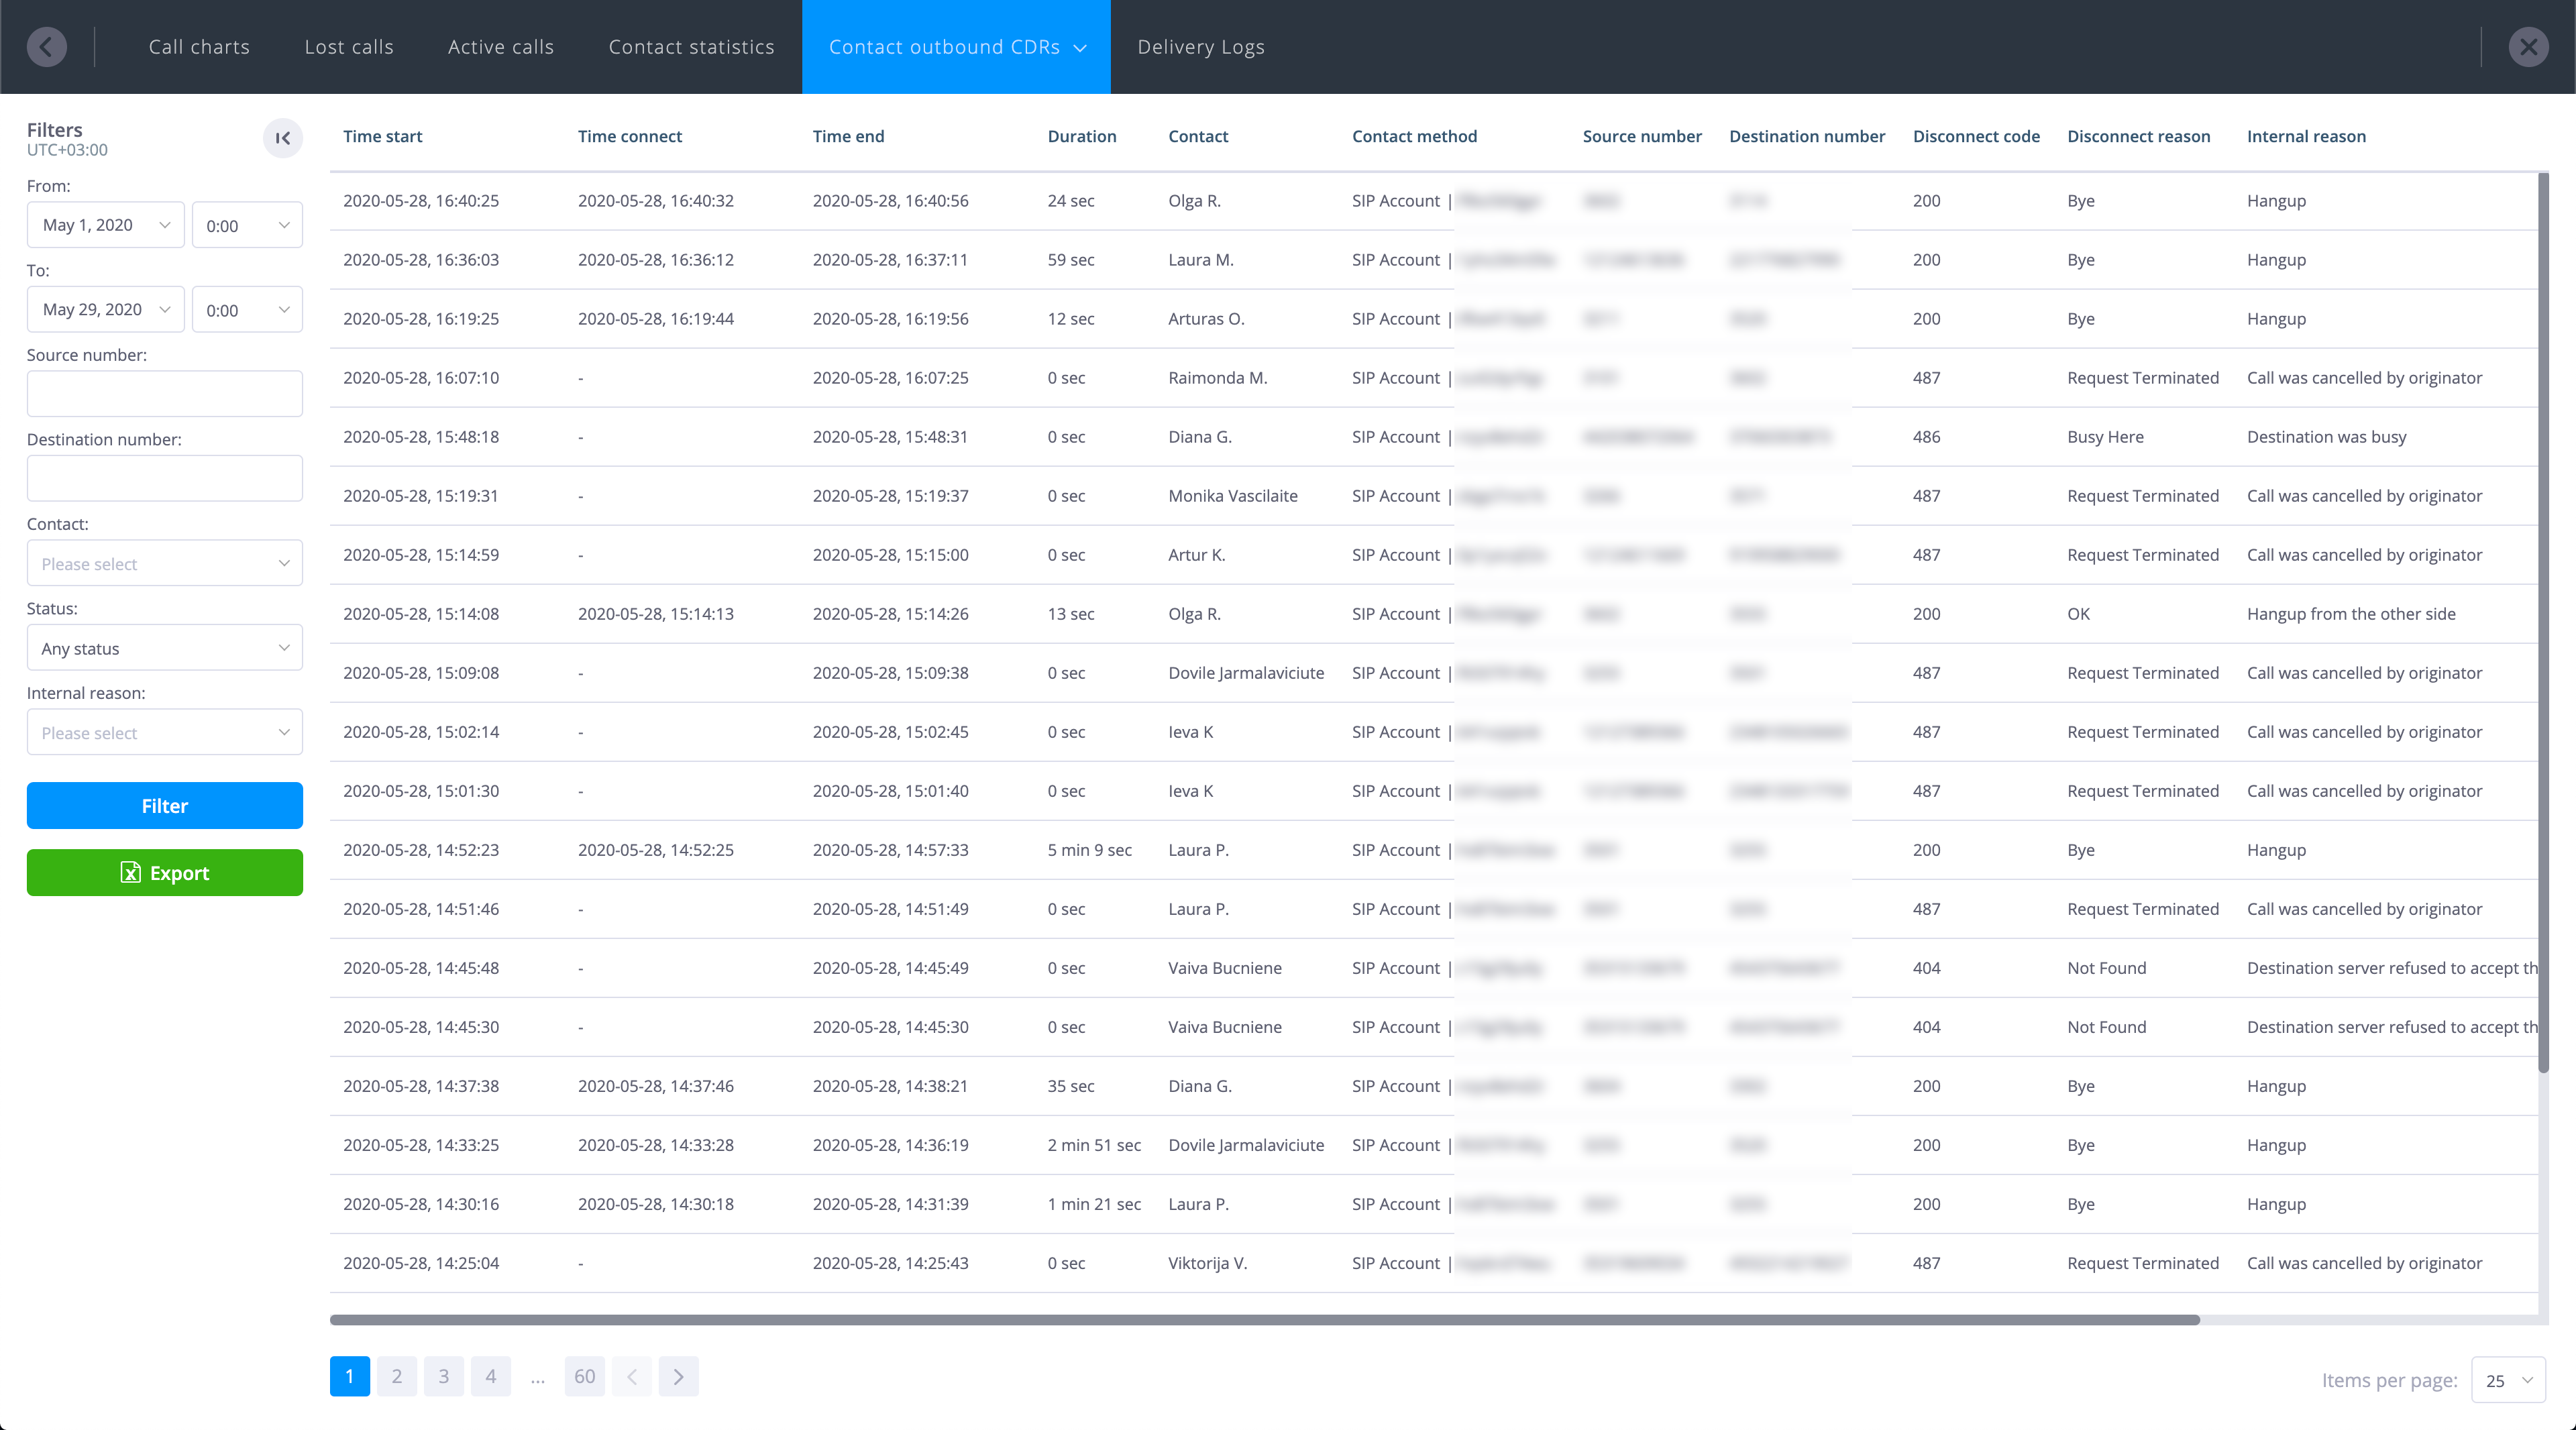
The information presented in this chart is as follows:
-
Time start – Time that the outbound call was initiated
-
Time connect – Time when the outbound call was answered
-
Time end – Time when the outbound call ended
-
Duration – outbound call duration (from Time connect to Time end)
-
Contact – The name of the Contact entity from which the outbound call was initiated
-
Contact method – The Contact Method associated with the Contact that initiated the call
-
Source Number – The external or internal caller ID
-
Destination number – The number to which the outbound call was initiated
-
Disconnect code – The SIP disconnect code (if applicable) from the caller's point of view (200 OK call ended by destination, 200 BYE call ended by call initiator)
-
Disconnect reason – SIP disconnect code from the caller's point of view
-
Internal reason – A disconnect reason set by phone.systems™
-
Call-ID – The unique call ID
Filters may be applied to the CDRs as follows:
-
Source number – Results are limited to a provided source number (phone number or internal number). Note that a complete number must be entered.
-
Destination number – Results are limited to a provided destination number (phone number or internal number). Note that a complete number must be entered.
-
Contact – Results are limited to a specified Contact.
-
From / to – Allows the selection of the time period applicable to the displayed statistics.
-
Status – Filter records according to the call status, with the options being Any Status, Success or Failed.
-
Internal disconnect reason – Results are limited to a provided disconnect reason that is set by phone.systems™, with the following options:
-
Unspecified reason
-
Insufficient channels
-
Account is blocked
-
Outbound calls are blocked
-
Outbound calls are not enabled
-
Number not found
-
Reached the end of call flow configuration
-
Number is blacklisted
-
Call Pickup timeout
-
Call was cancelled by originator
-
Hangup
-
Hangup after transfer
-
Hangup from the other side
-
Redirect from destination side
-
Destination server refused to accept the call
-
Destination was busy
-
Error on destination side
-
Destination declined the call
-
Internal error
-
Contact inbound CDRs
Displays all inbound calls within the PBX on a per-contact basis, including internal calls (extension to extension) and calls distributed from Ring Groups and Queues.
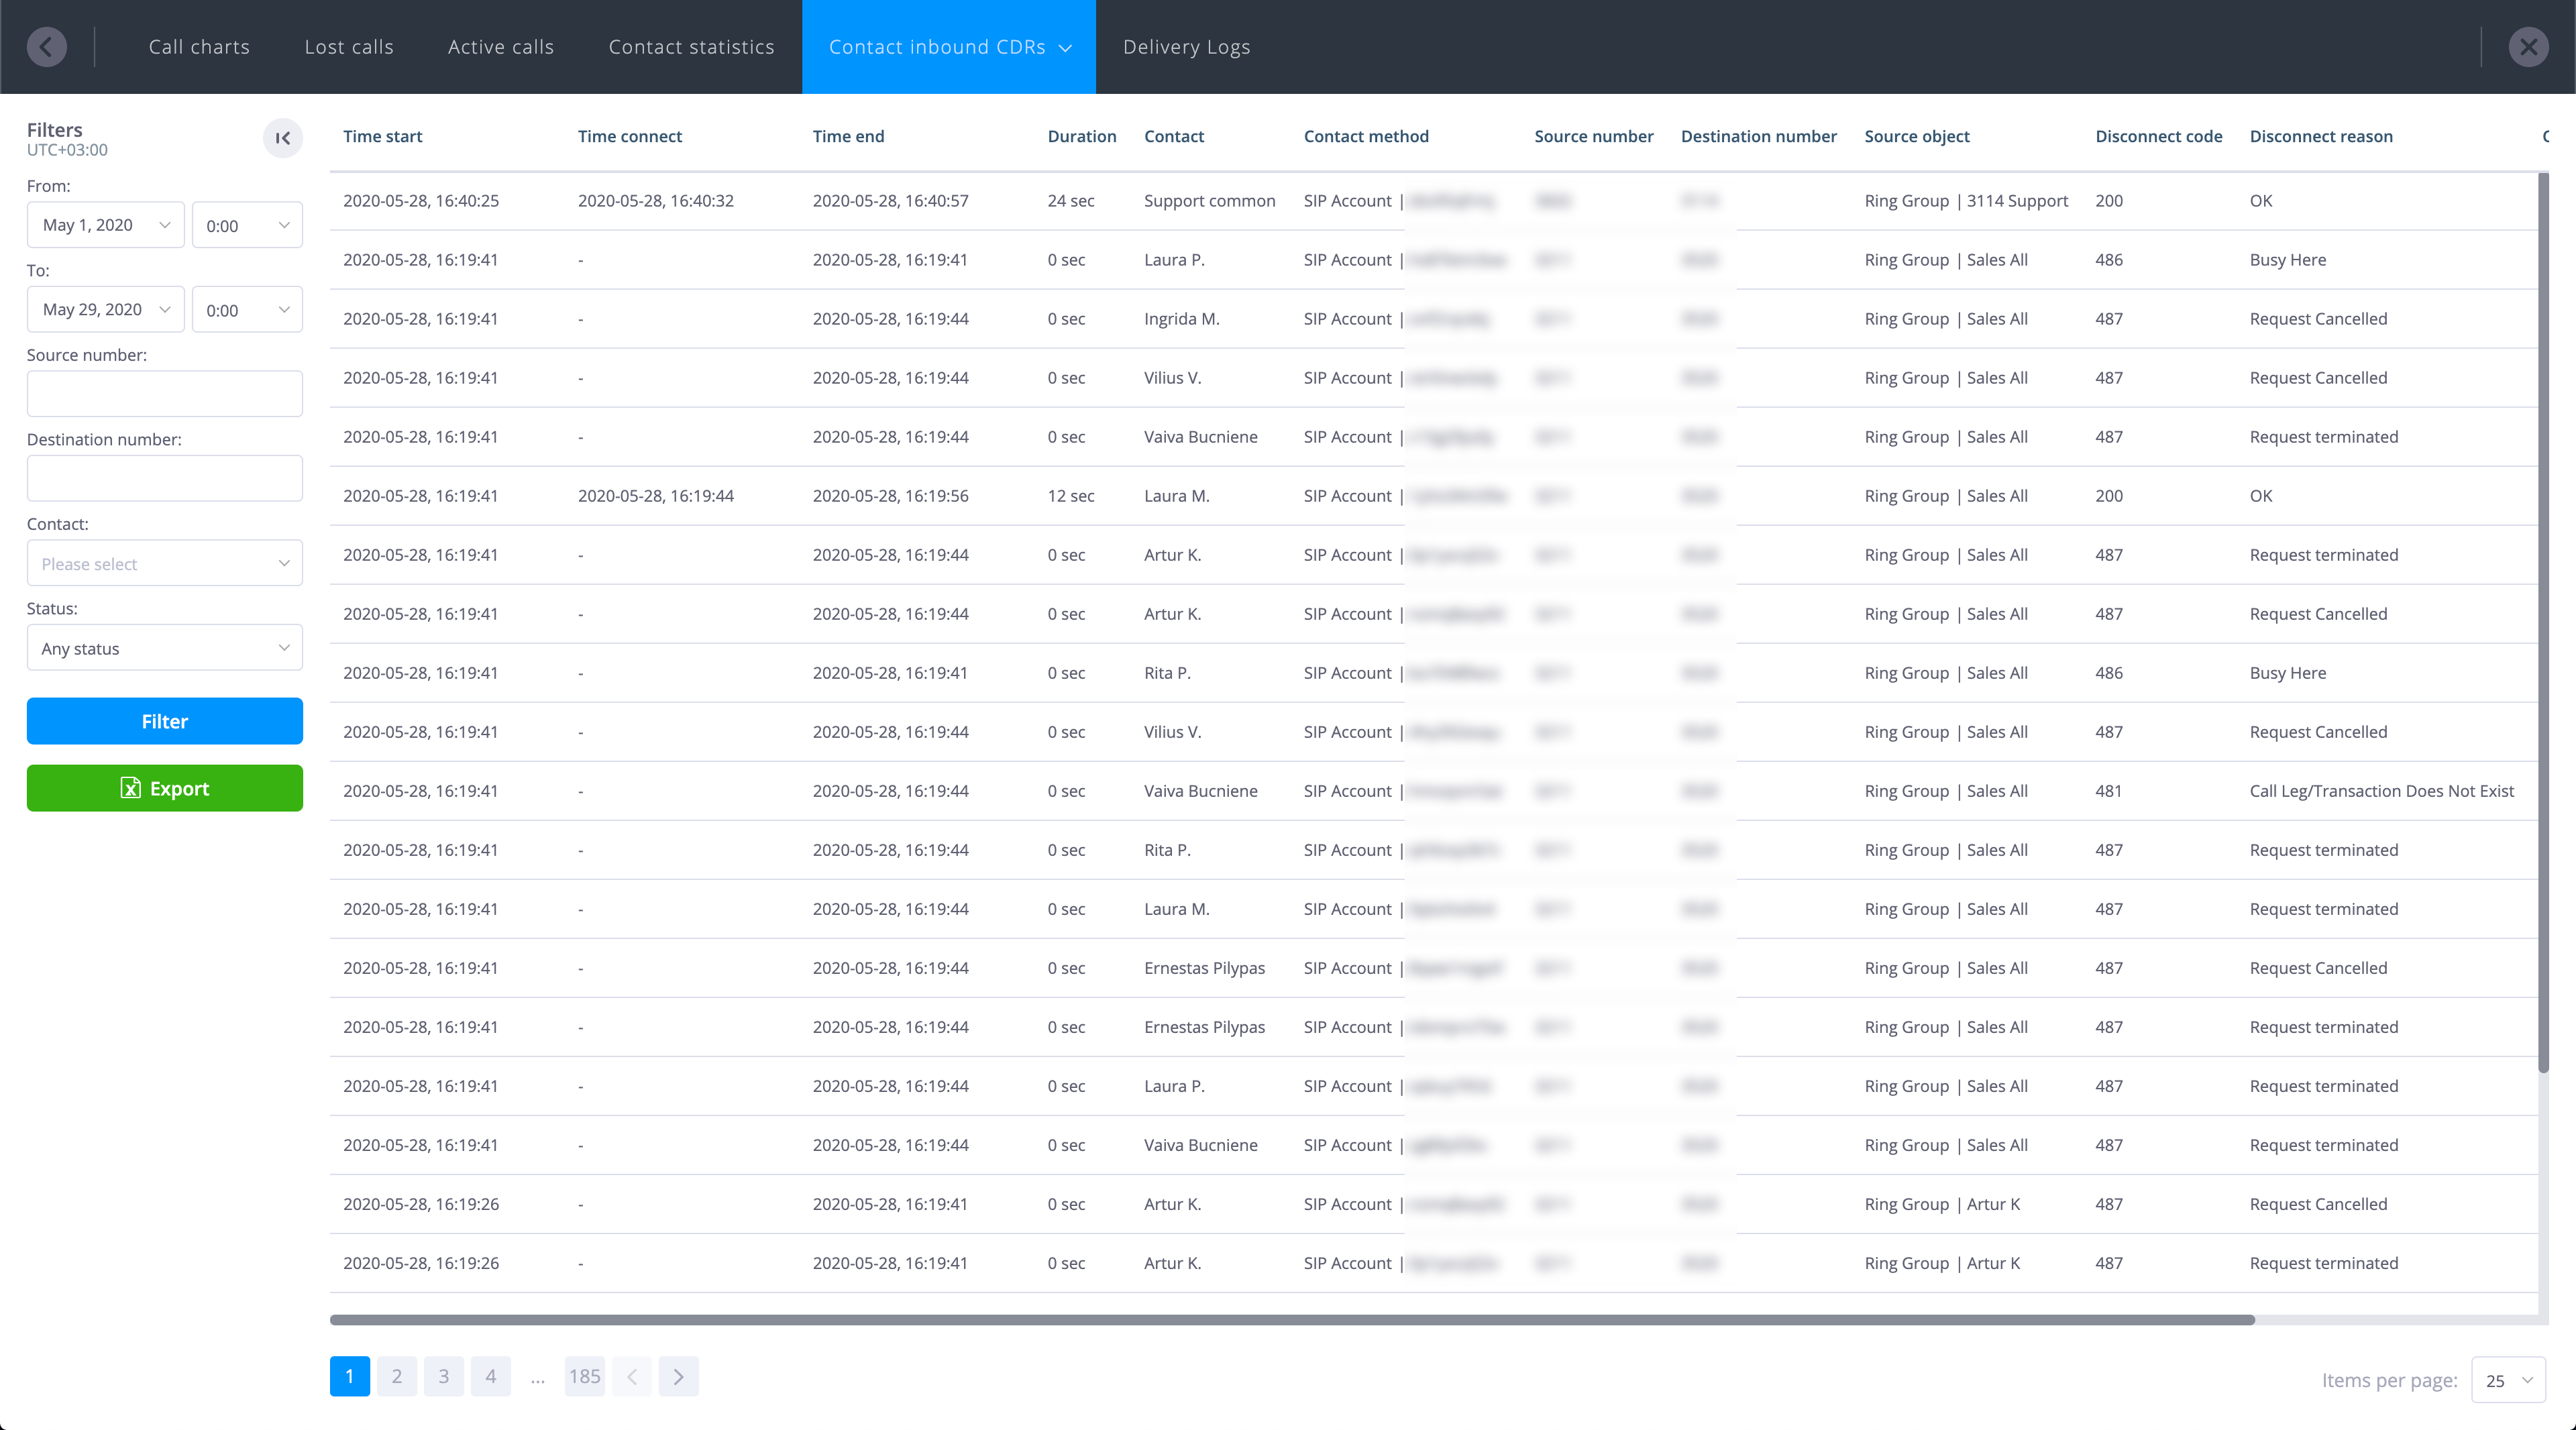
The information presented in this chart is as follows:
-
Time start – Time when call was forwarded to Contact Method
-
Time connect – Time when the inbound call was answered
-
Time end – Time when the inbound call ended
-
Duration – Inbound call duration (from Time connect to Time end)
-
Contact – The name of the Contact entity to which the inbound call was initiated
-
Contact method – The Contact Method associated with the Contact that received the inbound call
-
Source Number – Callers phone number (ANI/CLI)
-
Destination number – The number in phone.systems™ which received the incoming call (includes internal and external numbers)
-
Source object – The phone.systems™ object (such as Ring Group or Queue) that received the incoming call
-
Disconnect code – The SIP disconnect code (if applicable) from the receiver's point of view (200 OK call ended by receiver, 200 BYE call ended by call initiator)
-
Disconnect reason – SIP disconnect code from the caller's point of view
-
Call-ID – The unique call ID
Filters may be applied to the CDRs as follows:
-
Source number – Results are limited to a provided source number (phone number or internal number). Note that a complete number must be entered.
-
Destination number – Results are limited to a provided destination number (phone number or internal number). Note that a complete number must be entered.
-
Contact – Results are limited to a specified Contact.
-
From / to – Allows the selection of the time period applicable to the displayed statistics.
-
Status – Filter records according to the call status, with the options being Any Status, Success or Failed.
Queue & Ring Group CDRs
Displays inbound call statistics for Queue and Ring Group objects. Internal calls are also included in these CDRs.
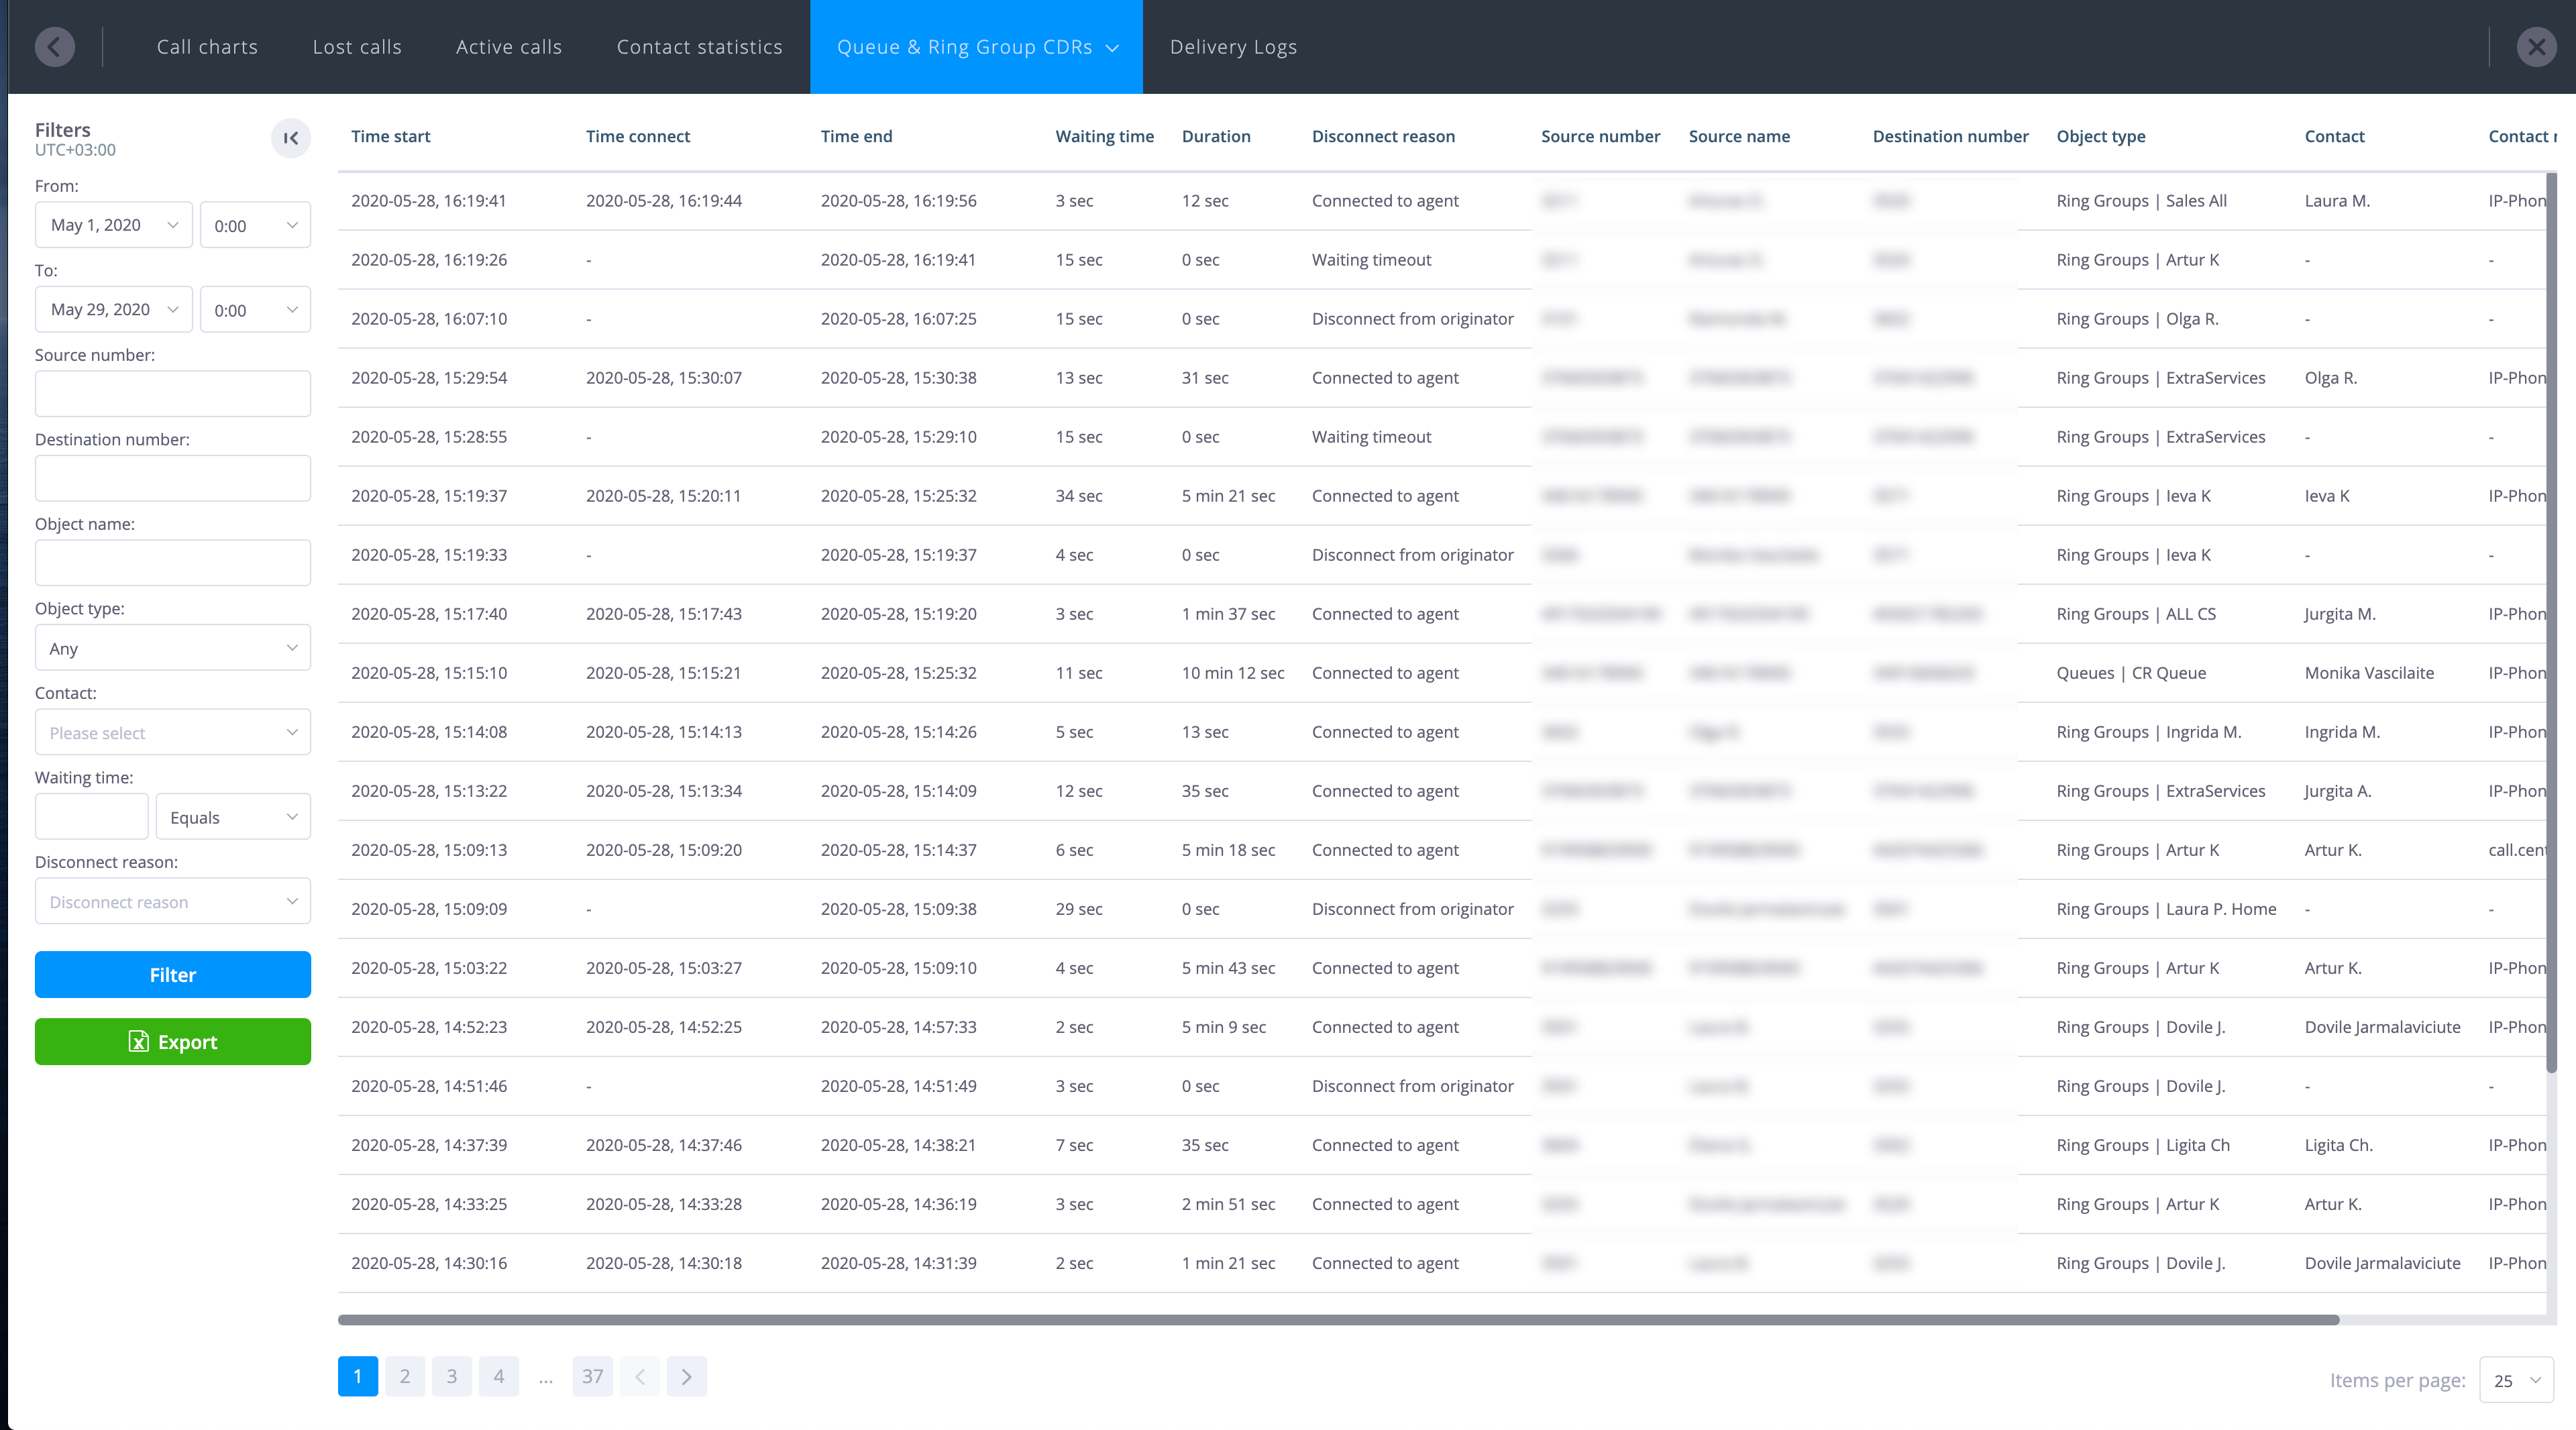
The information presented in this chart is as follows:
-
Time start – Time that the incoming call reached the Queue or Ring Group object.
-
Time connect - Time that the incoming call was answered by one of the contacts in the Queue or Ring Group object.
-
Time end - Time when the call ended.
-
Waiting time - Time it took for the incoming call to be answered by one of the contacts in the Queue or Ring Group object.
-
Duration - Total call duration (from Time connect to Time end).
-
Disconnect reason - A call disconnect reason is set by phone.systems™, with the following options being available:
Connected to agent - Inbound call was answered by one of the Contacts assigned to the Queue or Ring group object.
Waiting timeout - Inbound call was not answered before the Queue or Ring group timeout limit was reached.
Disconnect from originator - Inbound call was ended by the caller before the Queue or Ring group timeout limit was reached.
Pick-up - Incoming call was answered using the Call Pickup Feature code.
Redirect - Incoming call was forwarded to a different destination.
-
Source Number – Callers phone number (ANI/CLI)
-
Source Name – External callers phone name (CNAM) if supported, or Caller ID name of SIP account.
-
Destination number – The number in phone.systems™ which received the incoming call (includes internal and external numbers)
-
Object type - Queue or Ring Group object that received an inbound call, including the name of the object.
-
Contact - Contact that answered the inbound call.
-
Contact method - The Contact Method associated with the Contact that received the inbound call.
Filters may be applied to the charts as follows:
-
From/To – Allows the selection of the time period applicable to the displayed statistics.
-
Source or Destination number – Results are filtered according to a provided source or destination phone number. Note that a partial phone number may be entered, such as an area code prefix.
-
Object Name - Results are filtered according to the Queue or Ring Group object name. Note that a partial name of the object may be entered.
-
Object Type - Filter out the results to only show Queue or Ring Group object CDRs.
-
Contact - Results are filtered according to a single selected Contact.
-
Waiting time - Results are filtered according to the waiting time duration.
-
Disconnect reason - Results are filtered according to a single selected disconnect code.
Delivery Logs
Displays various delivery method statistics, such as the date and time of file delivery, the delivery status, the file name and more.
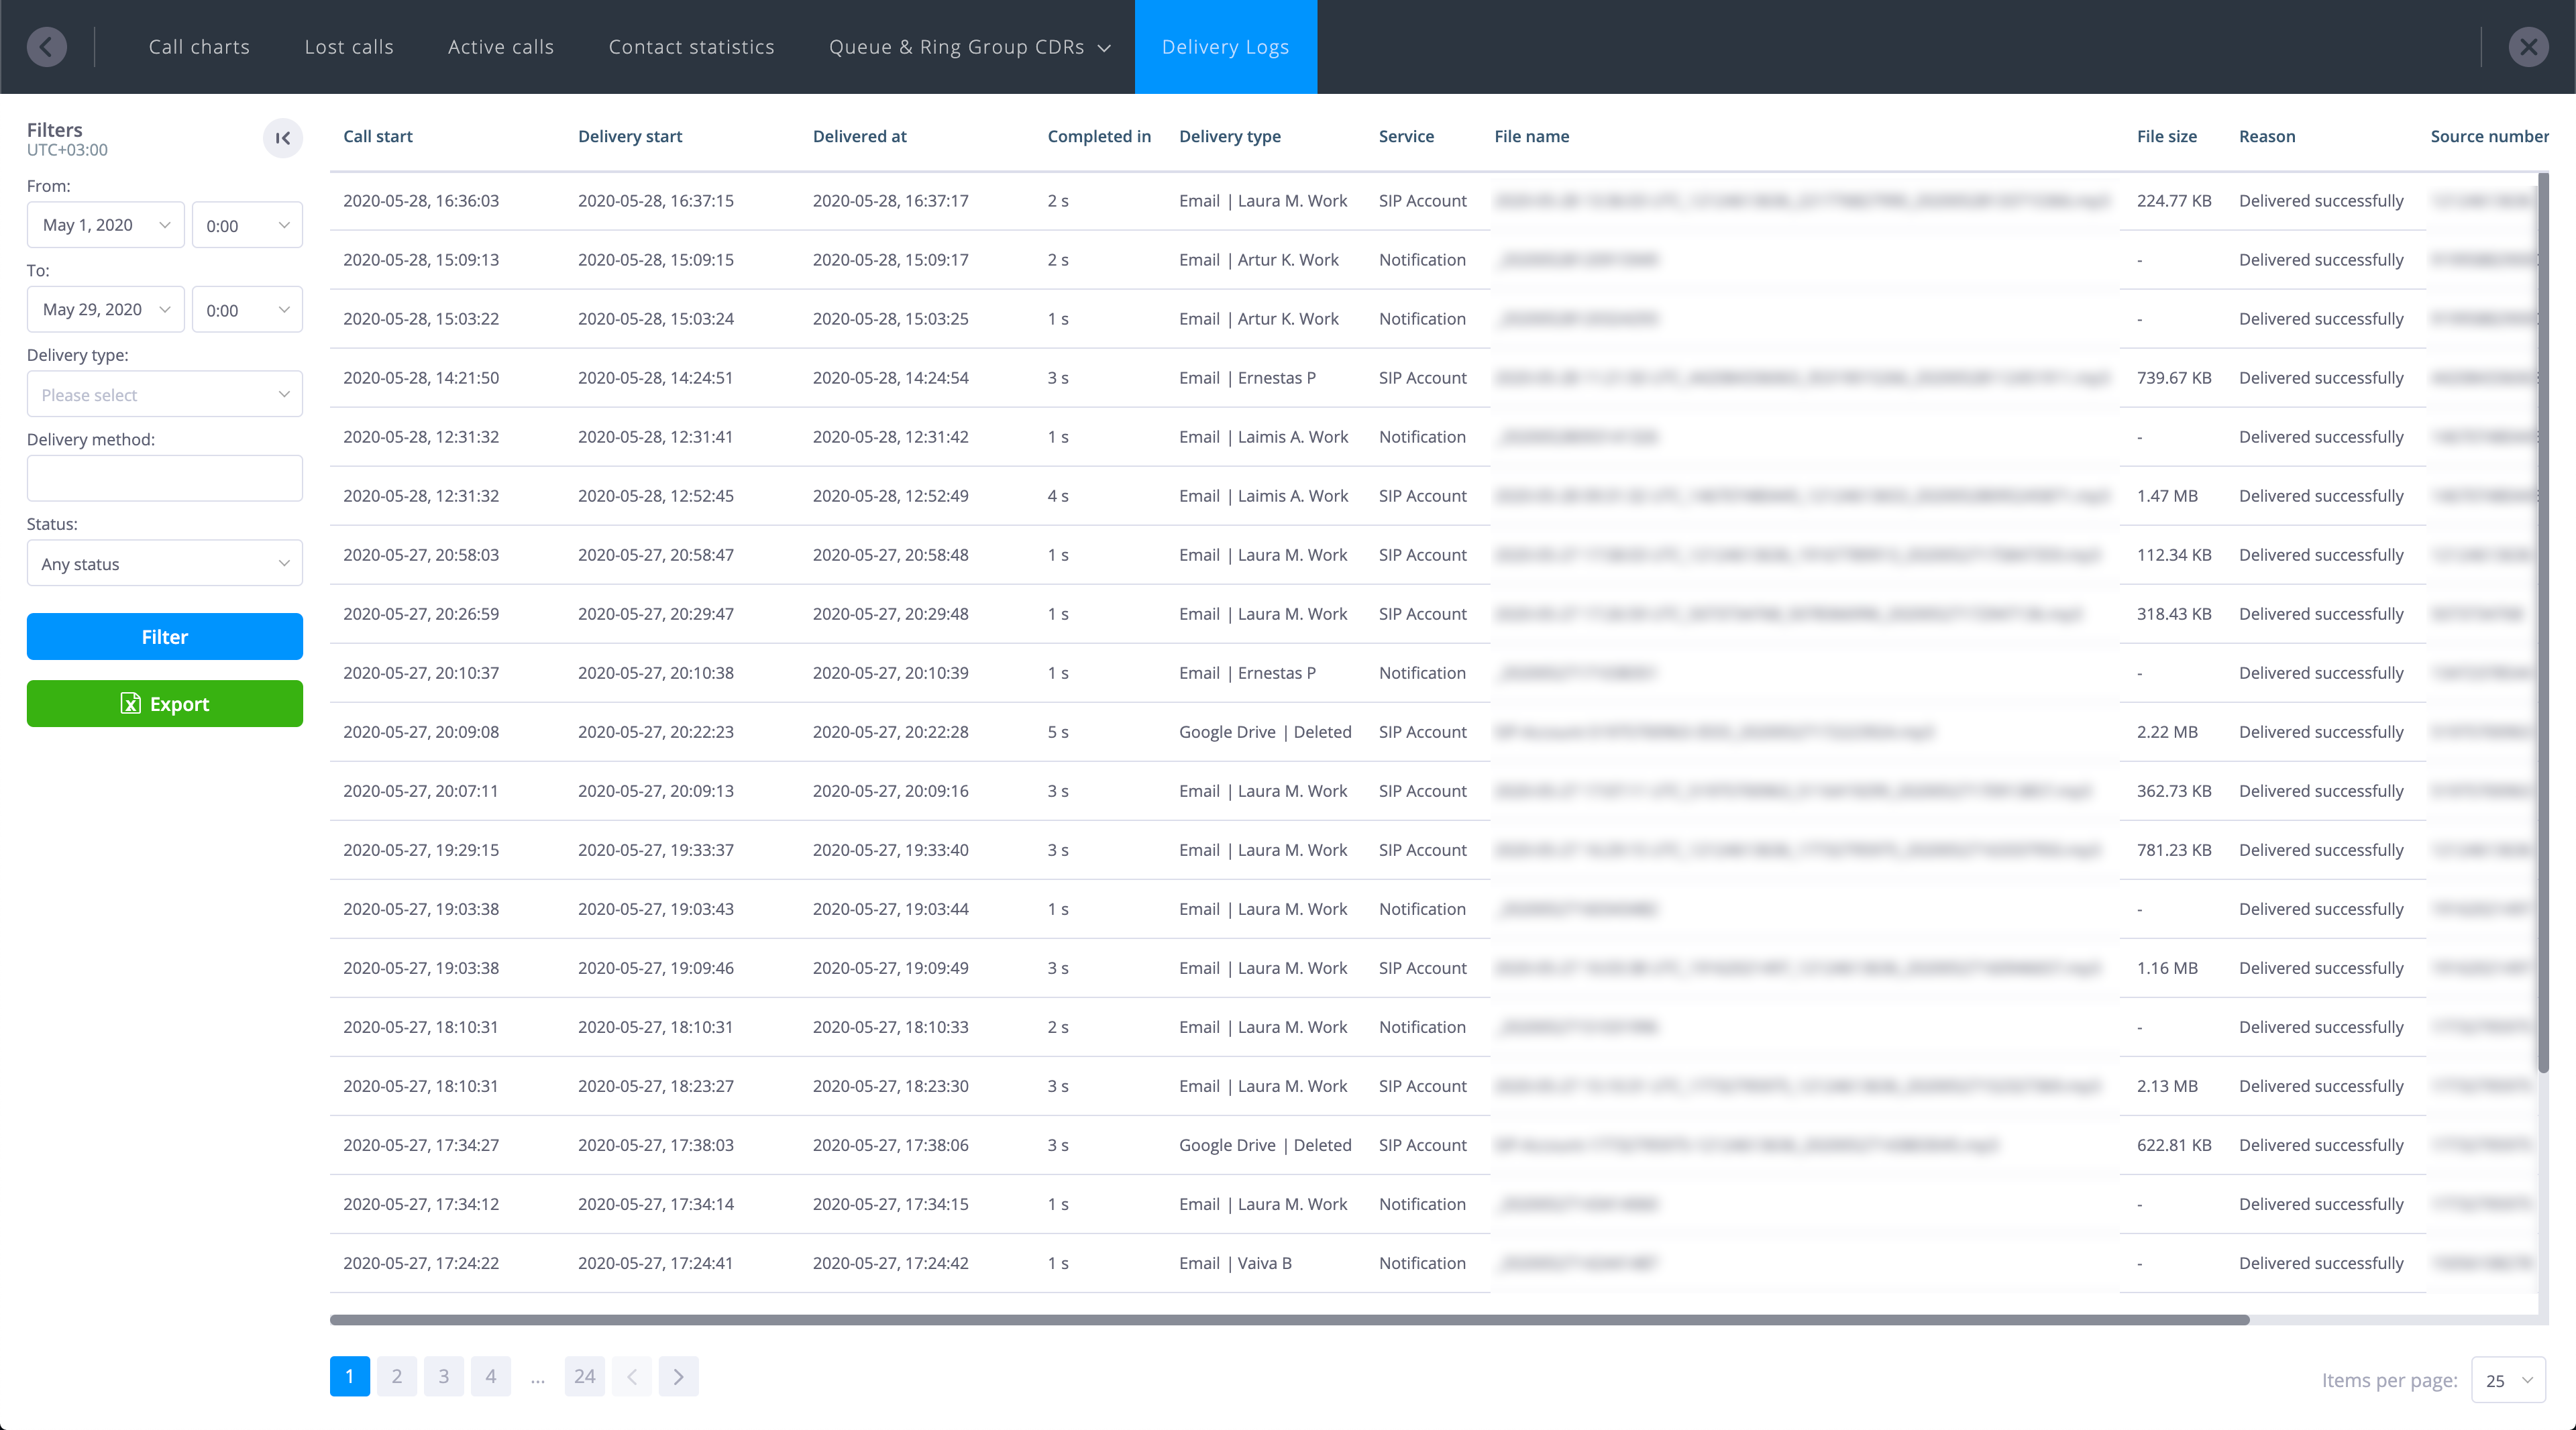
The information presented in this chart is as follows:
-
Call Start – Date/time of the beginning of the call for which the delivery was assigned
-
Delivery Start – Date/time of the sent delivery
-
Delivered At – Date/time when the delivery confirmation was received from the endpoint
-
Completed In – Time for the delivery in seconds
-
Delivery Method – Delivery Method type and name
-
Service – Service that the delivery method was assigned to (for example, a Call Recorder object)
-
File Name – Delivery file name
-
File Size – Delivery file size in kilobytes
-
Reason – Delivery status (“Delivered successfully” or reason for failure)
-
Source Number – Caller’s phone number (ANI/CLI)
-
Source Name – External caller’s phone name (CNAM), if supported
-
Destination Number – The number in phone.systems™ which received the incoming call, or the destination number for an outbound call
Filters may be applied as follows:
-
Delivery Method – Name of the Delivery Method
-
Select a Type – Type of Delivery Method
-
From / to – Allows the selection of the time period applicable to the displayed information
-
Status – Filter records according to the delivery status, with the options being Any Status, Success or Failed.
Exporting Call Logs
Data may be exported in .csv format and sent to a defined email address by
clicking on the
 button on the left-hand side of the selected call log page. Exporting of call logs
may be customized on a per-tab basis, and data from call charts, lost calls, contact statistics,
CDRs and delivery logs may be individually exported as required.
It should be noted that filters such as Source Number, Destination Number, etc. are not applied when generating data that is to be exported. However, the From / to parameters for selecting the applicable time period are relevant to this exported data.
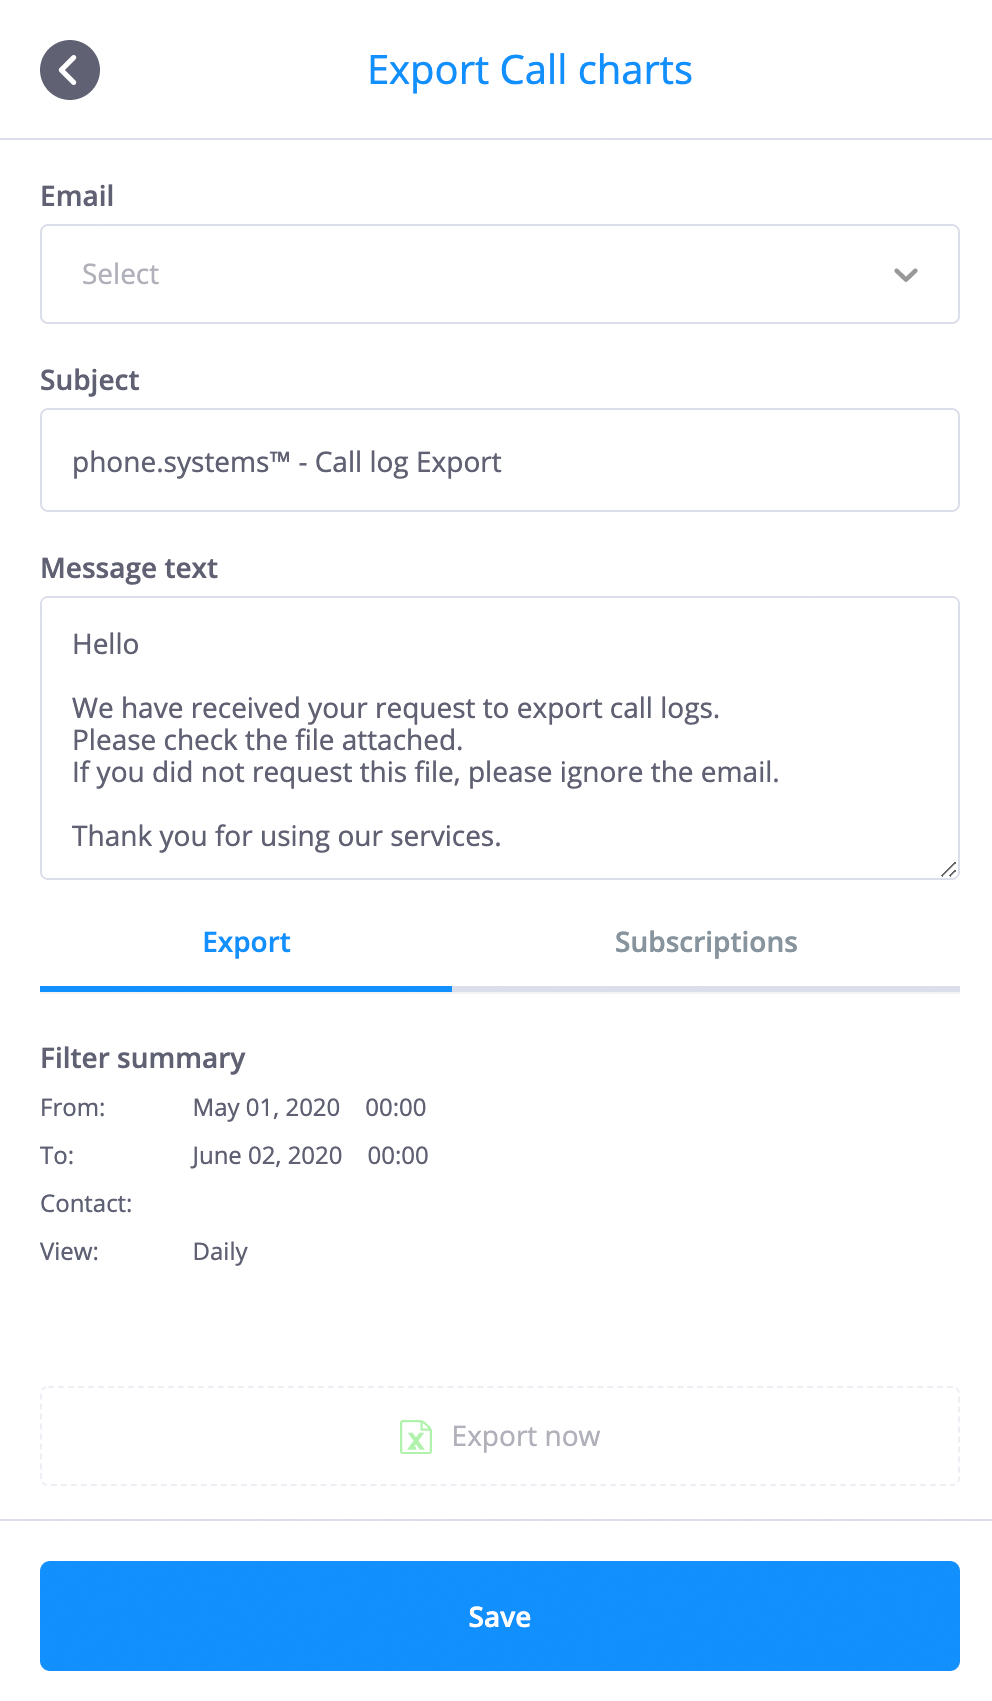
The information to be entered for exporting data is:
-
Email - An email address to which the call logs must be sent. The email address may have been previously configured, or may be added to an existing or new contact.
-
Subject - The subject to be included in the email.
-
Message Text - The email message text.
-
Export Now - An option to immediately generate and send the call log is available by clicking on the
 button. This option exports data according to the filters that are currently being applied to that data.
-
Subscriptions - An optional subscription, which allows the automated exporting and emailing of the selected log/chart on a daily, weekly (issued on Mondays) or monthly basis (issued on the first day of the month). Note that subscriptions will be sent at midnight (00:00) according to the time zone configured in phone.systems™.
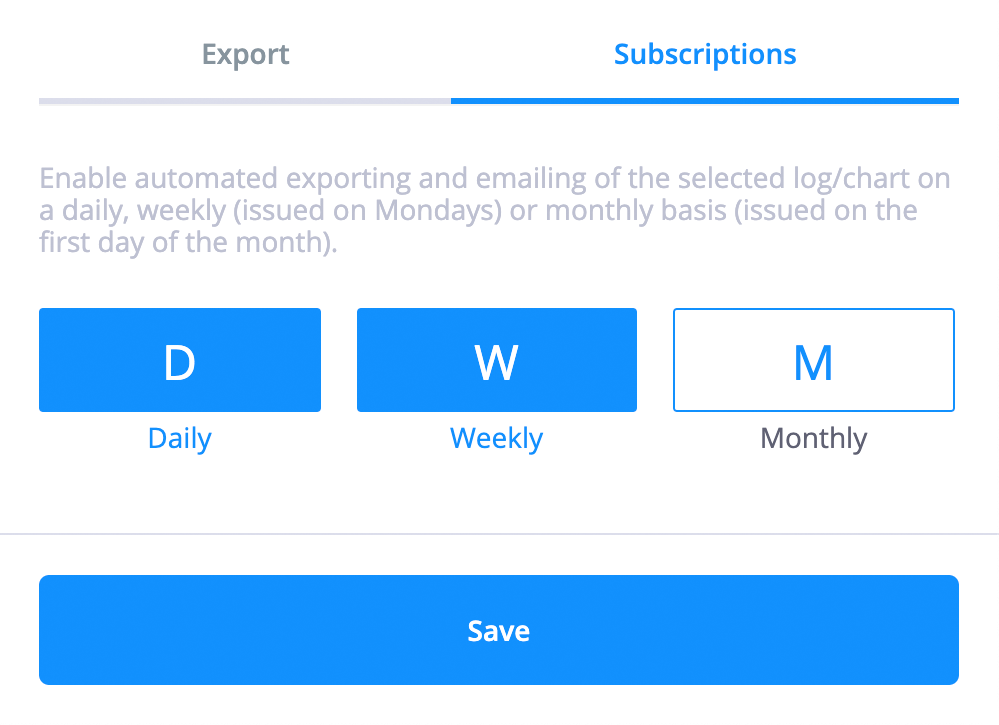
Subscriptions may be canceled at any time for selected log/chart by clicking on the Delete Export Subscription button.
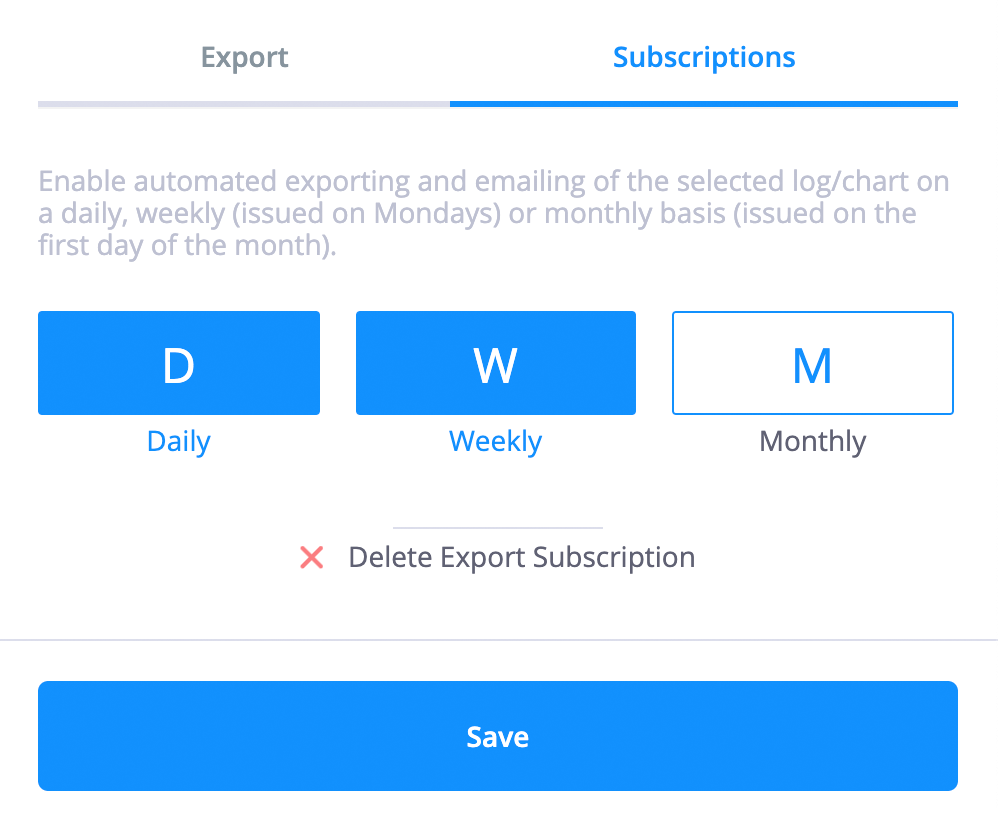
Feature Codes
Feature codes are accessed by clicking on the
![]() button in the upper right-hand corner of the workspace. This opens the
Settings menu, which includes the
button in the upper right-hand corner of the workspace. This opens the
Settings menu, which includes the
 option.
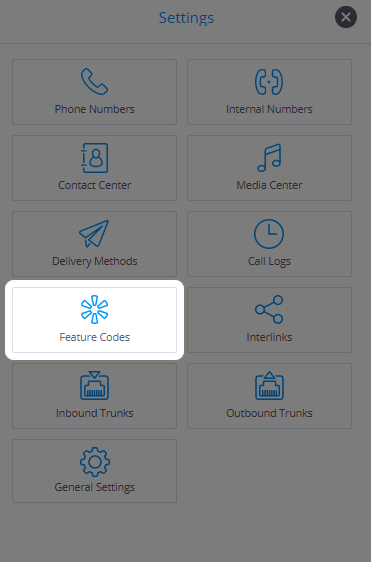
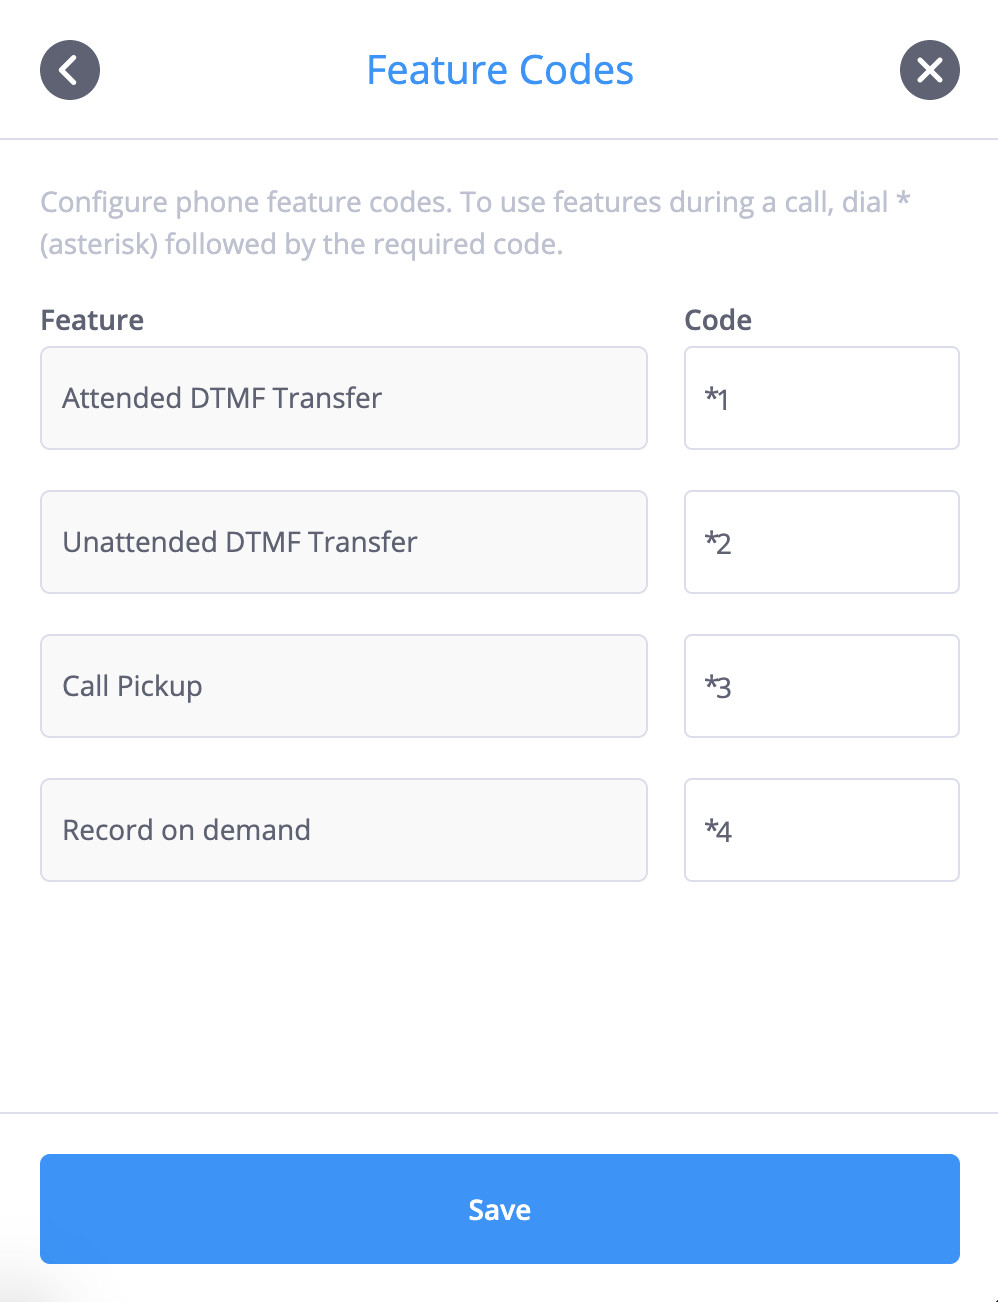
Supported feature codes are as follows:
Back to the topAttended DTMF Transfer
Attended DTMF Transfer - Attended (or warm) transfers occur when an active call is put on hold, and another call is initiated via an Internal Number to a third-party end destination. That third-party will then confirm whether or not they will accept the call. Accordingly, the call may then be transferred, or the transfer action may be cancelled.
These transfers are achieved by pressing the configured *Attended DTMF Transfer code on the phone keypad, or by using the transfer (xfer) button if available on an IP or soft phone. Detailed steps for attended DTMF transfers are as follows:
-
Answer the incoming call, enter the *Attended DTMF Transfer feature code on the dial pad, and the call will automatically be put on hold. Enter the required Internal Number (extension) when prompted, followed by the hash (#) key. Once this call has been answered and you have spoken with the person to whom the call is to be transferred, simply hang up and the call will automatically be connected between the original caller and the new participant.
-
To cancel an already initiated attended transfer, once again enter the same *Attended DTMF Transfer feature code. You will be reconnected to the original caller.
-
Alternatively if a transfer (xfer) button is available on the phone device or softphone, answer the incoming call, put that call on hold, call the required Internal Number (extension) on a second line, speak with the person to whom the call is to be transferred, press the transfer button, and the call will be immediately transferred. Note that the call may have to be manually disconnected from the first line if your device does not do this automatically.
Unattended DTMF Transfer
Unattended DTMF Transfer - Unattended (or blind) transfers are used if the call should be transferred without first speaking with the person to whom the call will be forwarded. These transfers are achieved by pressing the configured *Unattended DTMF Transfer on the phone keypad, or by using the transfer (xfer) button if available on an IP or soft phone. Detailed steps for unattended DTMF transfers are as follows:
-
If a transfer button is not available on the device, answer the incoming call, enter the *Unattended DTMF Transfer feature code on the dial pad, and the call will automatically be put on hold. Enter the Internal Number (extension) when prompted followed by the hash (#) key, and the call will then be transferred to the new participant. Note that initiated unattended transfers can not be cancelled.
-
If a transfer (xfer) button is available on the device, answer the incoming call, press the transfer button, enter the required Internal Number (extension), and the call will be immediately transferred.
Call Pickup
Call Pickup - Call pickup is used when an incoming call rings on one of the SIP Accounts configured for phone.systems™, but another person would like to answer this call on their device.
There are several ways to use this feature:
-
To pick up an incoming call at any extension number, enter the *Call Pickup feature code.
-
To pick up an incoming call at a specific Internal Number (extension), enter the *Call Pickup feature code followed by an Internal Number.
-
To pick up a call received on a specific phone number or partial number, enter the *Call Pickup feature code followed by that phone number (full or partial). Note that because this feature code supports the entry of partial phone numbers, call pickup may be enabled for multiple devices that match the provided input.
Record on demand
Record on demand - Applicable to the SIP Account (also to External Line) contact method, and allows users to initiate the recording of calls in real time. In order to use this feature code, the SIP Account must have the Record on demand option enabled in the Call Recording settings, together with a configured delivery method for receiving the contents of the recorded call.
Note that when using this feature code to enable call recording, a sound effect is played to the initiator to indicate that the code has been accepted and call is being recorded.
Back to the topInterlinks
The Interlink feature allows users to link up their instance of phone.systems™ with other phone.systems™ accounts, unifying remote offices into an integrated phone system. An important benefit of this feature is the ability of users to directly dial Internal Numbers on linked PBX accounts.
The Interlink menu is accessed by clicking on the
![]() button in the upper right-hand corner of the workspace. This opens the Settings menu, which includes the
button in the upper right-hand corner of the workspace. This opens the Settings menu, which includes the
 option.
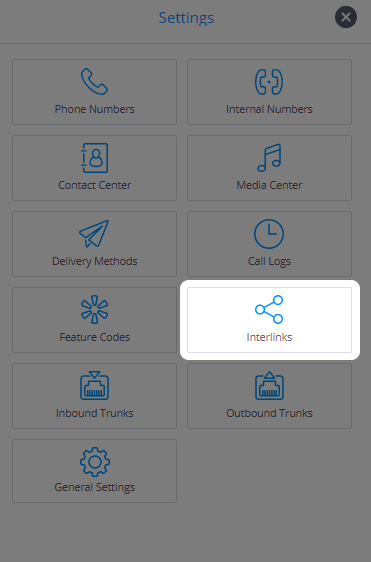
In order to connect to another phone.systems™ account, you may either:
-
Generate an authorization code, and send that code to the administrator of the remote phone.systems™ account. Once the authorization code has been entered on the remote account, then the two PBX systems will be interconnected.
-
Enter the authorization code received from the administrator of the remote phone.systems™ account with which you wish to connect.
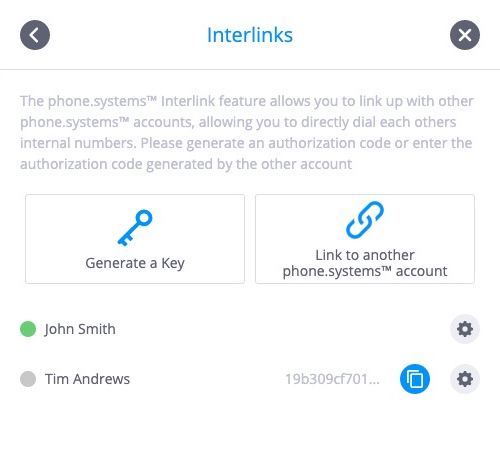
If a key has been generated locally, but interconnection has not yet been established (i.e., the key has not yet been entered by the administrator of the remote phone.systems™ account) , this status will be indicated by a grey circle icon next to the Interlink name. Once interconnection is established, the status will be automatically updated with a green circle icon.
If an Interlink is deleted by any of the two participants, then this listing will be automatically removed from the connection details for both phone.systems™ accounts.
Each authorization key may be used to link only one user account.
Note that only the two phone.systems™ accounts that have been interconnected using a single authorization key will have access to each other’s shared internal resources. In the above example of a phone.systems™ account belonging to “Mike Brown“, the interconnections are between:
“Mike Brown“ and “John Smith”
“Mike Brown“ and “Tim Andrews”
There is no interconnection between the phone.systems™ accounts of “John Smith” and “Tim Andrews”.
Back to the topGenerate a Key
Click on the
 button. In the next window,enter a name for this connection. Click on the Save
button and an authorization key will be generated.
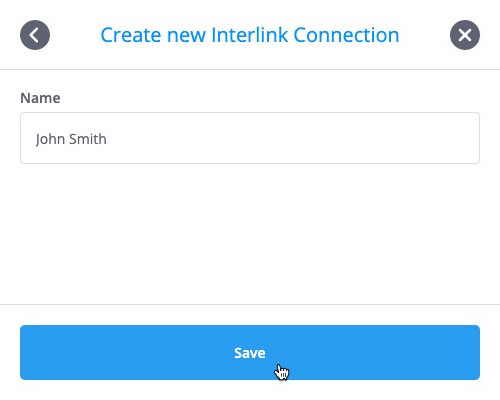
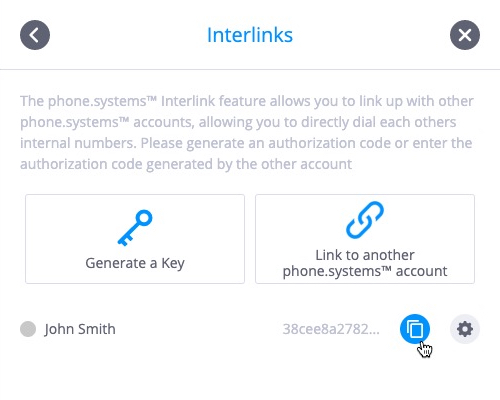
Copy this key by clicking on
![]() icon and provide it to the administrator of the remote phone.systems™
account. Clicking on settings
icon and provide it to the administrator of the remote phone.systems™
account. Clicking on settings
![]() icon will allow you to rename or delete a selected interconnection.
icon will allow you to rename or delete a selected interconnection.
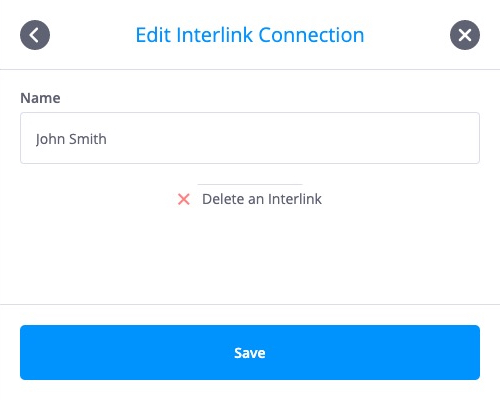 Back to the top
Link to another phone.systems™ account
Click on the
 button. In the next window, enter a name to identify this interconnection, as well as the authorization
key that has been provided by the administrator of the remote phone.systems™ account. Click on
the Save button to display the Interlinks summary window. A green circle status icon should
appear next to the newly added Interlink, indicating an active connection.
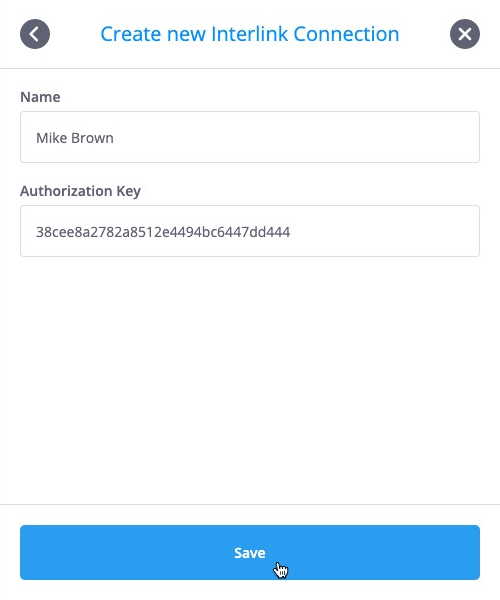
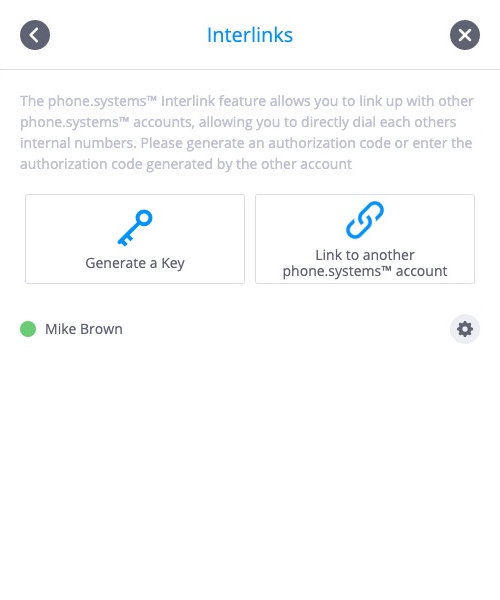
Clicking on the settings
![]() icon will allow you to rename or delete the selected interconnection.
icon will allow you to rename or delete the selected interconnection.
Reaching resources via Internal Numbers
When an interconnection has been established between two phone.systems™ instances, both accounts are able to share resources which have been added and linked via Internal Number objects on both accounts (for more information, refer to Internal Number Object configurations).
Note the following:
-
If both phone.systems™ accounts have the same Internal Number configured, then calling those numbers will reach the local Internal Number destination.
-
In order to restrict access to selected Internal Number destinations, use the “Private” settings when configuring Internal Number objects:
Privacy Disabled (default option) - The Internal Number is accessible to interlinked accounts.
Privacy Enabled - The Internal Number is not available to interlinked accounts.
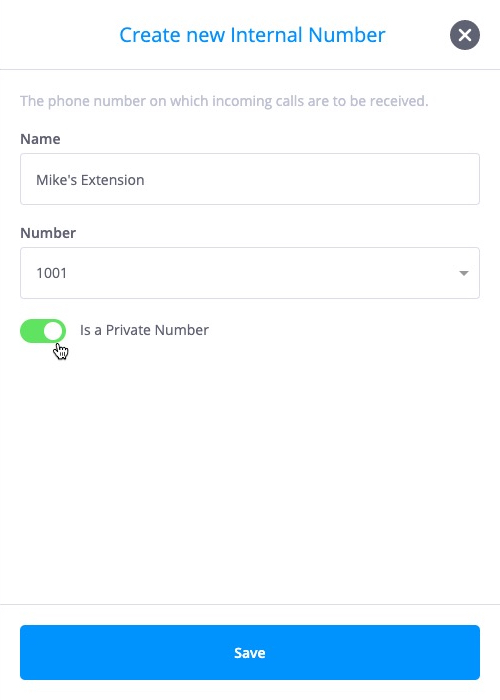 Back to the top
Directory Tab
The settings menu
 “Directory” tab may be used to display the Internal Numbers configured for the local instance
of phone.systems™, as well as those Internal Numbers which are accessible through Interlink
connections. The first Internal Numbers listed are those of the native phone.systems™
account, and are followed (if applicable) by the name of the Interlink connection,
and the Internal Numbers that may be accessed for that connection.
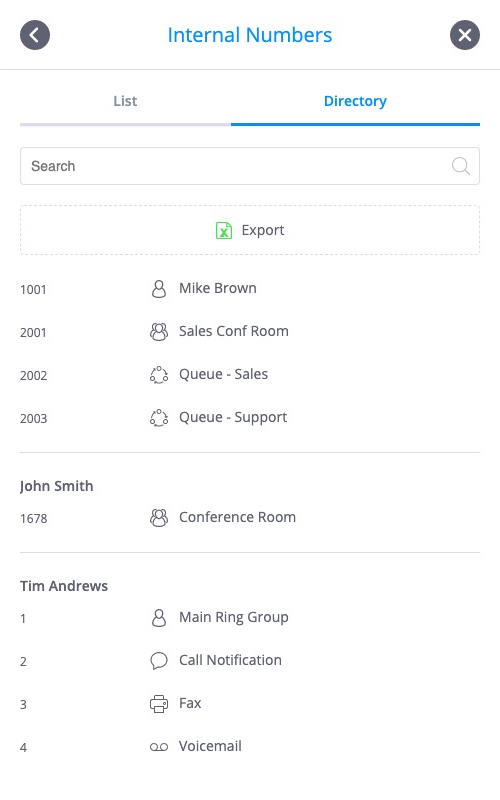 Back to the top
Inbound Trunks
Selecting the
 option from the "Settings" menu
![]() (if enabled) allows the addition and configuration of inbound trunks for interconnecting
phone.systems™ with VoIP service providers.
(if enabled) allows the addition and configuration of inbound trunks for interconnecting
phone.systems™ with VoIP service providers.
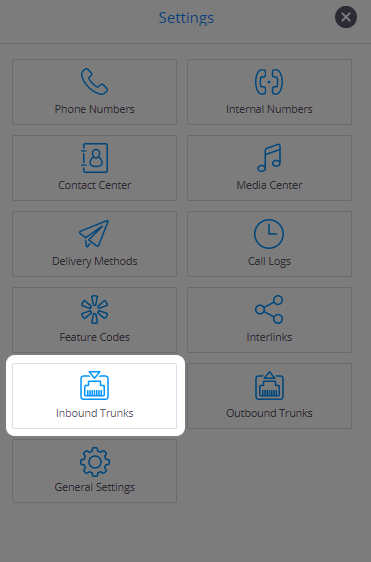 Back to the top
Forwarding calls to phone.systems™
Incoming domain addresses of the format xxxxxxxxxxxxx.in.phone.systems will automatically be assigned to all inbound trunks configured in a phone.systems™ account. These are unique domain addresses, and are used by 3rd party VoIP providers to route traffic to the phone.systems™ PBX. Therefore, VoIP service providers should configure inbound traffic to be forwarded to these SIP URI addresses.
The SIP URI address “This email address is being protected from spambots. You need JavaScript enabled to view it.” has the following components:
-
“phone number” is the VoIP provider’s phone number in E.164 format (for example, 14169233346 for Toronto, Canada, and 442034116446 for London, the United Kingdom). Additionally, this number must be added in E.164 format to the phone.systems™ environment (see the section Managing Phone Numbers for more details).
-
“xxxxxxxxxxxxx.in.phone.systems” is the unique domain address allocated by phone.systems™ to the specific inbound trunk.
These SIP URI addresses are listed when displaying the configured inbound trunks by accessing the
 menu.
menu.
We recommend that you consult your VoIP provider/s for more details on how inbound traffic should be forwarded from your DID numbers to the phone.systems™ environment.
A default inbound trunk is presented by phone.systems™, and this trunk may be renamed, configured or deleted. In addition, multiple inbound trunks can be added and configured as per the requirements specified by the selected VoIP providers.
Back to the topAdding and Configuring Inbound trunks
To add a new inbound trunk, click on
 . Alternatively, click on the
![]() button to edit a previously configured trunk. The following trunk configurations options are
available:
button to edit a previously configured trunk. The following trunk configurations options are
available:
Friendly name for the trunk
Select UDP or TCP transport protocol support for the connection
-
Multiple codecs may be added for call negotiation between the VoIP service provider and the PBX environment. Codec options that may be selected from the dropdown list are:
OPUS
G722
PCMU
PCMA
G729
GSM
telephone-event
-
Optional SIP registration may be enabled with parameters such as the Domain, Port, Username and Password being obtained from the service provider or system administrator.
Please note that the codec priority may be arranged by dragging the listed codecs into the required position, with the left-most codec being of the highest priority.
IMPORTANT - In order to be able to use DTMF codes for events such as Interactive Menu options or for using Feature Codes, the “telephone-event” codec must be included in the “Allowed Codecs” list.
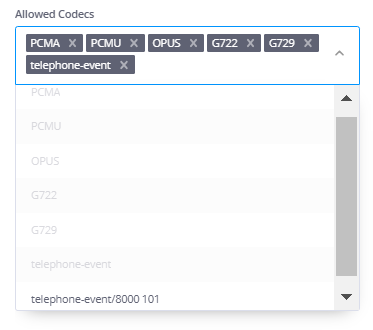
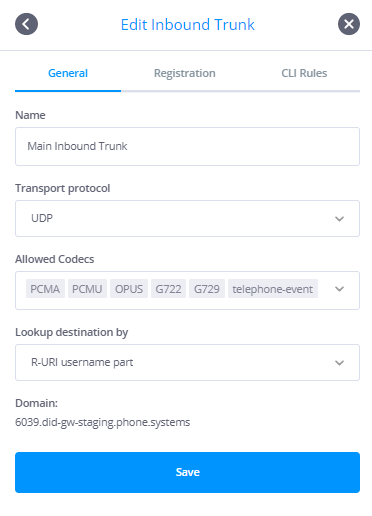
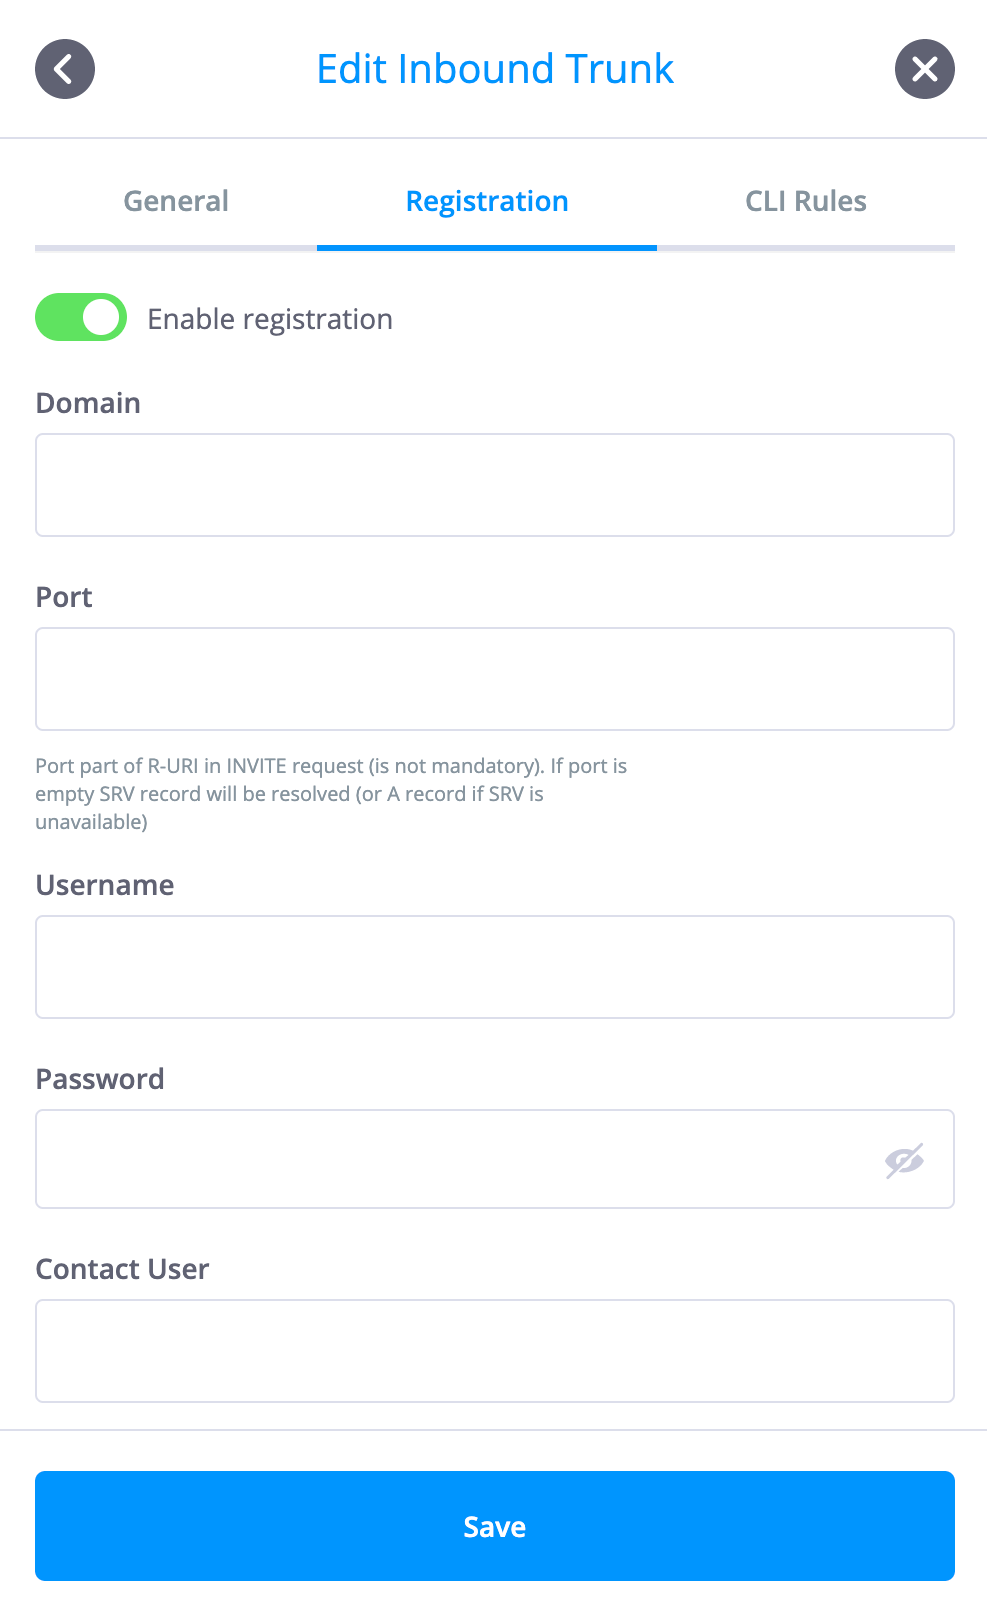
CLI Rules
CLI Rules are used to override the Source Caller Name and Destination number. This functionality allows flexible Caller Name configurations and may be used to differentiate SIP calls received from phone.systems™. CLI Rules will help you to identify which Inbound Trunk is being used to carry the call.
Note: By default, the CLI Rules feature is disabled.
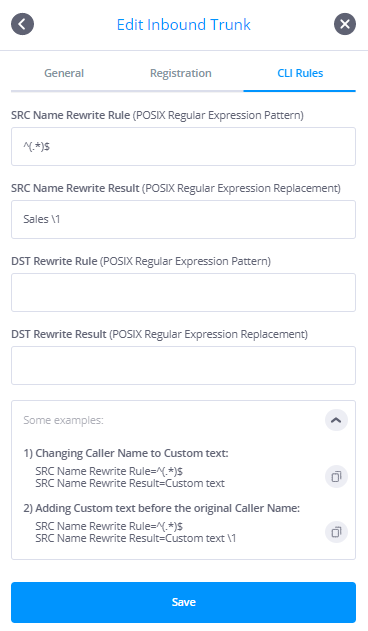 Back to the top
Outbound Trunks
Outbound Trunks are used to call out from phone.systems™ using created SIP accounts or to forward calls to PSTN destinations. A 3rd party termination provider must be added and configured under the “Gateways” tab section. This gateway must then be assigned to a route by accessing the “Routes” tab.
Adding and configuring routes and gateways for outbound SIP trunks is achieved by selecting the
 option from the "Settings" menu
![]() (if enabled). The configuration of these termination services allows phone.systems™ to seamlessly
interconnect with any SIP-standard compatible VoIP service provider.
(if enabled). The configuration of these termination services allows phone.systems™ to seamlessly
interconnect with any SIP-standard compatible VoIP service provider.
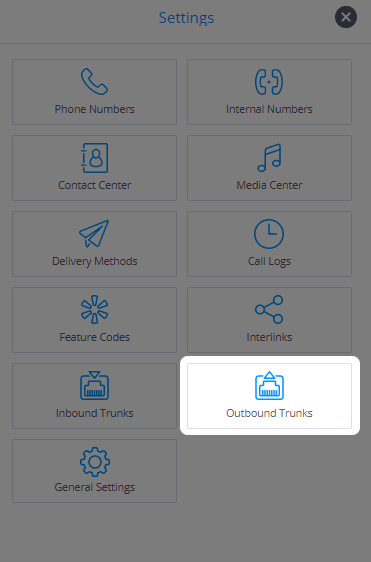 Back to the top
Configuring Gateways
Gateway configuration options are as follows:
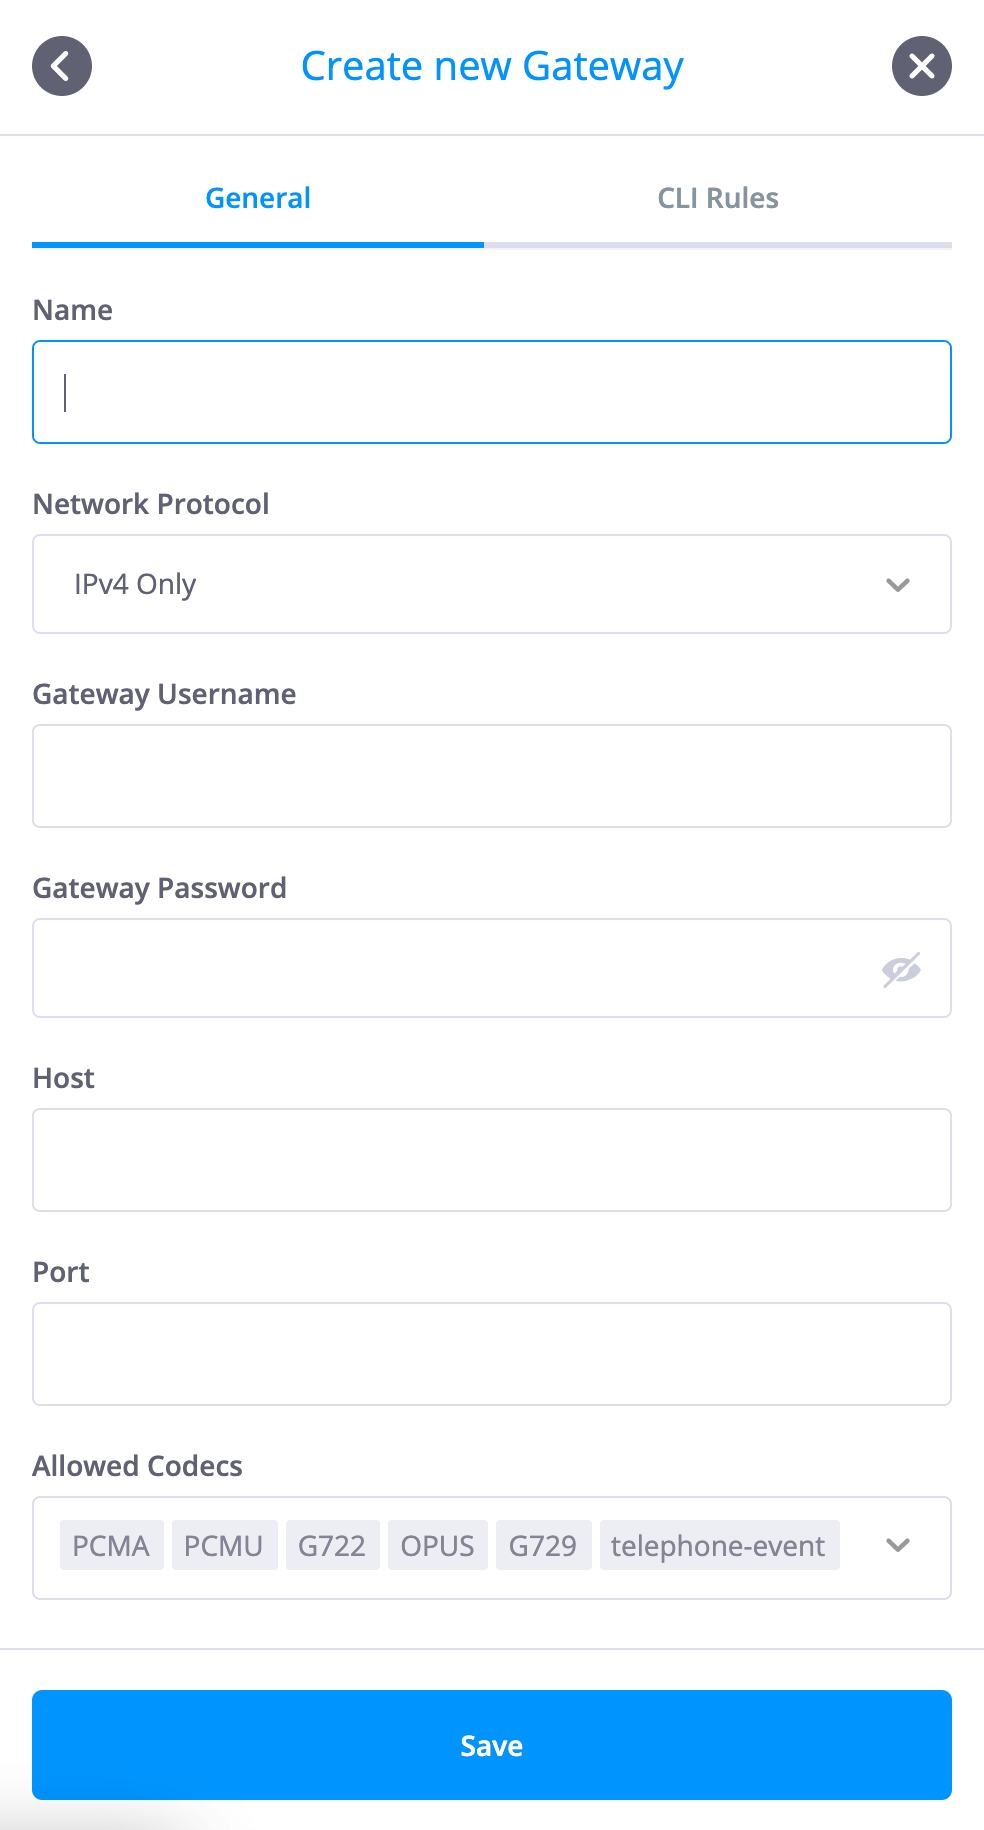
Name - a friendly name for this gateway.
Gateway Username - Authorization username
Gateway Password - Authorization password
Host - Gateway IP address or domain
Port - Port used on this gateway (if not entered, port 5060 will be used by default)
Multiple codecs may be added for call negotiation between the VoIP service provider and the PBX environment. Codec options that may be selected from the dropdown list are:
OPUS
G722
PCMU
PCMA
G729
GSM
telephone-event
These details are obtained from the service provider or system administrator of your termination provider:
Please note that the codec priority may be arranged by dragging the listed codecs into the required position, with the left-most codec being of the highest priority.
IMPORTANT - In order to be able to use DTMF codes for events such as Voice Menu options or for using the Feature Codes, the “telephone-event” codec must be included in the “Allowed Codecs” list.
 Back to the top
CLI Rules Tab
The CLI Rules are used to automatically modify the source and destination numbers sent to the termination gateway, allowing users to add and remove prefixes or completely rewrite the numbers on a per-gateway basis.
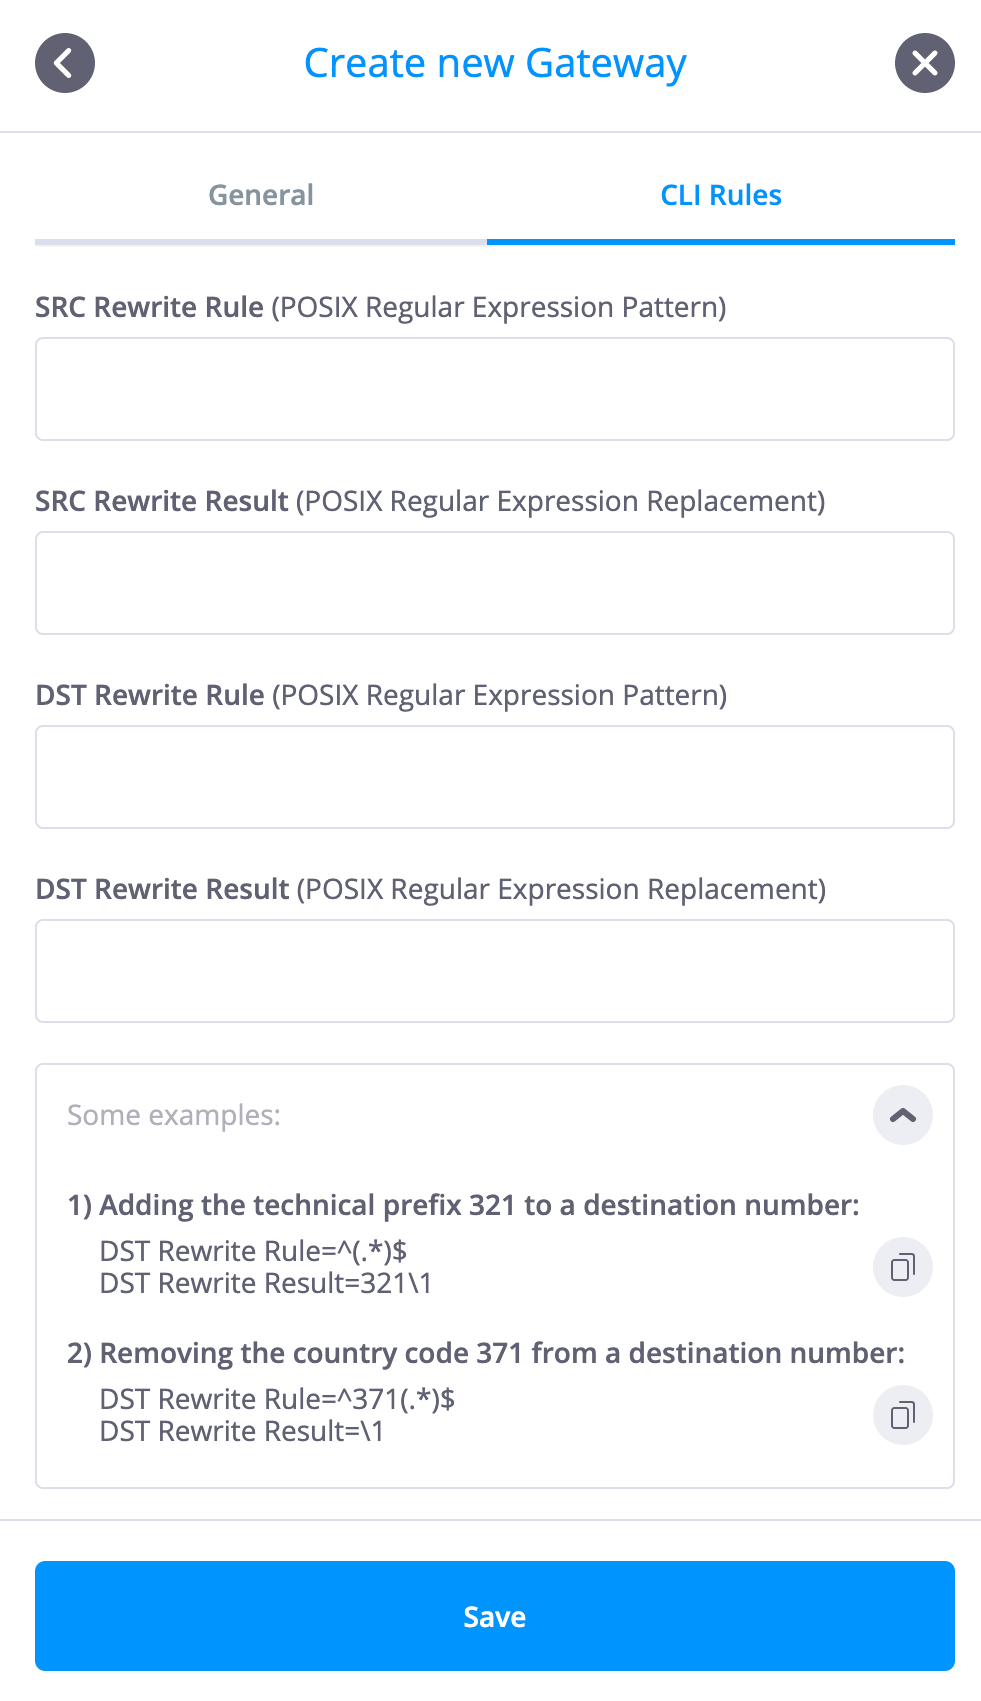
SRC Rewrite Rule/Result (optional) - Modifies the source number that phone.systems™ sends to the provider’s termination gateway.
DST Rewrite Rule/Result (optional) - Modifies the calling destination number that is sent to the provider’s gateway.
If no changes are required to be made to the numbers when making outbound calls, then the Rule and Result fields should be left blank. Knowledge in using POSIX Regular Expressions is required in order to use this feature. Please refer to the Common POSIX Usage Examples section for further details.
Back to the topConfiguring Routes
Comprehensive and flexible route configuration options are available, with multiple routes being able to share outbound gateways if required. Routes add flexibility for routing outbound calls, such as using different service providers when calling specific countries so as to minimize calling costs or to localize dialing patterns when calling a specific country.
At least one route must be created and assigned to a previously configured outbound gateway.
Route configuration options are:
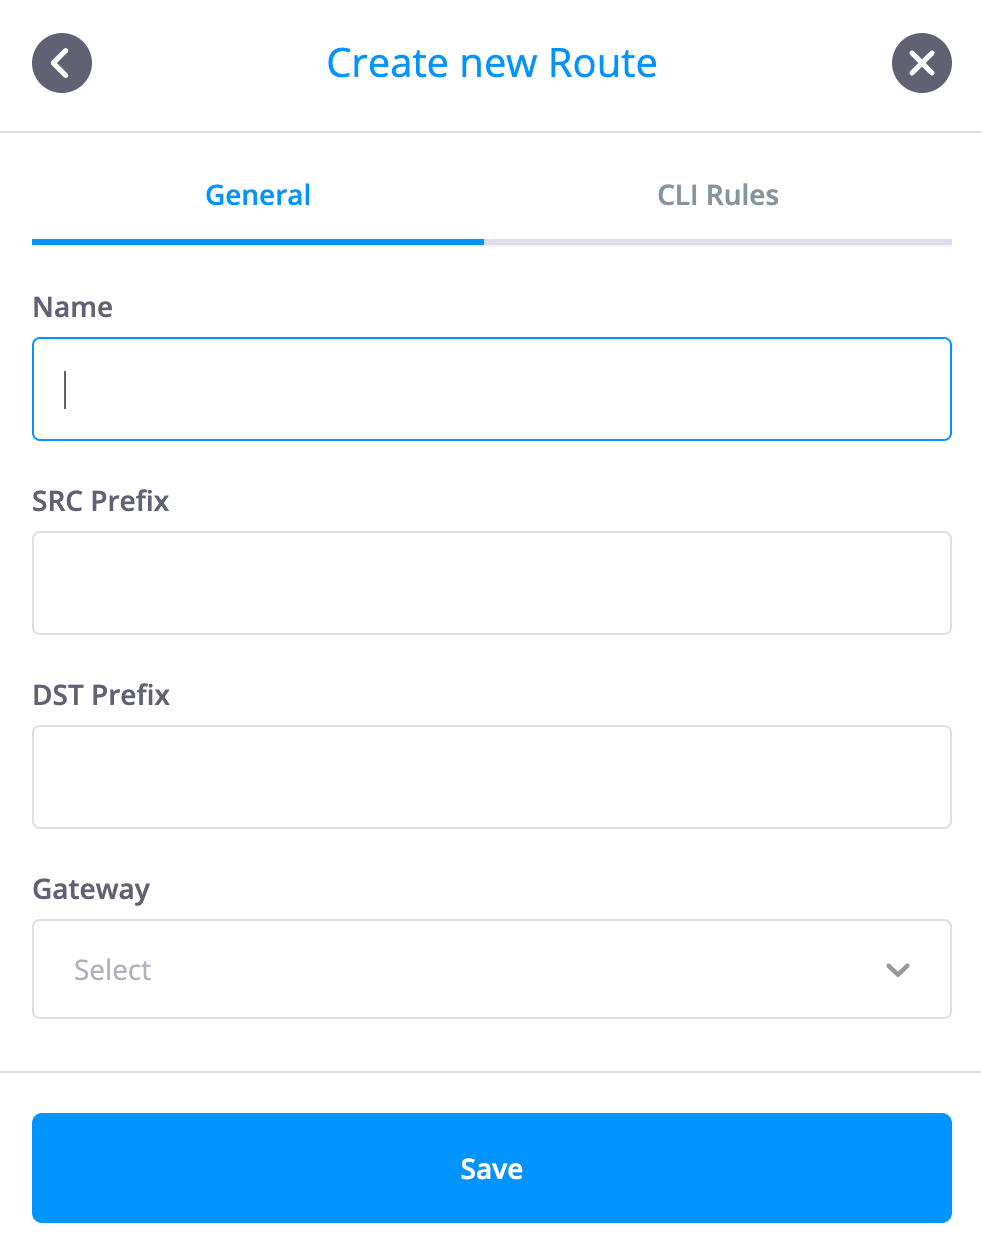
Name - a friendly name to identify the route.
SRC Prefix (optional) - The source prefix which defines the outbound CLI that will cause this route to be selected. Leaving this field empty implies that this route may be used with any CLI. If several routes are added with the same starting prefix digit (for example 3, 37, 371), then the route with the closest match to the CLI will be used for the call.
DST Prefix (optional) - The called destination prefix that will cause this route to be selected (for example dialing 44 for the United Kingdom). If this route may be used for calling any destination, then the DST Prefix should be left blank. If several routes are added with the same starting prefix digit (for example 3, 37, 371), then the route with the closest DST prefix match will be used for the call.
Gateway - The outbound gateway that is assigned to this route.
CLI Rules Tab
The CLI Rules are available for the modification of source and destination numbers, allowing users to include rewrite rules such as adding prefixes to numbers or deleting country codes from numbers on a per-route basis.
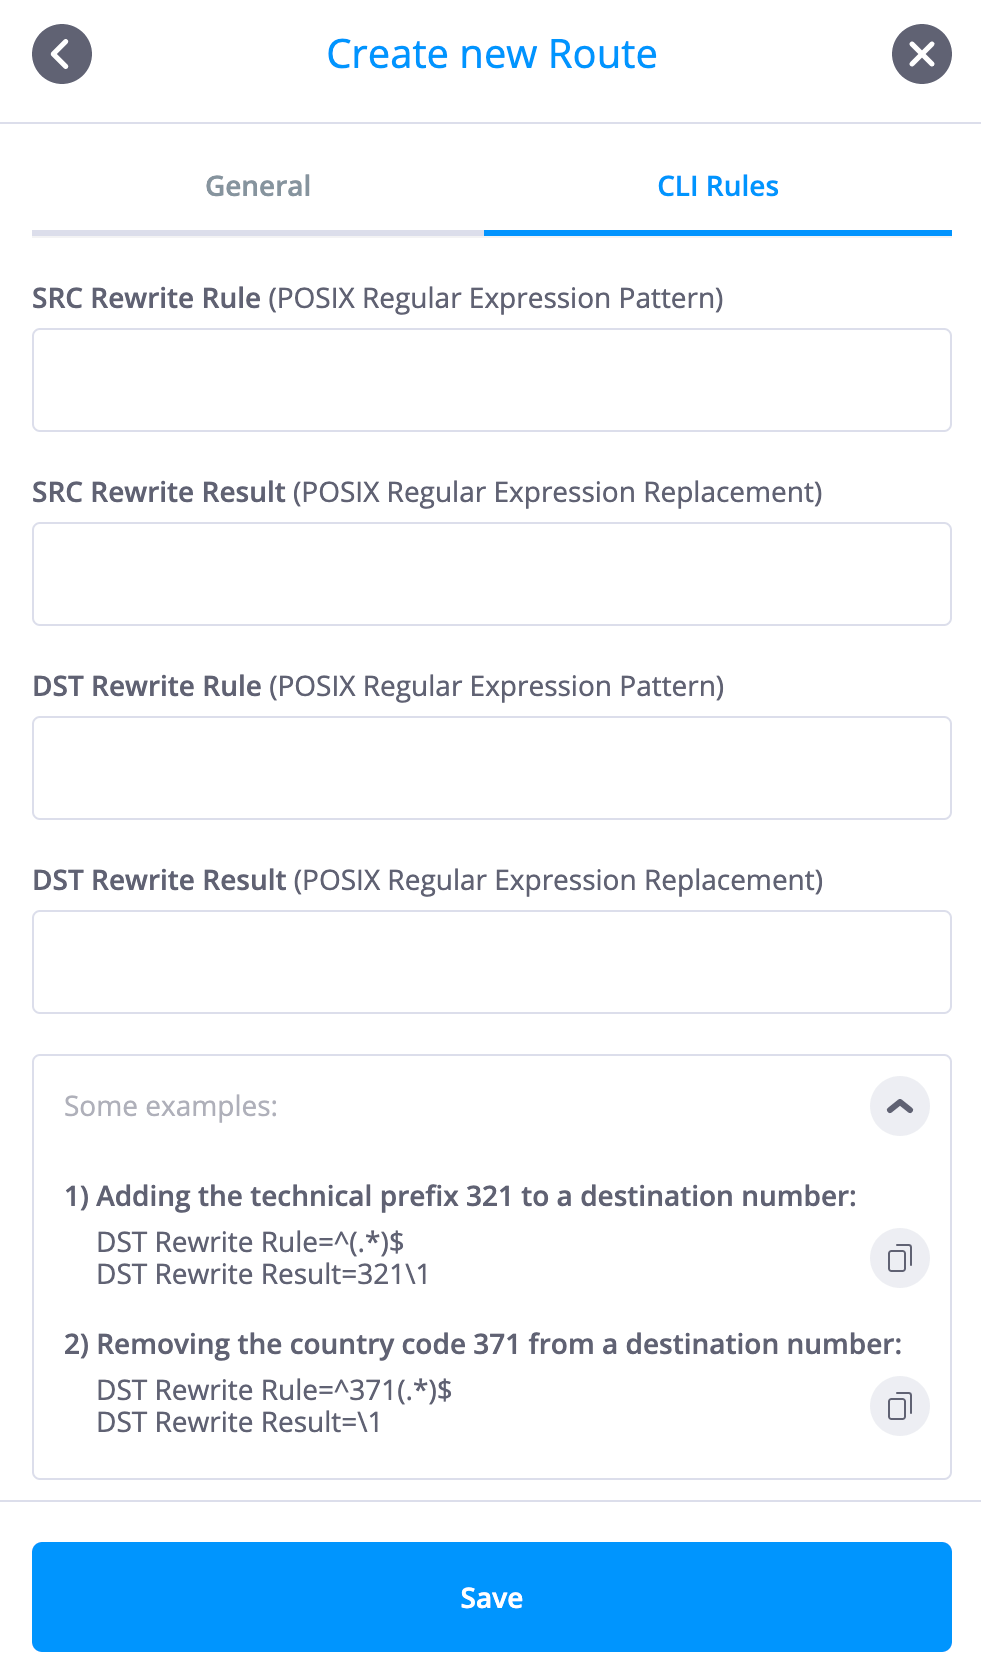
SRC Rewrite Rule/Result (optional) - Modifies the source CLI that phone.systems™ sends to the provider’s outbound gateway.
DST Rewrite Rule/Result (optional) - Modifies the calling destination prefix that is sent to the provider’s gateway.
If no changes are required to be made to the dialled numbers when making outbound calls, then the Rule and Result fields should be left blank. Knowledge in using POSIX Regular Expressions is required in order to use this feature. Please refer to the Common POSIX Usage Examples section for further details.
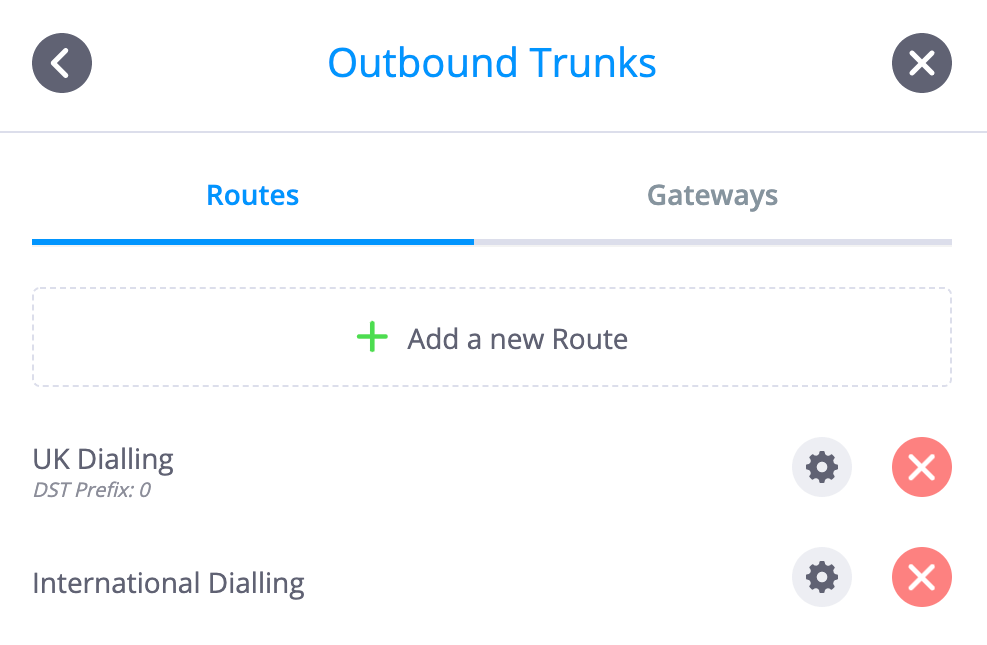
Each rule could be added as a separate route or gateway in order to meet the requirements for localized dialing and to fully comply with the call format specifications demanded by the service provider/s.
Back to the topCommon POSIX Usage Examples
These examples apply to Source (SRC) and Destination (DST) prefix modifications. Please note that POSIX commands are case sensitive, and must exclude additional spaces, tabs, hyphens, quotation marks, etc. unless these characters are required by the POSIX expression syntax. In the examples below, the exact Rule/Result texts are written in italic bolded font.
Add additional prefix (321 or any other)
Removing prefix (371 or any other)
Replacing prefix (371 or any other, to 8 or any other)
-
Send numbers in E.164 format to the provider when using different dialing patterns for international calling (example calling 0037167514550 or +37167514550 will result in sending the destination number in the format 37167514550 to the provider)
Rule ^(.*)$
Result 321\1
Rule ^371(.*)$
Result \1
Rule ^371(.*)$
Result 8\1
Rule ^(?:\+|00)?(.*)$
Result \1
Usage Examples
phone.systems™ objects may be arranged and logically connected in an unlimited number of combinations that will satisfy a wide variety of voice system requirements. Below are some basic configuration examples that will assist the user to understand the various objects, their functionality and the versatility of phone.systems™.
Back to the topSimple Call Forwarding Setup
For this easy setup only 2 objects are required to be connected - a Phone Number and a Ring Group object.

Before adding these objects to the phone.systems™ workspace, some resources may optionally be pre-configured, namely:
- A phone number must be added to the phone.systems™ environment - see the section Phone Numbers for further details.
- A Contact Method (preferably a SIP account) should be configured - see the section Adding a new contact method for further details.
If these resources are not pre-configured, then they may be added during object configuration.
-
Add a “Phone Number” object - From the Object Menu , drag and drop a “Phone Number” object onto the workspace.
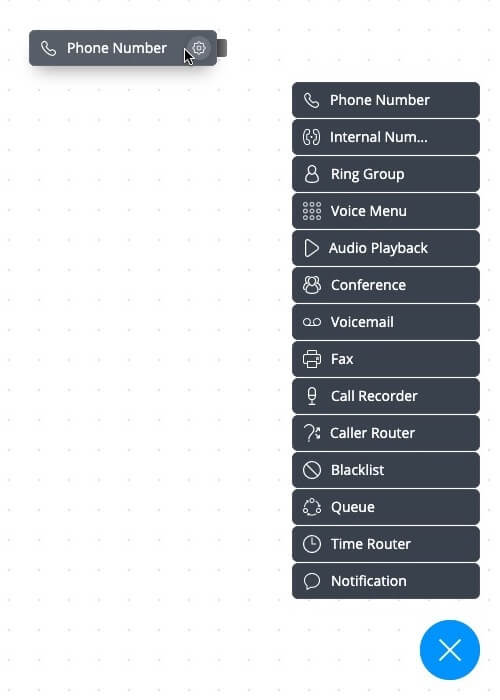
Once the object has been released onto the workspace, a new configuration window will appear. Click on the “Number” section dropdown menu, and select a phone number that was configured in the previous step. Alternatively, a new phone number may be added and allocated to the “Phone Number” object. Click the “Save” button.
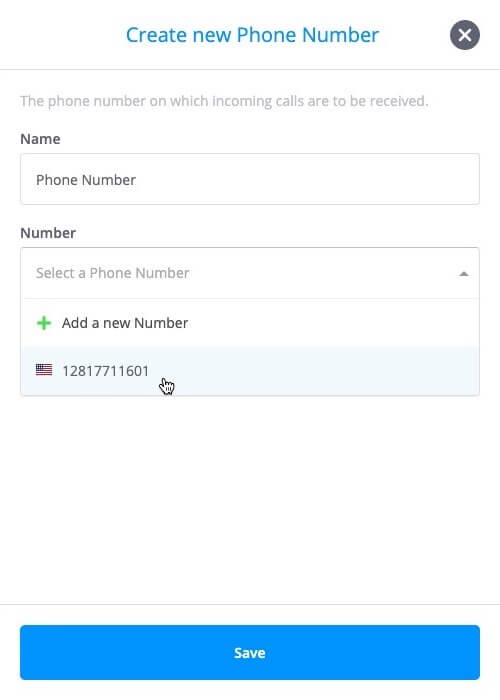
-
Add a “Ring Group” Object - From Object Menu drag and drop a “Ring Group” object onto the workspace.
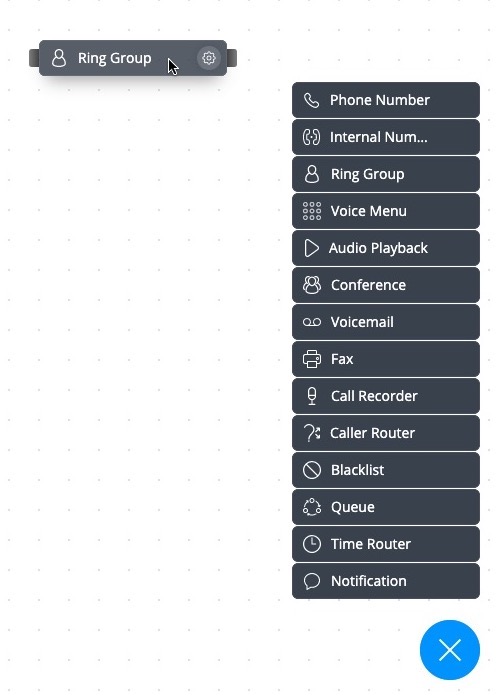
Once the object has been released onto the workspace, a window will appear that allows the configuration of the Ring Group. Click
 and select a previously configured Contact Method from the drop down menu. Alternatively,
a new Contact and Contact Method may be added and allocated to the “Ring Group” object. Click on the “Save” button
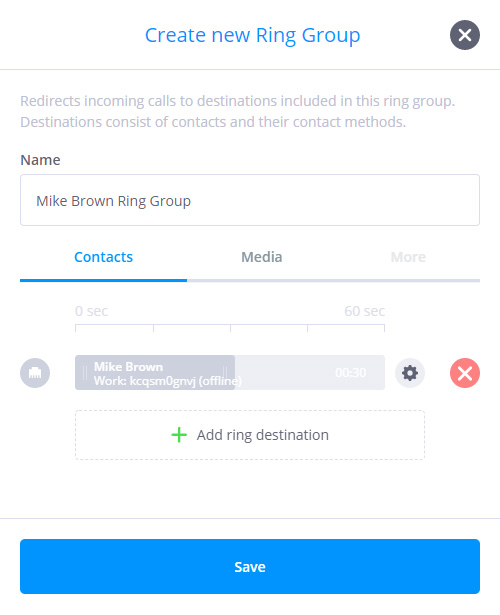
-
Connect objects with the “cable” - Drag the “cable” from the “Phone Number” object and connect it to the “Ring Group” Object. The setup has now been completed in the phone.systems™ environment.

-
Configure a SIP account on your device - please refer to the section Configuring Softphones.
You are now ready to receive and make phone calls using phone.systems™.
 Back to the top
Calling between Internal Numbers (Extensions)
This usage example will enable voice calls on phone.systems™ between two softphones, using Internal Numbers (or extensions) to connect the two parties. The configuration steps for this usage example are as follows:
Optionally pre-configure resources
Two Internal Numbers - see the section Internal Numbers for further details.
Two SIP account Contact Methods - see the section Adding a new contact method for further details. Important - when configuring a SIP account, the “Internal caller ID” for the account must be assigned from the pre-configured Internal Number list. This number will be displayed as “Caller ID” to the recipient of the incoming call.
Add an “Internal Number” object
Add a “Ring Group” Object
Connect the “Internal Number” and “Ring Group” objects with a “cable”
Repeat the procedure of adding and configuring “Internal Number” and “Ring Group” objects
Configure the SIP accounts on your devices
Resources required for this PBX setup may be optionally pre-configured. Note that this pre-configuration is not mandatory, as these resources may be added during the actual configuration of the objects that are to be used. The resources to be optionally added and pre-configured are:
From the Object Menu, drag and drop an “Internal Number” object onto the workspace.
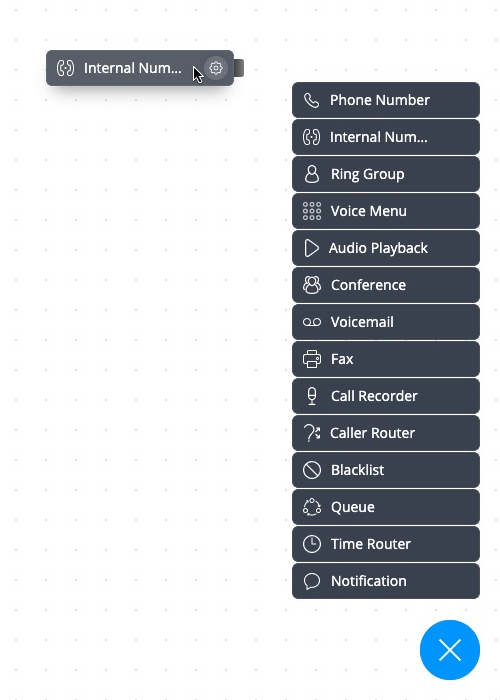
Once this Internal Number object has been released onto the workspace, a configuration window will appear. Click on the “Number” section in the dropdown menu, and select a pre-configured internal number (if applicable). Alternatively, a new internal number may be added and allocated to this “Internal Number” object. Click on the “Save” button.
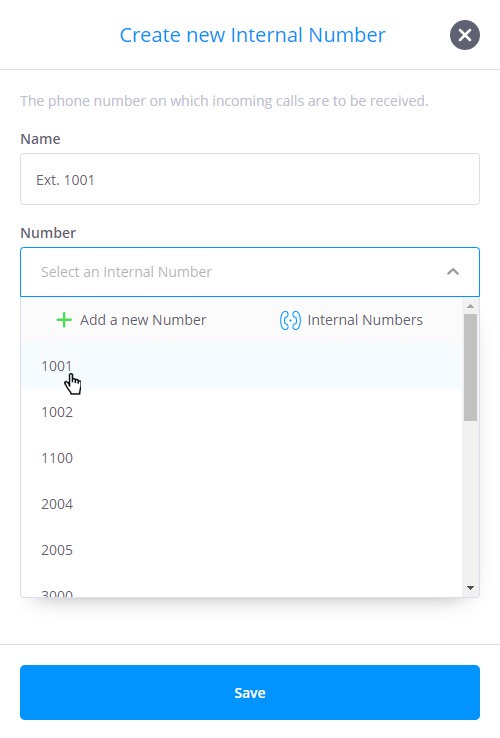
From the Object Menu, drag and drop a “Ring Group” object onto the workspace.

Once that object has been released onto the workspace, a window will appear that allows the configuration of the
Ring Group. Click
 and select a previously configured Contact Method from the drop-down menu (if applicable).
Alternatively, a new Contact and Contact Method may be added and allocated to the
“Ring Group” object. Click on the “Save” button.

Drag a “cable” from the “Internal Number” object and connect it to the “Ring Group” object.

Add another Internal Number object (for example, using the number 1002) and another Ring Group destination (for example Tim’s Softphone), and connect these two objects with a “cable”.
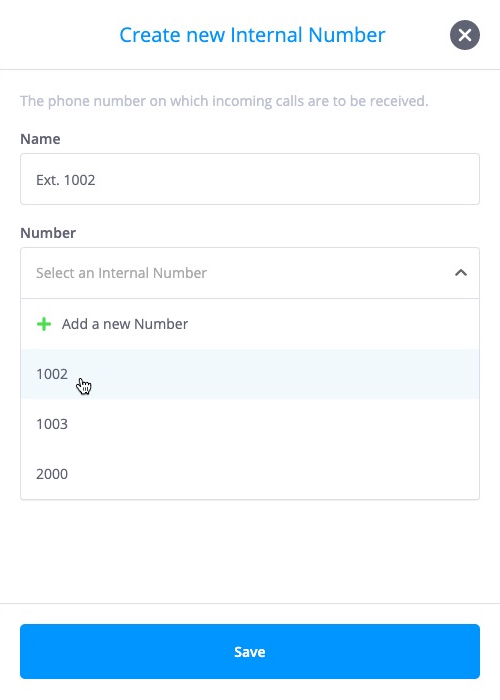
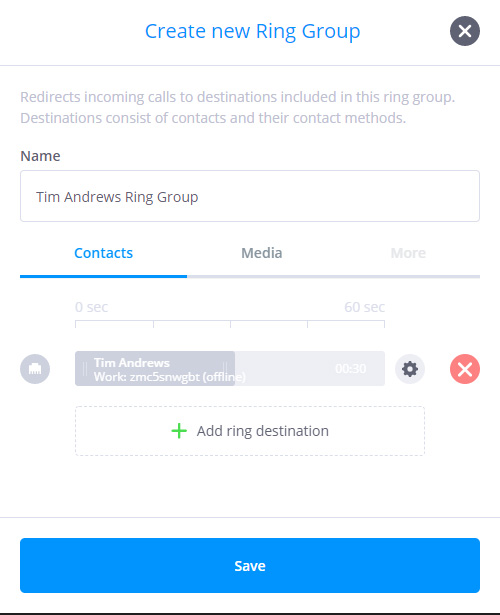

The PBX setup has now been completed in the phone.systems™ environment.
Please refer to the section Configuring Softphones for further details.
Calls may now be made between the two internal numbers (extensions) on phone.systems™.
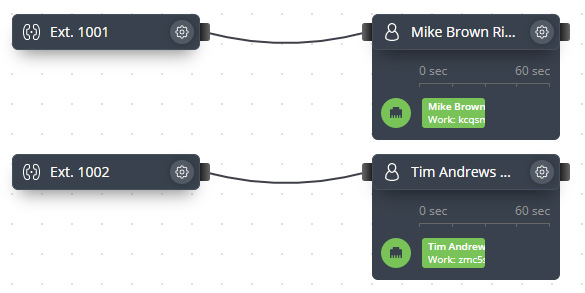 Back to the top
For Personal/Small Business Use
Incoming calls to the assigned phone number are directed to a Ring Group object ("Mike Brown"), where the calls are forwarded to Mike's configured contact numbers ("Work" and "Mobile") in a defined sequence. If the call is not answered, then that call is directed to voicemail. The caller leaves a message that is sent to a specified email address.

In the above example, this Ring Group object is configured for the following logic:
-
On receiving an incoming call, first ring Mike's work phone for 30 seconds.
-
If the work phone is not answered (or the line is busy), then ring Mike’s mobile phone for 30 seconds.
-
If there is still no answer, then forward the call to voicemail.
Note that the ring sequence and ring times for each contact method are configurable.
Back to the topFor Small Businesses and Groups
Incoming calls to multiple phone numbers are directed to the Voice Menu object, and a previously recorded, custom message is played. This message serves to provide the caller with further options regarding the routing of their call via extension numbers, for example, “Press 1 for Mike, 2 for Pete”. If neither Mike nor Pete answer the incoming call within the defined timeouts, then that call is sent to their personal voicemail. In the case that callers do not select a valid extension option or if they do not provide keypad input within the defined timeout period, the Voice Menu object directs those calls to Audio Playback objects where messages are played to callers.
 Back to the top
For Medium-Size Businesses
phone.systems™ objects may be simply added and configured to meet the evolving needs and functions of a business, with the Voice Menu object being used to direct phone calls to various departments and personnel, whether they be local or remote.
In the scenario shown below, calls to multiple phone numbers are directed to a Voice Menu object functioning as the main switchboard. Calls are then forwarded to secondary Voice Menus, where extension numbers entered by the callers direct those calls to specific personnel in the sales or technical support departments.
 Back to the top
Configuring Softphones
Softphones allow the user to receive calls and make outbound calls over the Internet from a computer or smart device. This software acts as a phone interface, allowing users to dial numbers and carry out other phone related functions via a screen (such as a computer or smartphone) using a mouse, keypad or keyboard.
Softphone applications may be downloaded from a variety of providers, and are easily configured to become seamless components of the phone.systems™ PBX. phone.systems™ is compatible with all SIP-compliant softphones, including the call.center™ softphone which is highly integrated into phone.systems™.
The SIP Account contact method is used to add softphones as a component of phone.systems™ (see the section Contact Center for details). The SIP credentials such as username, password and domain that are required for configuring a SIP device are automatically generated by phone.systems™.
To view and copy these credentials, edit the SIP Account Contact Method, and
expand the SIP details window by clicking on
![]() button.
button.
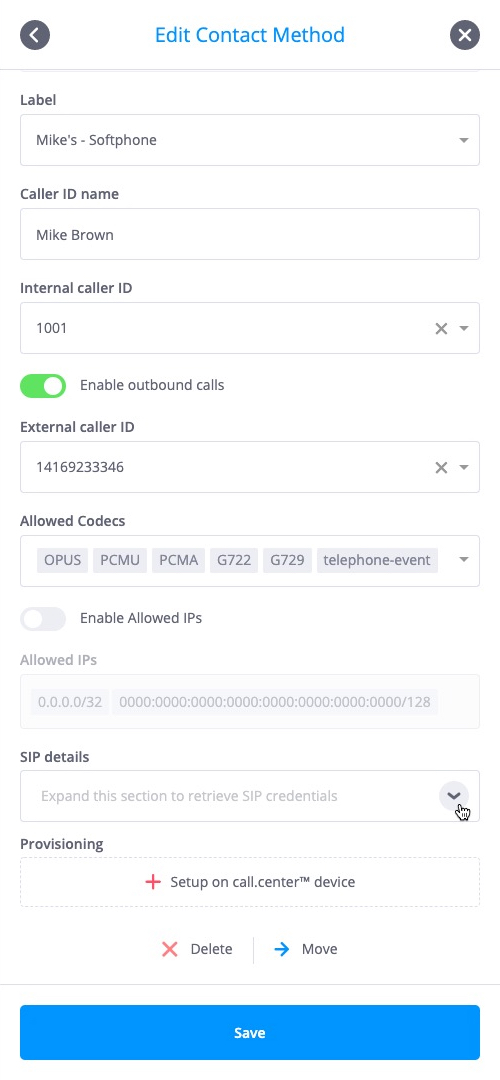
The full list of SIP credentials are displayed, together with the current status of the SIP device (Offline or Online).
Clicking on the
![]() icon next to the Username, Password and Domain fields copies
the configuration data to a clipboard for convenient use in configuring the
SIP device.
icon next to the Username, Password and Domain fields copies
the configuration data to a clipboard for convenient use in configuring the
SIP device.
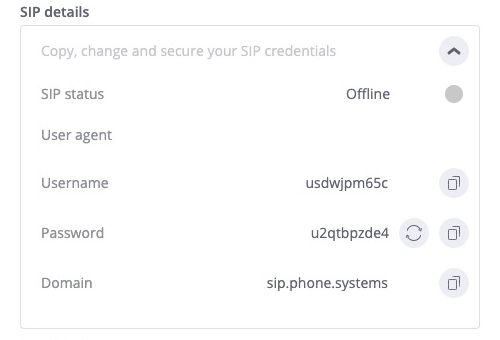
Once the softphone is configured with the required credentials and the SIP account has been activated on that device, then that softphone will be automatically be connected to phone.systems™ and is usable as an integrated end-device.
Note - If this softphone is also to be used for outbound calling, then the Enable outbound calls option must be enabled in the contact method configuration screen shown above.
Back to the topTechnical Information
Supported Codecs
OPUS/48000/2
G722/8000
PCMU/8000
PCMA/8000
G729/8000
GSM/8000
telephone-event (for DTMF transport)
IP addresses and RTP ports
-
46.19.208.0/21 (46.19.208.0 - 46.19.215.254) - for incoming and outgoing traffic. (Please note that incoming traffic can be accepted only to phone.systems™ unique domain xxxxxxxxxxxx.in.phone.systems)
RTP port range - 16384-32767
DTMF Transport Methods
RFC2833
Protocols
SIP over UDP
SIP over TCP
t.38 for fax transmission
Audio file formats
Supported audio files for uploading to Media Center (file size is limited to 14 MB)
.mp3
.wav
.flac
.ogg
Call Recording File Specifications
File format .mp3
Bit rate 16 kbps
Sample rate 8 kHZ
Time Zone
phone.systems™ is using UTC offsets and daylight-saving rules issued by IANA
-
IANA Time Zone database - https://www.iana.org/time-zones (https://en.wikipedia.org/wiki/Tz_database)
Default timezone is GMT (+0)


